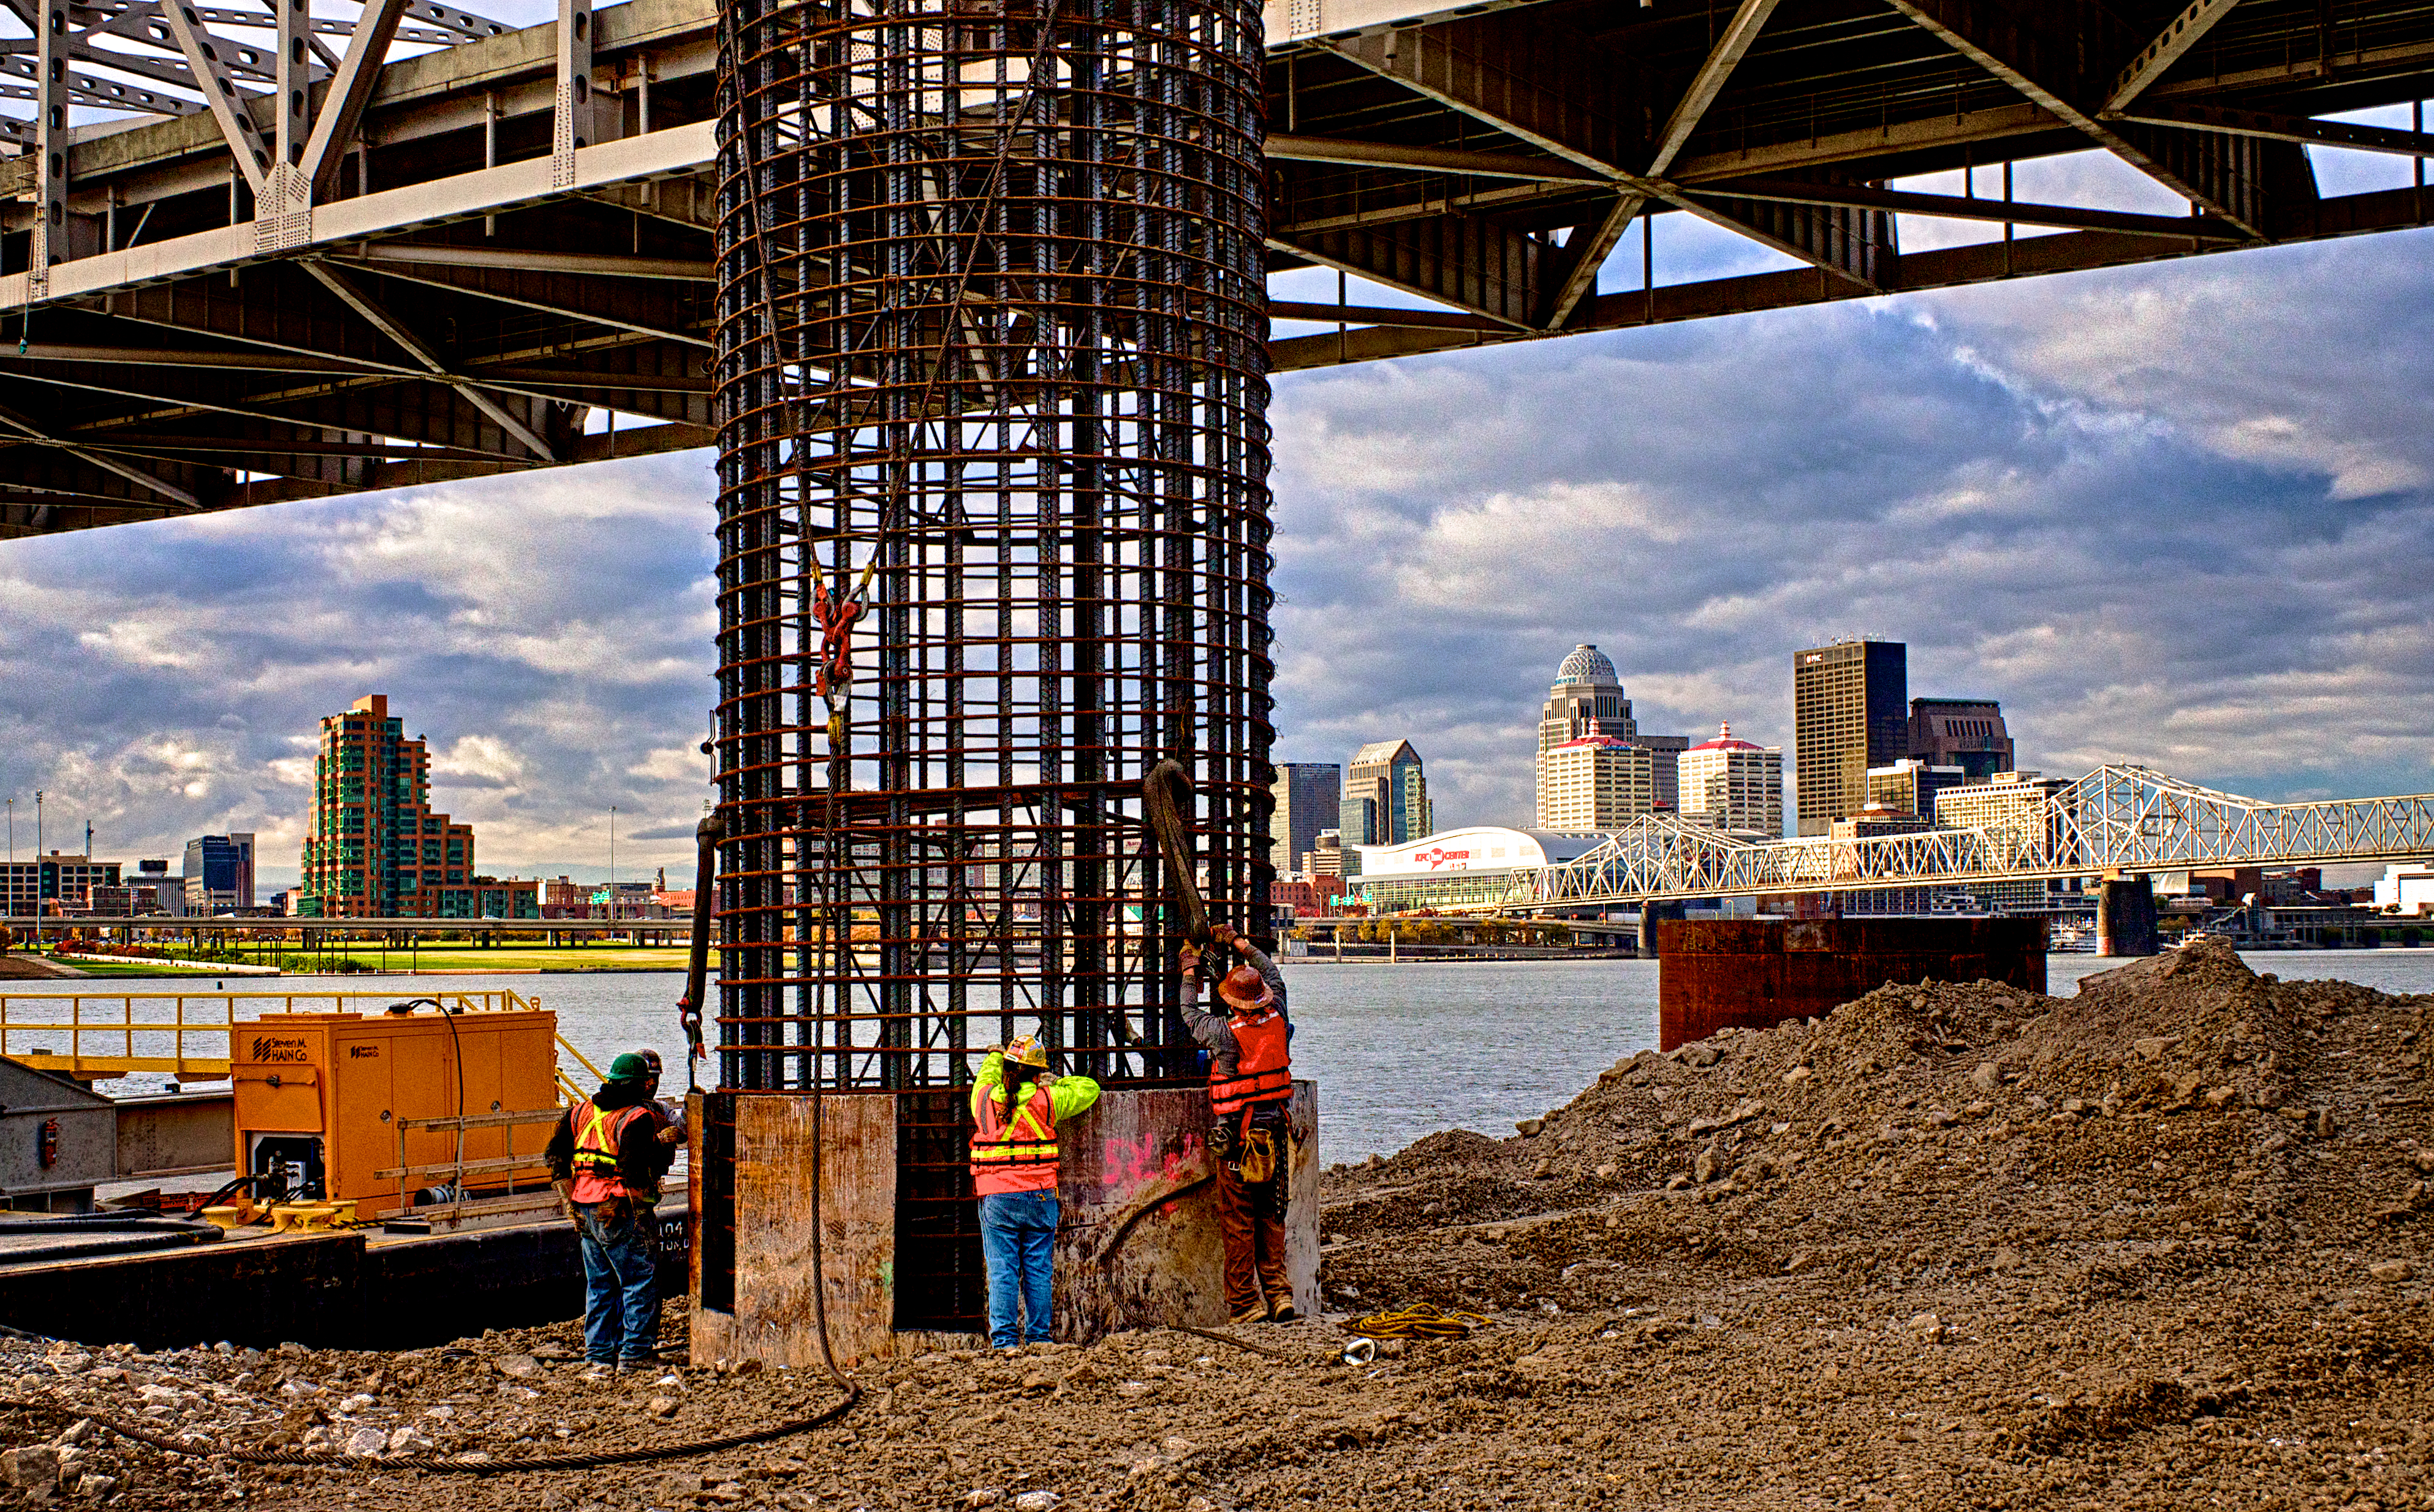
Click on the image to enlarge it in a new window.
This image shows the concrete pump boom transferring concrete to a pier pour in the middle of the river. The concrete is first transferred from the delivery trucks to the concrete pump which is sitting on shore. The concrete pump then pushes the wet concrete through the large pipe on the boom to the concrete placement workers who direct it’s placement in the concrete form in the river.
I chose this composition to emphasize the length that the material must be transported in order to make the piers in the river. I shot a three frame bracket set of -2, o and +2 EV and then processed the final image by merging them in NIK HDR Efex Pro 2. After merging them and applying some basic tone-mapping adjustments I returned the image to Aperture 3 for final processing.

Click on the image to enlarge it in a new window.
In this image the vibrator operator is using a control box he is wearing around his waist to vibrate the wet concrete and eliminate any air pockets that may have formed as the concrete was placed in the form. The metal rebar that he is standing inside will connect the next pice of concrete to this base after additional forms are attached as the tower base rises out of the river. This particular concrete pour required 53 truck loads of concrete, 537 cubic yards of material, and took nearly an entire workday to complete.
This image is also a three frame bracket set processed with NIK HDR Efex Pro 2 and Aperture 3.