Category: Fine Art Photo

HDR Image of 127 Feet Tall Caisson

This caisson is 127 feet tall and weighs over 170,000 pounds.

Click on the image to enlarge it in another window.

Last Wednesday the Ironworkers placed a 12 foot diameter, 127 foot tall caisson in the pier near the Kentucky shore. It weighed over 170,000 pounds and was going in one of the deepest piers of the project. Watching them lift it from a horizontal position into a vertical position was amazing. It took two cranes to do it and the coordination required was incredible.

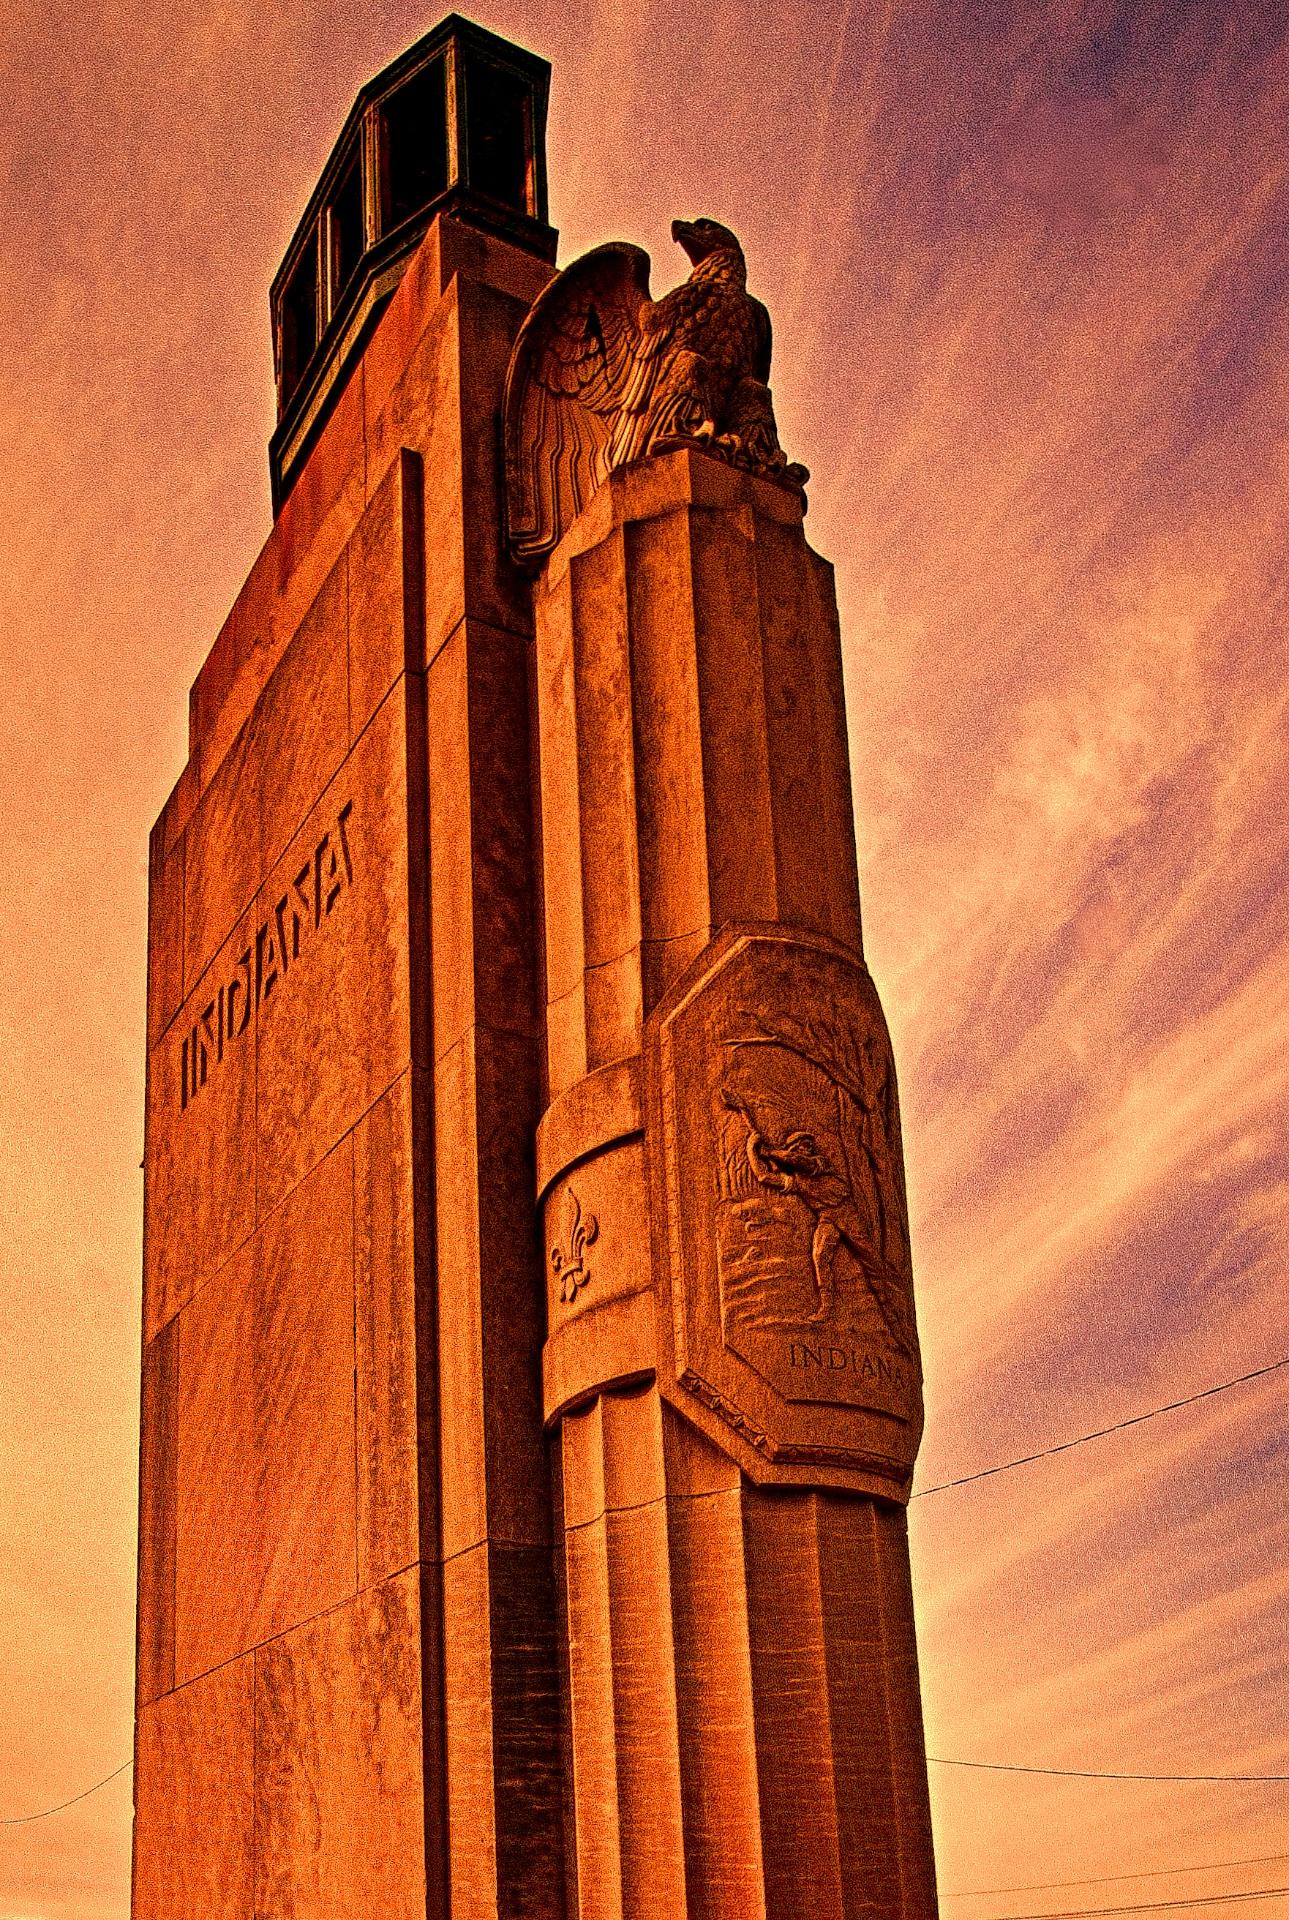
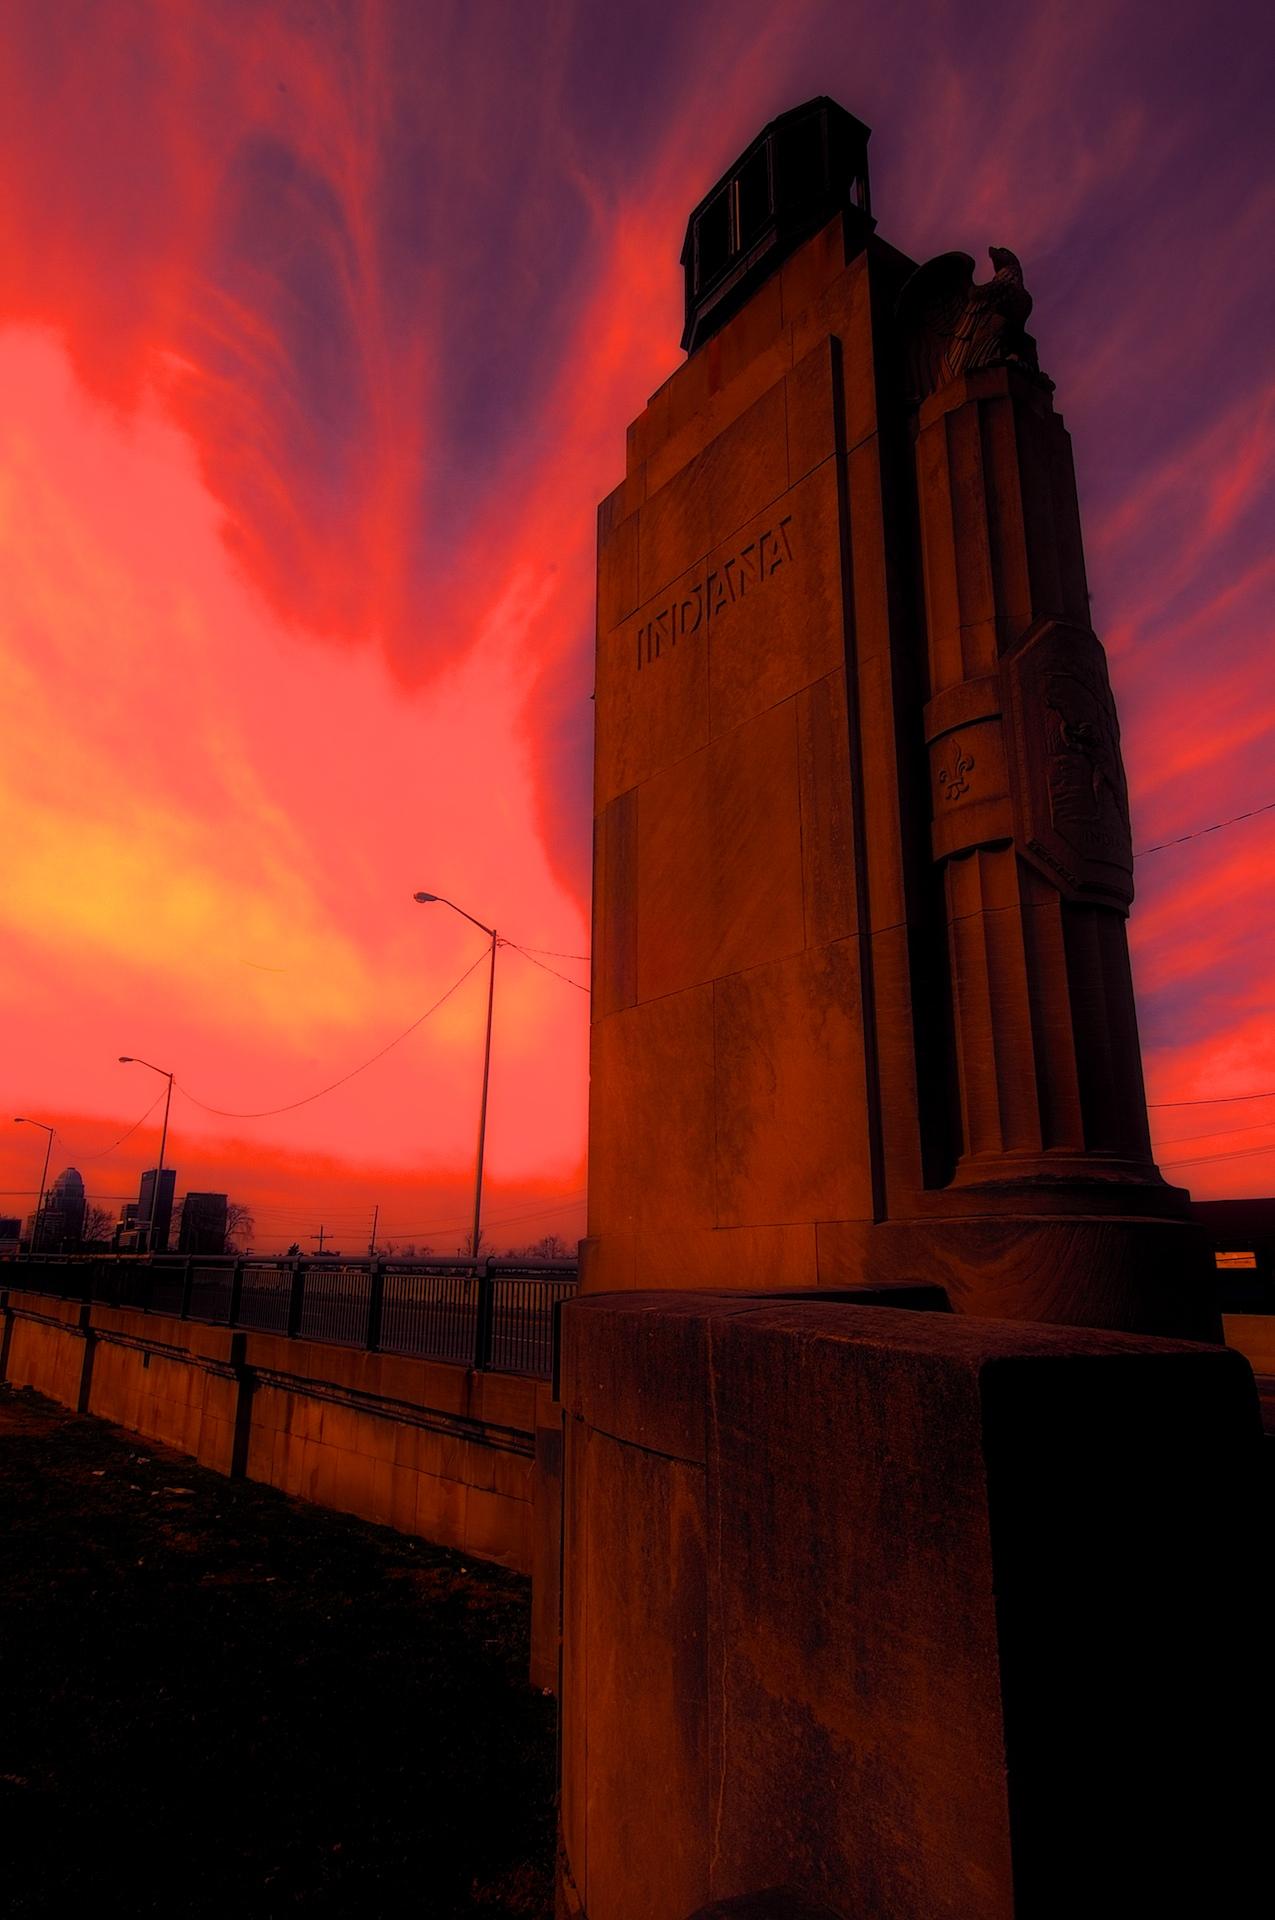
This HDR image is from a three frame handheld bracket set consisting of +2, 0 and -2 EV exposures. I took the three frames into NIK HDR Efex Pro 2 where I merged them and applied the Balanced preset. While there I set the Detail slider to accentuated and the Drama slider to deep. In order to suppress some serious halos that were showing up along the vertical elements in the sky I reduced the Method strength slider until the halos were gone. I then took the merged file back into Aperture 3 for final adjustments to colors, sharpening and contrast.


HDR Construction Images of a Morning in November 2013

Ironworkers from Local 70 preparing rigging on a caisson for the Ohio River Bridges Project in Louisville KY

Click on the image to enlarge it in another window.

Today’s post is rather long on images yet short on words. I decided that what I wanted to show my readers was a series of several HDR construction images from a morning in November 2013. I thought sharing these HDR images from a single morning shoot would help my readers see how busy things are on the Ohio River Bridges Project.

I am always amazed at the skill and expertise that is required to do the work of Heavy Highway and Bridge Construction. Ironworkers, Carpenters and Operating Engineers must choreograph so many moves into placing the pieces of a single pier. The skill and commitment  to safety that they use to get the massive components in place is a sign of their professionalism and dedication to their respective trades. Any miscalculation when handling these pieces could result in slowing or stopping construction or even worse the very real possibility of the loss of someone’s life. For that reason the attention paid to properly performing each element in the process is paramount to safely accomplishing the task at hand.

Ironworker Local 70 member Travis tying rebar on a caisson. #2
Ironworker Local 70 member Travis attaching rigging to a caisson. #2

Click on the image to enlarge it in another window.

Ironworker Local 70 member Travis tying rebar on a caisson.
Ironworkers Local 70 member Travis attaching rigging to the caisson.

Click on the image to enlarge it in another window.

Crane booms in the sky
Crane booms in the sky.

Click on the image to enlarge it in another window.

Ironworkers Sean and Travis rigging the caisson for the pick and placement in the pier casing. #2

Click on the image to enlarge it in another window.

Ironworkers Sean and Travis rigging the caisson for the pick and placement in the pier casing.

Click on the image to enlarge it in another window.

Starting the pick of the caisson as Travis and Sean stand by.
Starting the pick of the caisson as Travis stands by and Sean communicates with the crane operator through hand signs.

Click on the image to enlarge it in another window.

Early morning on the Indiana Approach
Early morning on the Indiana Approach.

Click on the image to enlarge it in another window.

Apprentice Carpenter Escarlett learning how to use a cutting torch.
Apprentice Carpenter, Escarlett, learning how to use a cutting torch.

Click on the image to enlarge it in another window.

Placing a Caisson in the pier casing
Placing a Caisson in the pier casing on the Indiana approach of the downtown span.

Click on the image to enlarge it in another window.

Placing a Caisson in the pier casing on the Indiana approach of the downtown span. #2

Click on the image to enlarge it in another window.

Rigging the caisson for picking.
Sean and Travis rigging the caisson for picking.

Click on the image to enlarge it in another window.

Sean and Travis rigging the caisson for picking. #2

Click on the image to enlarge it in another window.

I hope these HDR construction images help reveal the size and scope of the Ohio River Bridges Project as well as the my admiration for the skilled tradesmen and tradeswomen who perform these critical tasks. I also hope that the next time you see a construction site or meet a construction worker you will see their contribution to our way of life and the valuable part they play in building the world. Maybe you’ll even have a little more understanding of the important role that organized labor plays in providing skilled professionals that construct safe and dependable infrastructure for our world.

One final note about these images. All of the images in this post were created from three exposure bracket sets of +2, 0 and -2 EV exposures. They were merged in NIK HDR Efex Pro 2 and finished in Aperture 3. I use NIK HDR Efex Pro 2 because it does the best job I have found of reducing, and in most cases eliminating, ghosting when working with active subjects such as the men and women in these images. I finish the merged images in Aperture 3 because it allows me to control all the other variables such as color, contrast, sharpening etc in a non-destructive workflow.

HDR Images from Around the Ohio River Bridges Project In Louisville, KY

Ironworker working on caisson
Ironworker Working On A Caisson 

Click on the image to enlarge it in a separate window.

The HDR image above is a three frame bracket set using +2, 0 and -2 EV exposures. I merged the brackets set in NIK HDR EFex Pro 2 and then took it back to Aperture 3 for contrast, color and sharpening adjustments. I then opened it in Topaz FX Lab and added a black border. I chose this image because I liked the composition that I created using the geometric lines of the rebar and the organic lines created by the safety harness and air line and the man’s leg and body.

Excavator Teeth in HDR

Click on the image to enlarge it in a separate window.

Same drill here with NIK HDR Efex Pro 2 and Aperture 3 as the processing tools. I was drawn to this composition by the contrast of the polished steel of the teeth set against the texture of the limestone on the ground. I thought the way the ridges in the gravel were a good counterpoint to the triangular forms of the excavator teeth.

Excavator Teeth in HDR #2

Click on the image to enlarge it in a separate window

In this HDR image I followed my normal workflow using NIK HDR Efex Pro 2 and Aperture 3 to create a solid HDR image. I then opened the image in Topaz ReStyle and found a preset that added additional color and gave a new perspective to the excavator teeth. I’m finding that Topaz ReStyle offers a world of possibilities to create memorable images.

Excavator Teeth in HDR and Black and White

Click on the image to enlarge it in a separate window

For this version of the excavator teeth I used the same HDR image as a basis and took it into Topaz B&W to convert it. This Black and White version really shows the contrast of steel and gravel. I found the contrast and detail of the gravel and steel to be very interesting elements in the composition too.

Bridge Deck in HDR #1

Click on the image to enlarge it in a separate window

Bridge Deck in HDR #1 is a shot of the rebar and steel decking of a highway bridge before concrete is poured to form the road surface. This too is a HDR image that I used NIK HDR Efex Pro 2 to create using a three frame bracket set of +2, 0 and -2 EV exposures. I applied 60% anti-ghosting to get the flag to render properly. After using NIK HDR Efex Pro 2 I returned the image to Aperure 3 for final adjustments to color, contrast and sharpening. My final action was to send the completed HDR image to Photoshop CS5 to straighten the vertical perspective that my 12 mm lens had distorted.

Bridge Deck in HDR #2

Click on the image to enlarge it in a separate window

I chose this image because I like the composition that is created by the linear elements in the scene. The repetition of the of lines in the steel, in the texture  of the concrete and the rebar loops make this a strong composition. The camera angle and the lines formed by the decking also lead the eye back into the frame to the bridge and cranes on the horizon. Using HDR allowed me to bring out the texture while still retaining the broad dynamic range that shooting this time of the day produced. Once again my software choices were NIK HDR Efex Pro 2 and Aperture 3.

Caisson during assembly

Click on the image to enlarge it in a separate window.

Here again I have used line as the dominant aspect for the image. The way the rebar projects into the foreground and then leads your eye into the scene to the linear elements of the bridge in the background is a good example of a dynamic composition. This too is a HDR image that was processed using NIK HDR Efex Pro 2 and Aperture 3 software.

HDR Image of an Inside View of a Caisson During Assembly

Click on the image to enlarge it in a separate window.

This too is a HDR image that relies on line to create a compelling composition. The lines extend from the edges of the frame into a small window at the back that looks out onto the bridge in the distance. My standard method for HDR images was applied to give the image the color and texture I desired.

Finishing the Hammerhead

Click on the image to enlarge it in a separate window.


Click on the image to enlarge it in a separate window.

This final image today is another case where composition plays a major role in directing the viewer’s eye. The massive concrete “hammer head” with the worker kneeling on it reveals it’s size by juxtaposing the human element against the blue sky, clouds and the diagonal line it forms directs the viewer’s eye into the frame. By using HDR I was able to show the texture on the concrete, the details in the worker’s safety vest and the deep blue sky that a single image would have had trouble rendering.


Using NIK HDR Efex Pro 2 and Topaz Labs Software Together to Add Drama to an Image

1929 Monument to Progress
A Monument to Progress From the Art Deco Era

Click on the image to enlarge it in a separate window.

I was in the mood to experiment yesterday and decided to use this photo of the statue at the Indiana entrance of the Clark Memorial Bridge across the Ohio River in Jeffersonville Indiana as my source image. I first created a HDR image from a three frame bracket set of +2, 0 and-2 EV exposures where I applied the Balanced preset with Detail set for Accentuated and Drama set for Deep. I returned the merged file to Aperture 3 for some retouching of dust spots and other standard adjustments. After doing that I created a duplicate file and opened it in Topaz ReStyle where I applied a preset that I happened upon while experimenting with the Landscape presets. I don’t recall which one it is (I should write that stuff down) but I liked the feeling of Art Deco Posters that it gave the image. I also added a texture layer in OnOne Perfect Effects that simulates canvas.

After creating this image I spent a few hours applying different combinations of Topaz ReStyle and OnOne Perfect Effects to several other copies of the same image. It was very exciting to see how many ways I could change the overall feeling of one image simply through application of Various Topaz ReStyle and OnOne Perfect Effects.

1929 Monument to Progress
HDR Image of the Indiana Entrance to the Clark Memorial Bridge in Jeffersonville, Indiana.

Click on the image to enlarge it in a separate window.

The image above is the source image that I created in NIK HDR Efex Pro 2 before experimenting with Topaz ReStyle and OnOne Perfect Effects.

1929 Monument to Progress
There Was a Time When Design Was as Important as Function as in this Monument at the Entrance to the Clark Memorial Bridge in Jeffersonville, Indiana Illustrates.

Click on the image to enlarge it in a separate window.

This version uses only a single Topaz Restyle preset to convey an entirely different feeling to the HDR source image.

Indiana entrance to the Clark Memorial Bridge #4
Apocalyptic Morning

Click on the image to enlarge it in a separate window.

For this final image I worked with a HDR image that I then applied a Fiery preset in Topaz ReStyle to before taking it into OnOne Perfect Effects and using layers added a Glow preset and a Texture preset called Black Leather. In both instances I reduced the Opacity of the presets a lot to get this final version.

I had a blast experimenting with all three pieces of software and may do some further experimenting again soon.

Setting the First Concrete Form for the North Tower of the Downtown Span, Monotone Version

Setting the First Concrete Form on the North Tower of the Downtown Span

Click on the image to enlarge it in a separate window.

While sorting through my images from last fall I came across this version of the setting of the first concrete form for the north tower of the downtown span. I liked the composition and decided to try it as a monotone image. I used NIK Silver Efex Pro to convert it to monotone and applied a preset for an antique feeling. I then sent it back into Aperture 3 for final processing.