Three HDR images of the Ohio River Bridges Project Downtown Crossing progress as of March 22, 2014
Author: Nick Roberts
HDR Images from Around the Ohio River Bridges Project In Louisville, KY

Click on the image to enlarge it in a separate window.
The HDR image above is a three frame bracket set using +2, 0 and -2 EV exposures. I merged the brackets set in NIK HDR EFex Pro 2 and then took it back to Aperture 3 for contrast, color and sharpening adjustments. I then opened it in Topaz FX Lab and added a black border. I chose this image because I liked the composition that I created using the geometric lines of the rebar and the organic lines created by the safety harness and air line and the man’s leg and body.

Click on the image to enlarge it in a separate window.
Same drill here with NIK HDR Efex Pro 2 and Aperture 3 as the processing tools. I was drawn to this composition by the contrast of the polished steel of the teeth set against the texture of the limestone on the ground. I thought the way the ridges in the gravel were a good counterpoint to the triangular forms of the excavator teeth.

Click on the image to enlarge it in a separate window
In this HDR image I followed my normal workflow using NIK HDR Efex Pro 2 and Aperture 3 to create a solid HDR image. I then opened the image in Topaz ReStyle and found a preset that added additional color and gave a new perspective to the excavator teeth. I’m finding that Topaz ReStyle offers a world of possibilities to create memorable images.

Click on the image to enlarge it in a separate window
For this version of the excavator teeth I used the same HDR image as a basis and took it into Topaz B&W to convert it. This Black and White version really shows the contrast of steel and gravel. I found the contrast and detail of the gravel and steel to be very interesting elements in the composition too.

Click on the image to enlarge it in a separate window
Bridge Deck in HDR #1 is a shot of the rebar and steel decking of a highway bridge before concrete is poured to form the road surface. This too is a HDR image that I used NIK HDR Efex Pro 2 to create using a three frame bracket set of +2, 0 and -2 EV exposures. I applied 60% anti-ghosting to get the flag to render properly. After using NIK HDR Efex Pro 2 I returned the image to Aperure 3 for final adjustments to color, contrast and sharpening. My final action was to send the completed HDR image to Photoshop CS5 to straighten the vertical perspective that my 12 mm lens had distorted.

Click on the image to enlarge it in a separate window
I chose this image because I like the composition that is created by the linear elements in the scene. The repetition of the of lines in the steel, in the texture of the concrete and the rebar loops make this a strong composition. The camera angle and the lines formed by the decking also lead the eye back into the frame to the bridge and cranes on the horizon. Using HDR allowed me to bring out the texture while still retaining the broad dynamic range that shooting this time of the day produced. Once again my software choices were NIK HDR Efex Pro 2 and Aperture 3.

Click on the image to enlarge it in a separate window.
Here again I have used line as the dominant aspect for the image. The way the rebar projects into the foreground and then leads your eye into the scene to the linear elements of the bridge in the background is a good example of a dynamic composition. This too is a HDR image that was processed using NIK HDR Efex Pro 2 and Aperture 3 software.

Click on the image to enlarge it in a separate window.
This too is a HDR image that relies on line to create a compelling composition. The lines extend from the edges of the frame into a small window at the back that looks out onto the bridge in the distance. My standard method for HDR images was applied to give the image the color and texture I desired.

Click on the image to enlarge it in a separate window.
Click on the image to enlarge it in a separate window.
This final image today is another case where composition plays a major role in directing the viewer’s eye. The massive concrete “hammer head” with the worker kneeling on it reveals it’s size by juxtaposing the human element against the blue sky, clouds and the diagonal line it forms directs the viewer’s eye into the frame. By using HDR I was able to show the texture on the concrete, the details in the worker’s safety vest and the deep blue sky that a single image would have had trouble rendering.
Using NIK HDR Efex Pro 2 and Topaz Labs Software Together to Add Drama to an Image

Click on the image to enlarge it in a separate window.
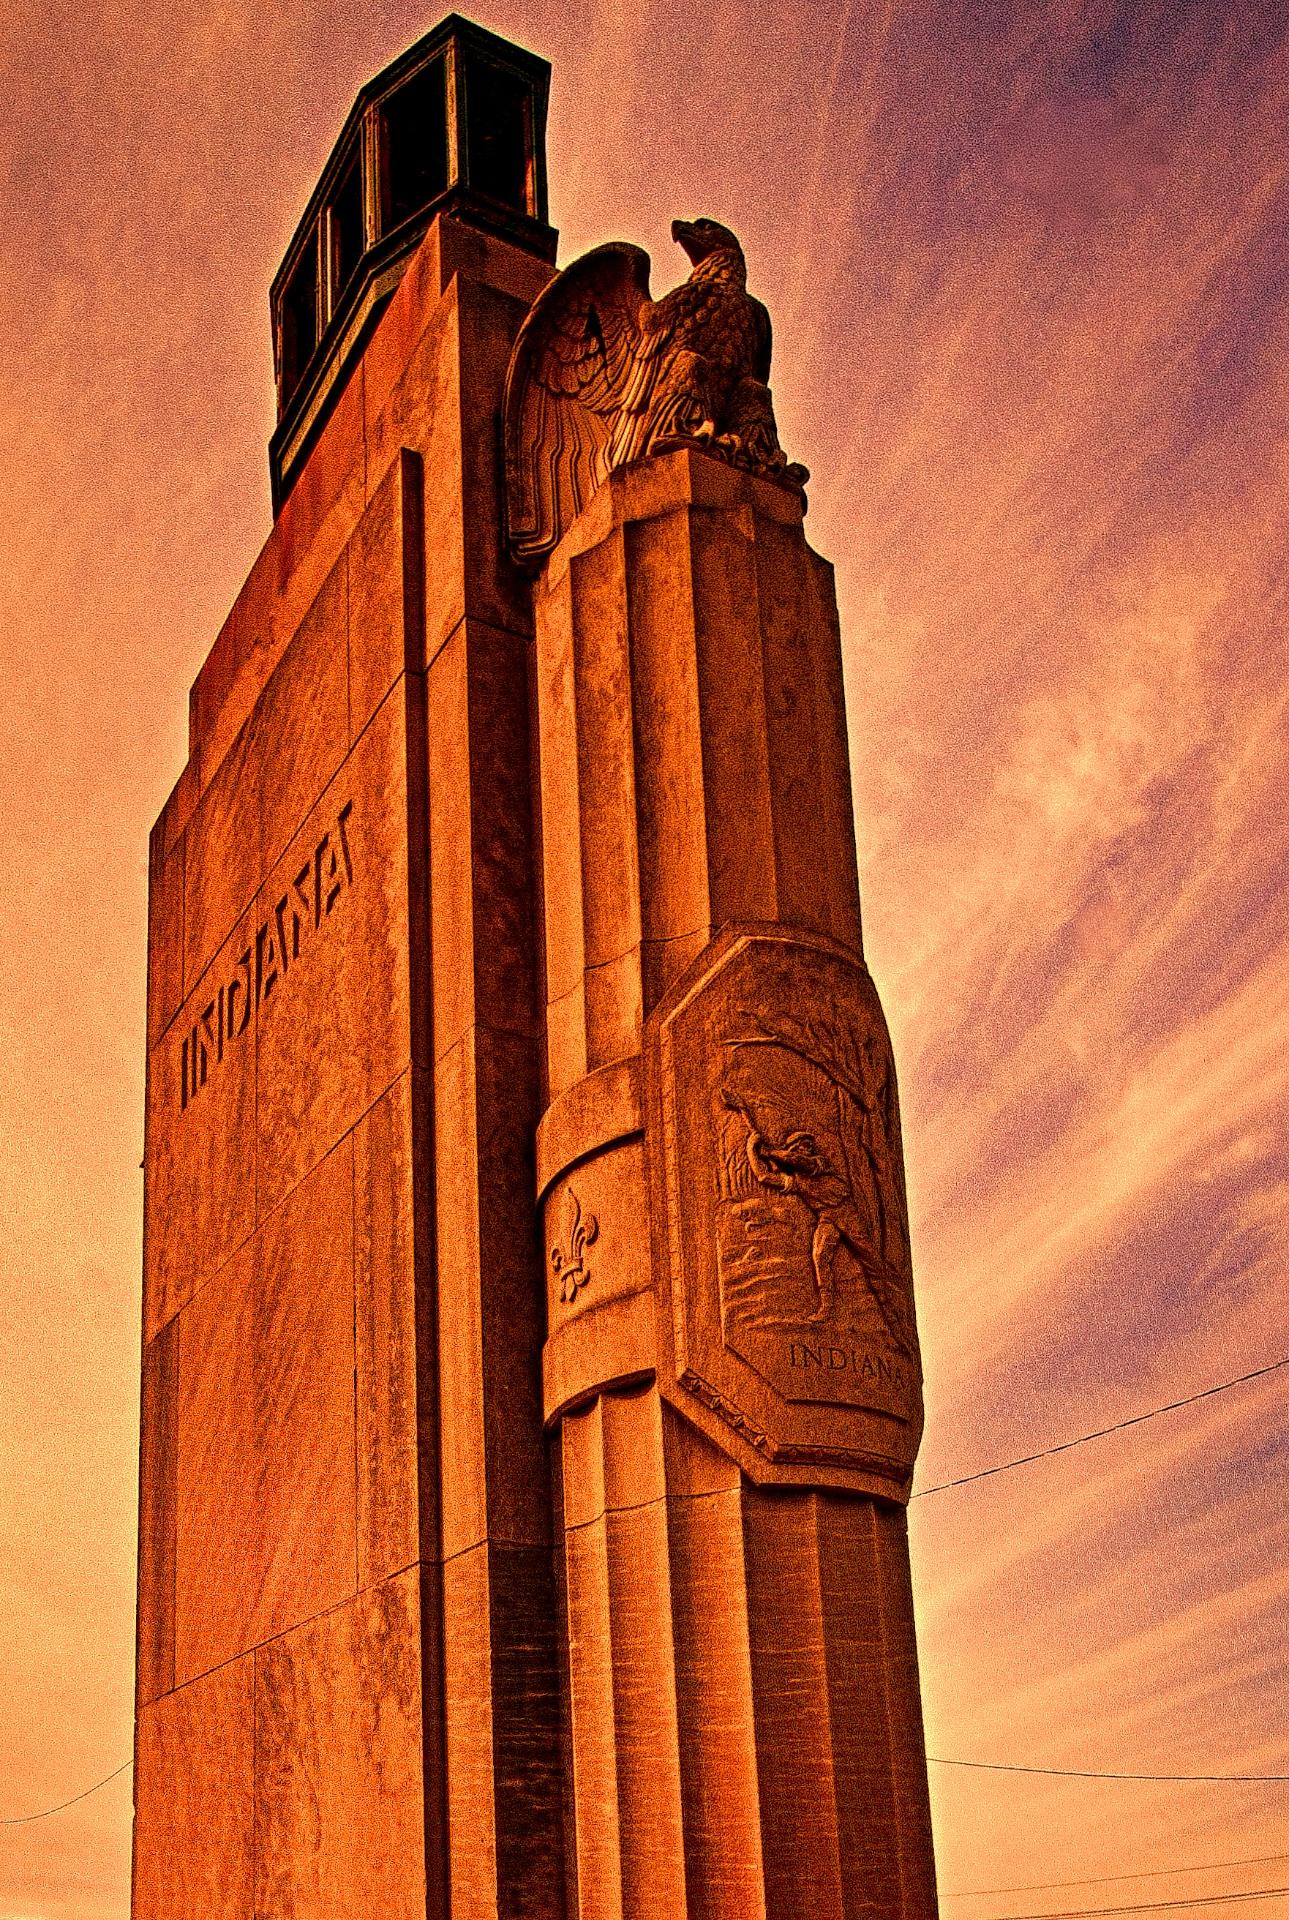
I was in the mood to experiment yesterday and decided to use this photo of the statue at the Indiana entrance of the Clark Memorial Bridge across the Ohio River in Jeffersonville Indiana as my source image. I first created a HDR image from a three frame bracket set of +2, 0 and-2 EV exposures where I applied the Balanced preset with Detail set for Accentuated and Drama set for Deep. I returned the merged file to Aperture 3 for some retouching of dust spots and other standard adjustments. After doing that I created a duplicate file and opened it in Topaz ReStyle where I applied a preset that I happened upon while experimenting with the Landscape presets. I don’t recall which one it is (I should write that stuff down) but I liked the feeling of Art Deco Posters that it gave the image. I also added a texture layer in OnOne Perfect Effects that simulates canvas.
After creating this image I spent a few hours applying different combinations of Topaz ReStyle and OnOne Perfect Effects to several other copies of the same image. It was very exciting to see how many ways I could change the overall feeling of one image simply through application of Various Topaz ReStyle and OnOne Perfect Effects.

Click on the image to enlarge it in a separate window.
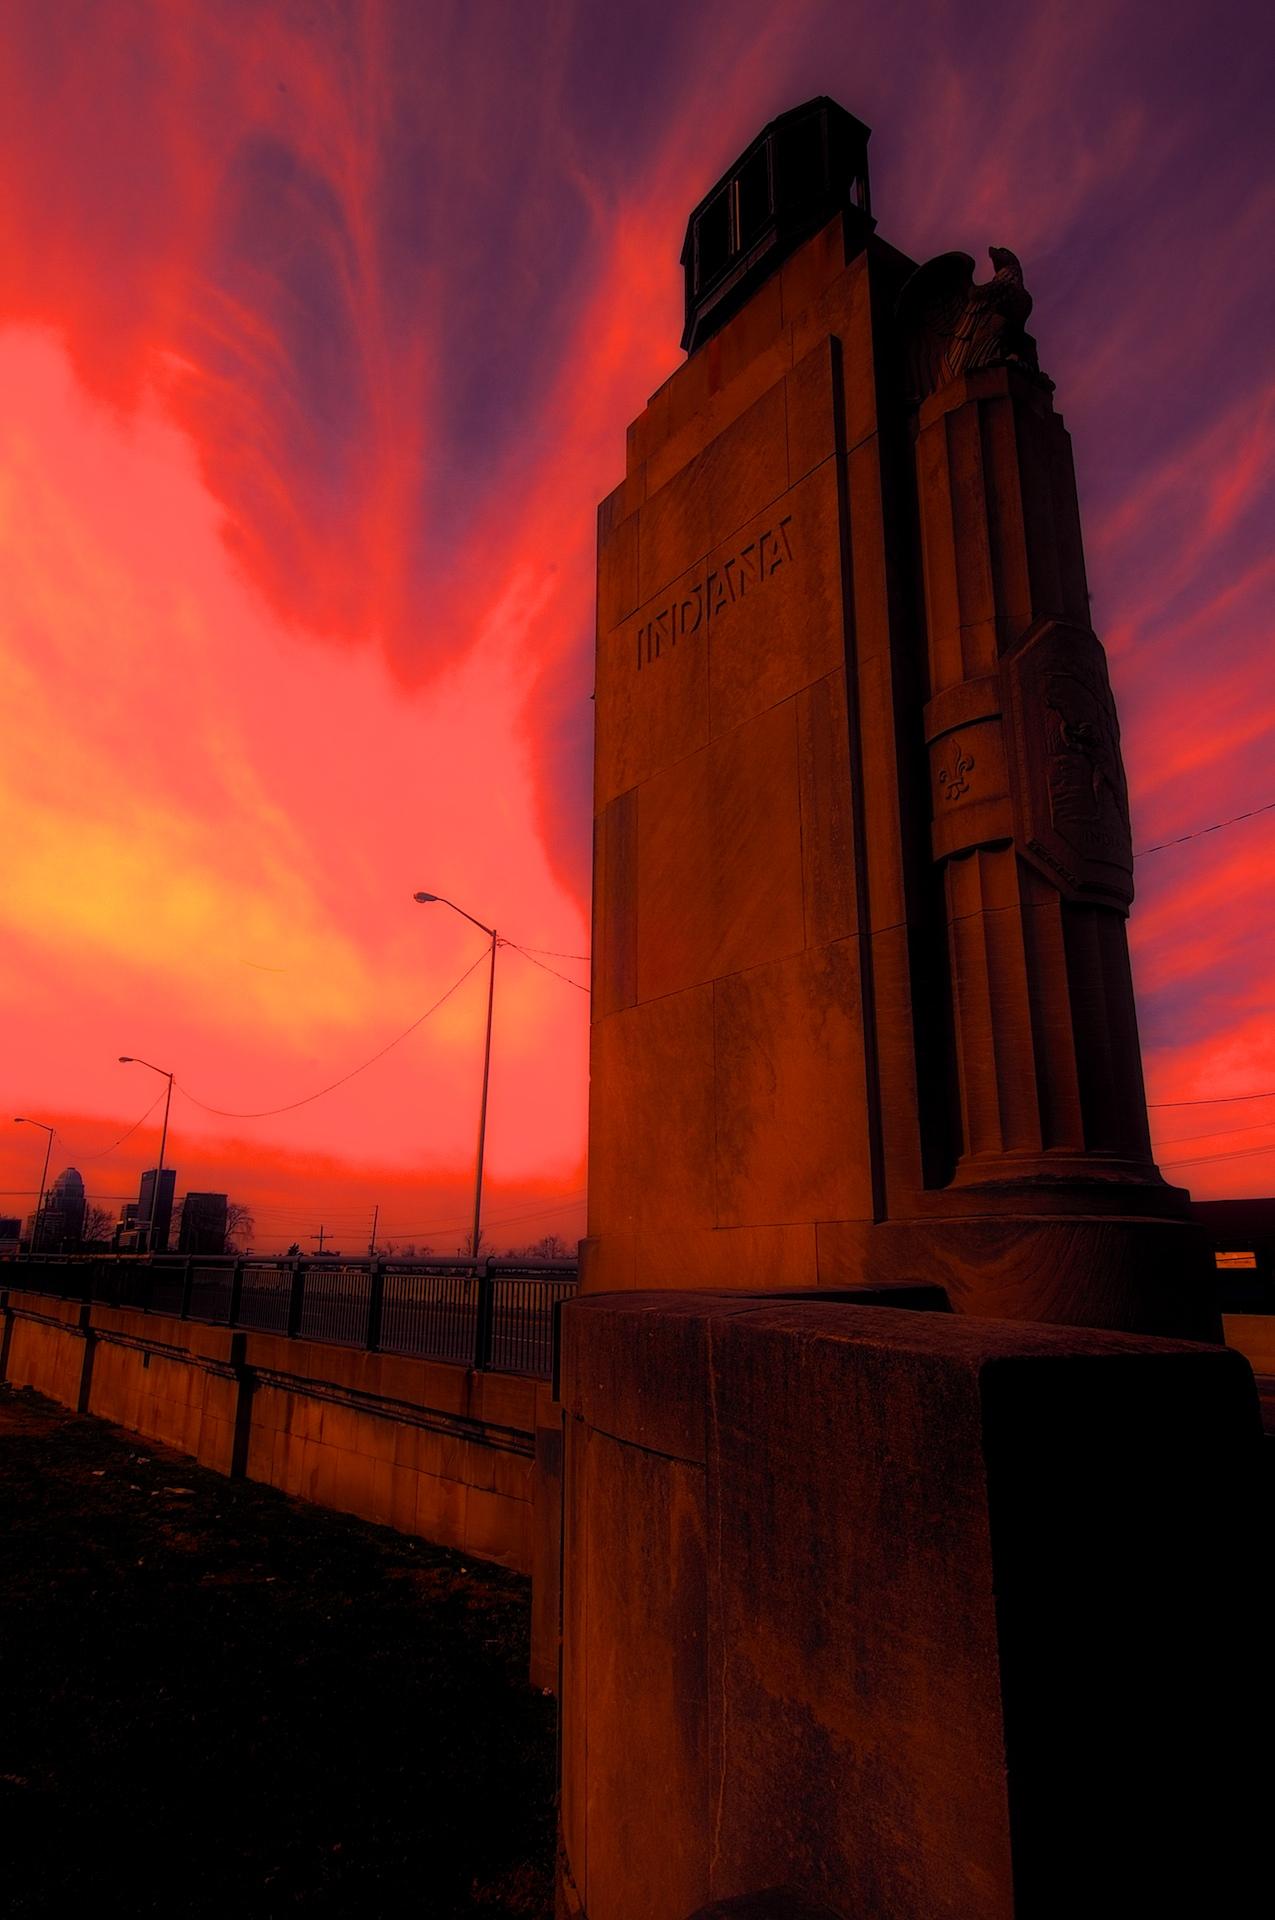
The image above is the source image that I created in NIK HDR Efex Pro 2 before experimenting with Topaz ReStyle and OnOne Perfect Effects.
Click on the image to enlarge it in a separate window.
This version uses only a single Topaz Restyle preset to convey an entirely different feeling to the HDR source image.
Click on the image to enlarge it in a separate window.
For this final image I worked with a HDR image that I then applied a Fiery preset in Topaz ReStyle to before taking it into OnOne Perfect Effects and using layers added a Glow preset and a Texture preset called Black Leather. In both instances I reduced the Opacity of the presets a lot to get this final version.
I had a blast experimenting with all three pieces of software and may do some further experimenting again soon.
HDR Photo of a Man Strolling Across the Clark Memorial Bridge in Louisville KY

Click on the image to enlarge it in a separate window.
This HDR image was captured from below the Clark Memorial Bridge in Louisville last fall. I liked the way the bridge beams intersected in the frame and the texture of the rust on them. The man walking on the bridge gave some scale to the photo and added an organic element to an otherwise mechanical scene.
I shot three frames in a bracket of -2, 0 and +2 EV exposures. I merged them using NIK HDR Efex Pro 2 and applied 60% anti-ghosting to eliminate the ghosting that his movement imparted. After merging the files I returned the image to Aperture 3 for final adjustments. Had I not used HDR techniques the shadows would have been blocked up or the highlights would have been blown out with a single exposure. After trying many of the popular HDR software apps on the market today I have found the anti-ghosting setting in NIK HDR Efex Pro 2 is the best I have used. This is especially important to me since I like to include people in my images and that I shoot handheld most of the time.
Setting the First Concrete Form for the North Tower of the Downtown Span, Monotone Version

Click on the image to enlarge it in a separate window.
While sorting through my images from last fall I came across this version of the setting of the first concrete form for the north tower of the downtown span. I liked the composition and decided to try it as a monotone image. I used NIK Silver Efex Pro to convert it to monotone and applied a preset for an antique feeling. I then sent it back into Aperture 3 for final processing.
