Tag: OnOne Perfect Effects

Using NIK HDR Efex Pro 2 and Topaz Labs Software Together to Add Drama to an Image

1929 Monument to Progress
A Monument to Progress From the Art Deco Era

Click on the image to enlarge it in a separate window.

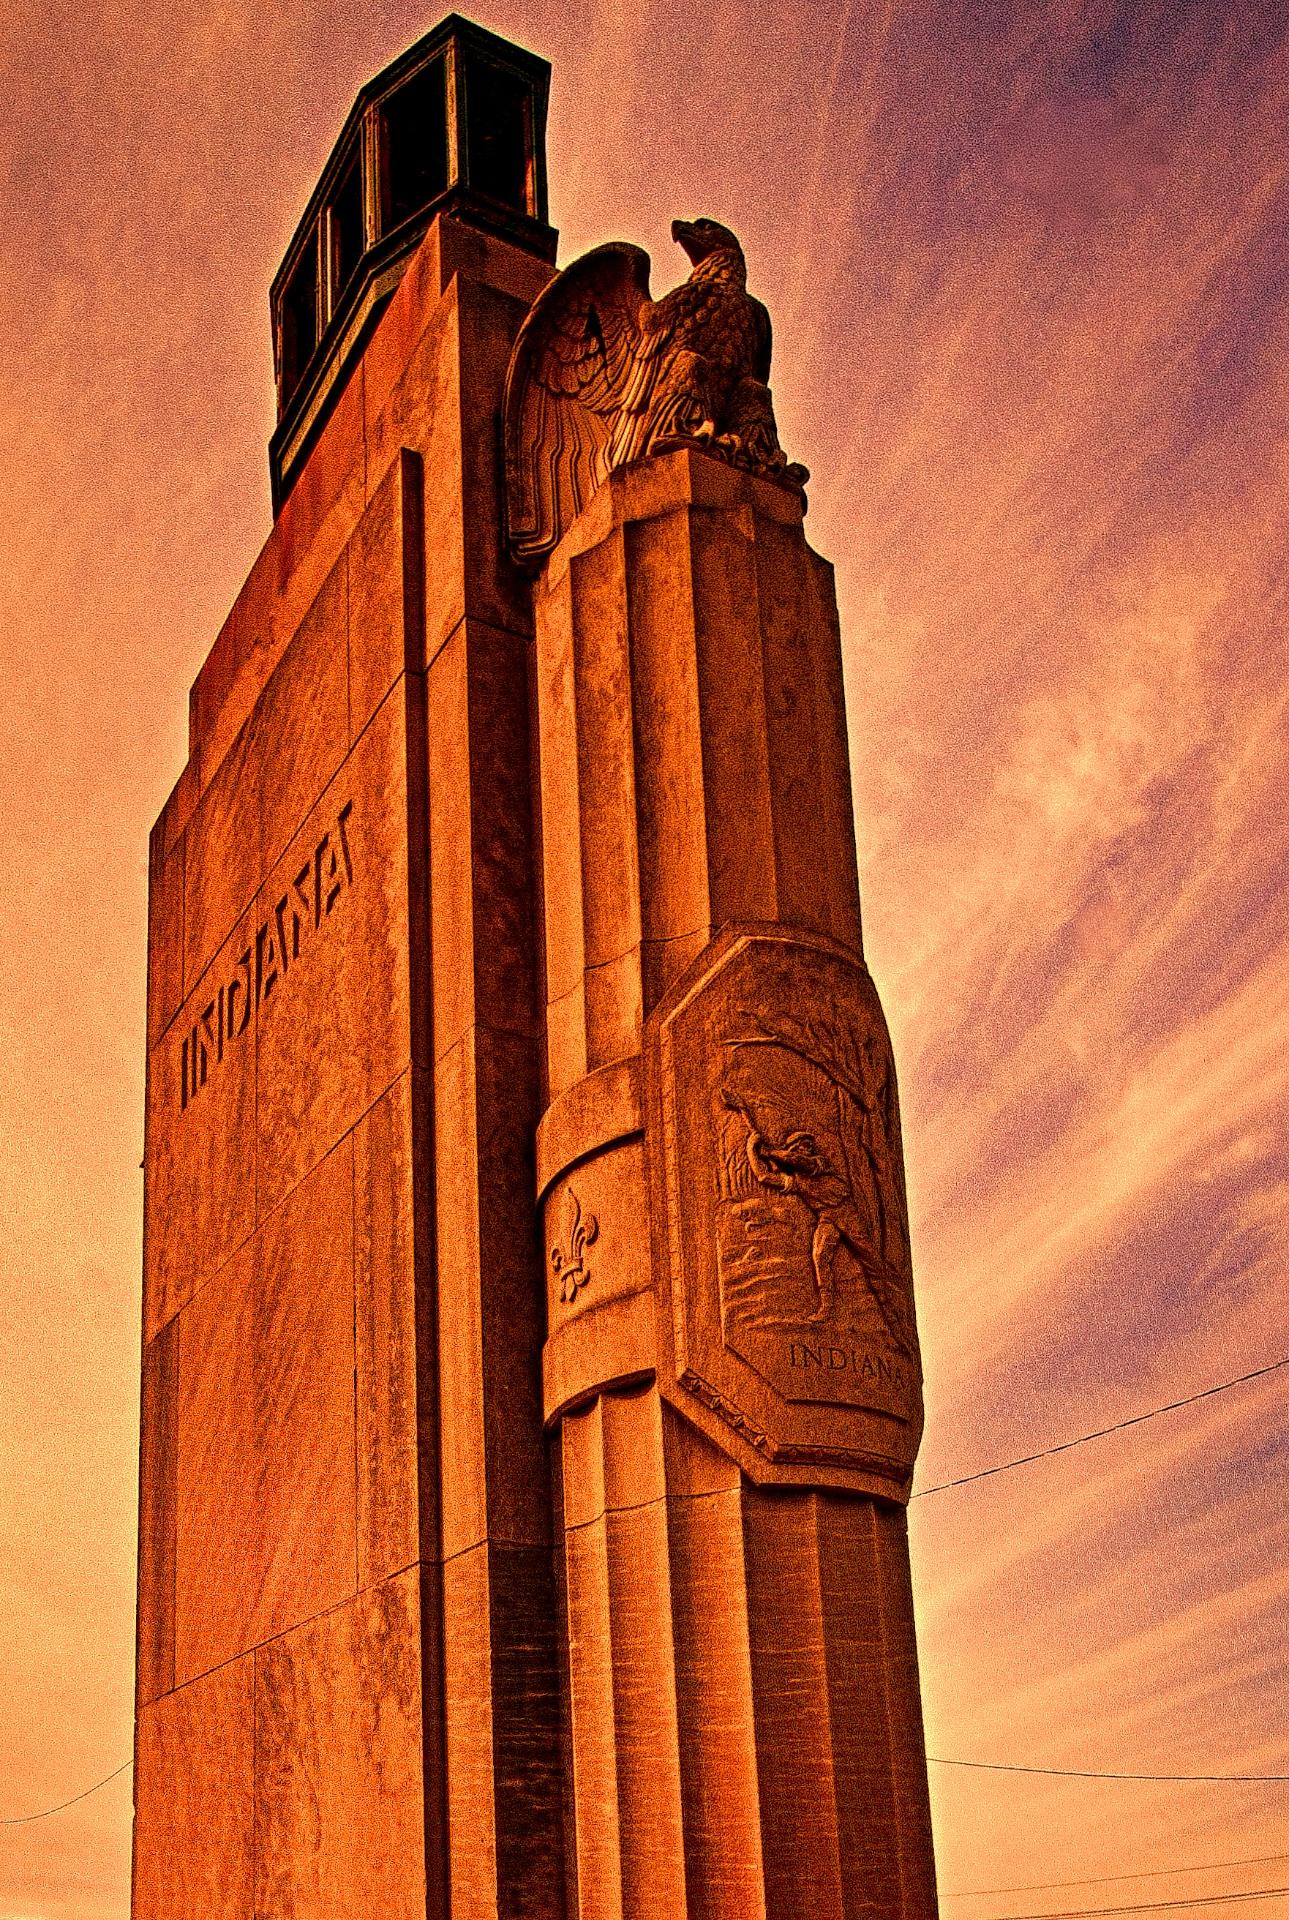
I was in the mood to experiment yesterday and decided to use this photo of the statue at the Indiana entrance of the Clark Memorial Bridge across the Ohio River in Jeffersonville Indiana as my source image. I first created a HDR image from a three frame bracket set of +2, 0 and-2 EV exposures where I applied the Balanced preset with Detail set for Accentuated and Drama set for Deep. I returned the merged file to Aperture 3 for some retouching of dust spots and other standard adjustments. After doing that I created a duplicate file and opened it in Topaz ReStyle where I applied a preset that I happened upon while experimenting with the Landscape presets. I don’t recall which one it is (I should write that stuff down) but I liked the feeling of Art Deco Posters that it gave the image. I also added a texture layer in OnOne Perfect Effects that simulates canvas.

After creating this image I spent a few hours applying different combinations of Topaz ReStyle and OnOne Perfect Effects to several other copies of the same image. It was very exciting to see how many ways I could change the overall feeling of one image simply through application of Various Topaz ReStyle and OnOne Perfect Effects.

1929 Monument to Progress
HDR Image of the Indiana Entrance to the Clark Memorial Bridge in Jeffersonville, Indiana.

Click on the image to enlarge it in a separate window.

The image above is the source image that I created in NIK HDR Efex Pro 2 before experimenting with Topaz ReStyle and OnOne Perfect Effects.

1929 Monument to Progress
There Was a Time When Design Was as Important as Function as in this Monument at the Entrance to the Clark Memorial Bridge in Jeffersonville, Indiana Illustrates.

Click on the image to enlarge it in a separate window.

This version uses only a single Topaz Restyle preset to convey an entirely different feeling to the HDR source image.

Indiana entrance to the Clark Memorial Bridge #4
Apocalyptic Morning

Click on the image to enlarge it in a separate window.

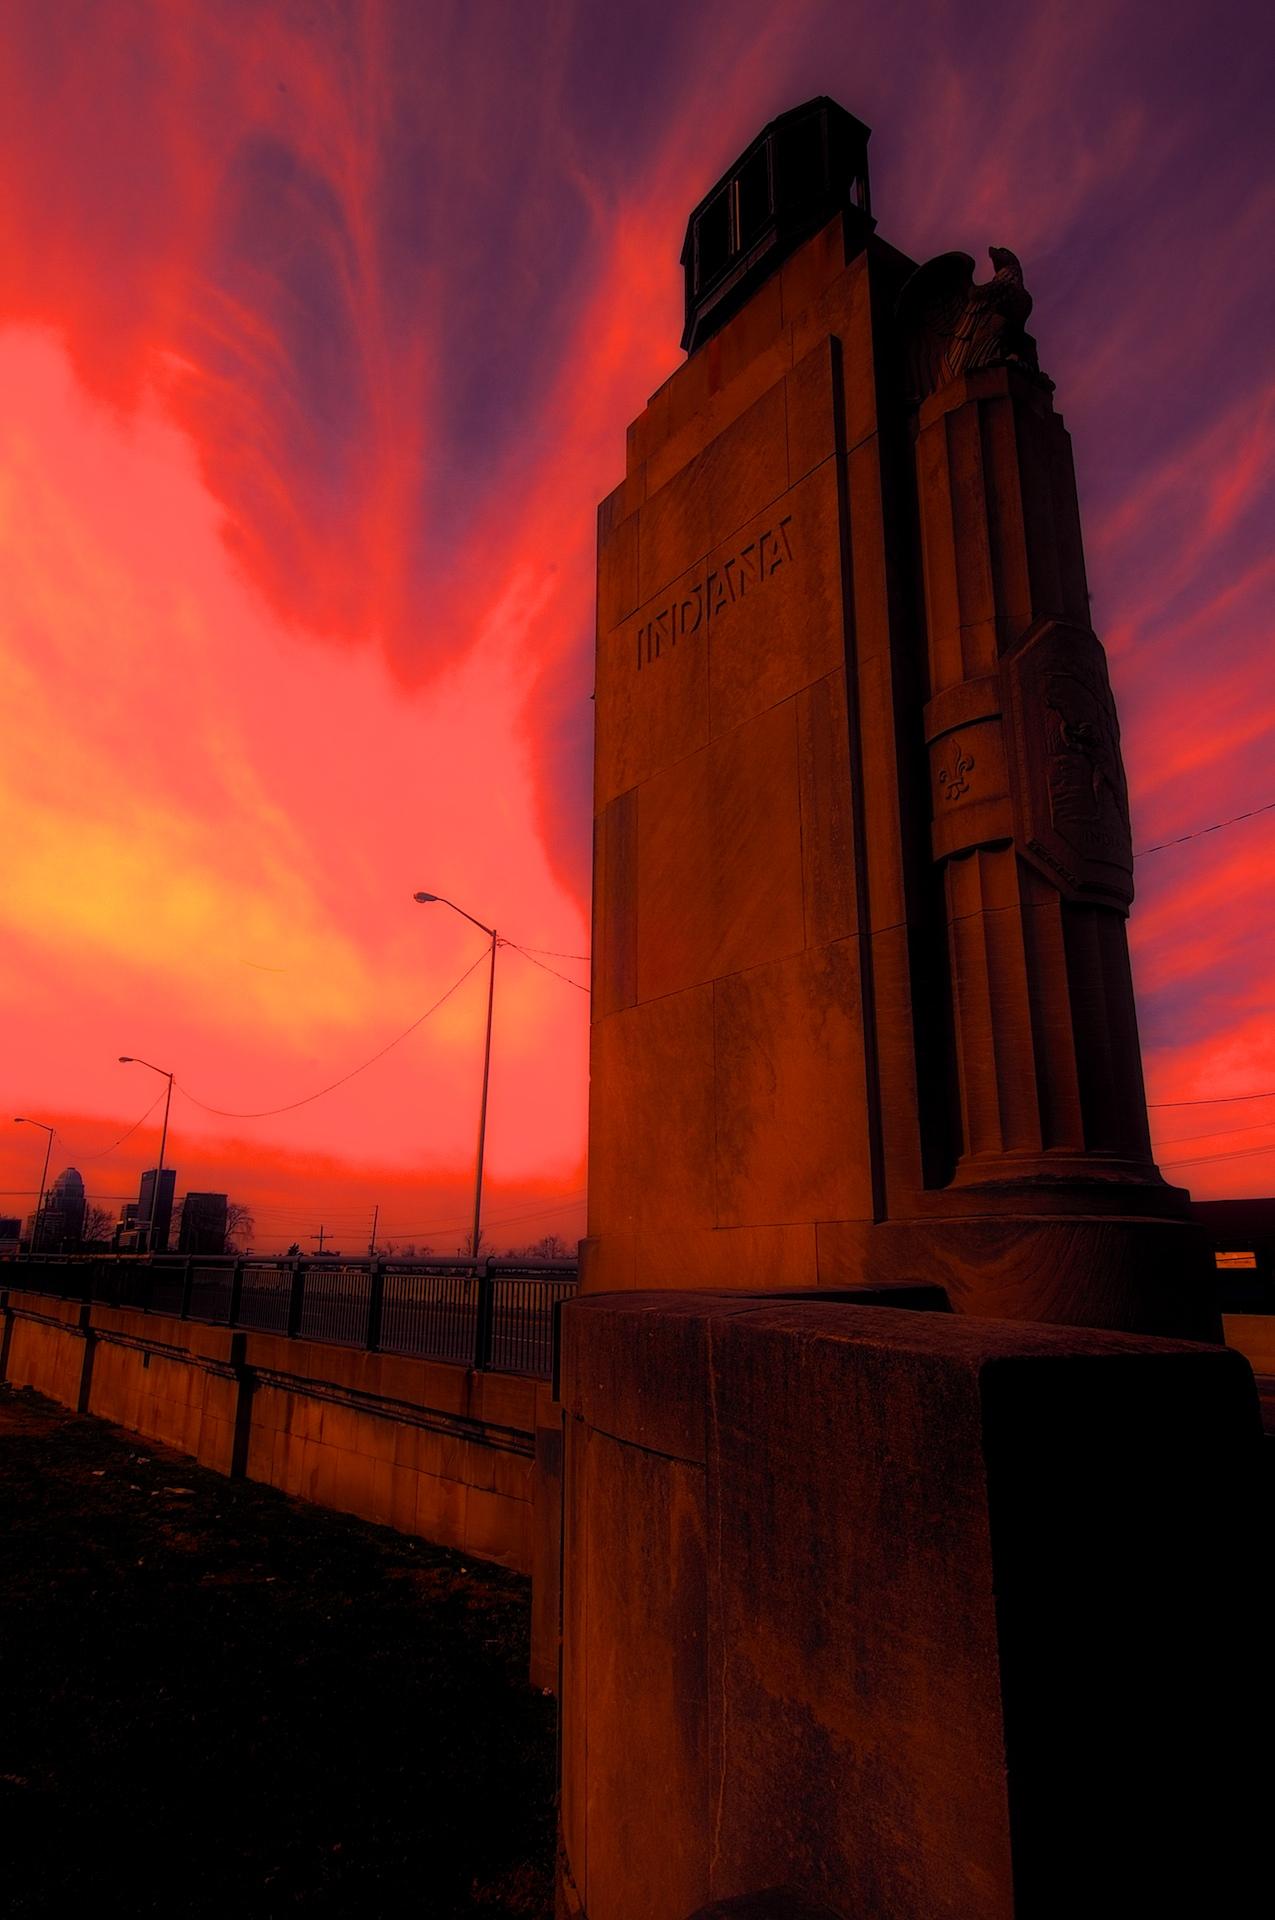
For this final image I worked with a HDR image that I then applied a Fiery preset in Topaz ReStyle to before taking it into OnOne Perfect Effects and using layers added a Glow preset and a Texture preset called Black Leather. In both instances I reduced the Opacity of the presets a lot to get this final version.

I had a blast experimenting with all three pieces of software and may do some further experimenting again soon.

Sunrise Over the Ohio River Bridges Project

Ohio River Bridges Project Morning

Click on the image to enlarge it.

Today’s HDR image is from the Ohio River Bridges Project, Downtown Span, being built by Walsh Construction on the Ohio River in Louisville Kentucky; they are now working on the foundation for every pier across the river. This view is from the Indiana shore in Jeffersonville looking east. There are cranes on barges across the river; each one doing some piece of work essential to the foundation prep work. Looking south there are also cranes along the horizon where work is also progressing on the rebuilding of Louisville’s Spaghetti Junction which will tie the existing freeways into the new Ohio River Downtown Span.

I used my usual three bracket set of -2, 0 and +2 EV to capture the broad dynamic range in the scene. In my processing I first merged the three images in NIK HDR Efex Pro 2 where I tone-mapped it before bringing the HDR image back into Aperture and into onOne Perfect Layers where I used some adjustment layers to intensify and enhance to colors in the scene. I also applied my sharpening in onOne Perfect Effects before saving the image for the web from Aperture 3.

onOne Software Announces Perfect Photo Suite 8

boxes_3 editions

OnOne Software Announces Perfect Photo Suite 8, a complete photo editor for every workflow. The new Perfect Enhance module, Perfect Eraser, Perfect Batch utility, and re-engineered Perfect Effects module create a complete photo editing solution that seamlessly integrates into any workflow.

OnOne Software, Inc., a leading developer of innovative and timesaving solutions for digital photography, today announced Perfect Photo Suite 8—the photographer’s choice for photo editing. Perfect Photo Suite 8 is a full-featured, standalone photo editor that integrates seamlessly with Adobe® Photoshop®, Lightroom®, Photoshop Elements, and Apple® Aperture® and it includes all the best tools a photographer needs to create extraordinary images. Key new features include the Perfect Enhance module for essential photo adjustments, the Perfect Eraser with content-aware fill technology, the Perfect Batch processing utility for applying workflows to multiple images at once, and a re-engineered Perfect Effects module with twice as many filters, customizable presets, and integrated FocalPoint™ technology.

The new tools and capabilities alongside Perfect Photo Suite 8’s eight modules—Effects, Enhance, B&W, Portrait, Mask, Layers, Resize, and Browse—allow photographers to enhance, retouch, and stylize images in a layered workflow, replace backgrounds, create high-quality enlargements, prepare images for output, and batch process workflows. The modules share a unified interface, each targeting a specific image processing task. Each module provides only the tools necessary to complete the job at hand, eliminating screen clutter and confusion for the user.

We listened intently to the digital photography community about what they wanted for their image processing in today’s world of plug-ins, online apps, and subscriptions,” said Craig Keudell, president of onOne Software. “We made it a priority to respond quickly and design a cohesive new product that continues to focus on photography and is built for photographers of all levels, from enthusiasts to professionals. We’ve leveraged our extensive experience as a plug-in company and evolved the Perfect Photo Suite into a complete and powerful photo editor that, unlike existing plug-in collections, works as one, elegantly designed product that seamlessly integrates into any workflow.”

New in Perfect Photo Suite 8:

• Perfect Enhance module – Perfect Enhance provides essential tools for basic enhancements. Use it to adjust brightness and contrast, remove a color cast, remove dust spots and power lines, and add sharpening and vignettes. It is an ideal module to start with when using Perfect Photo Suite 8 as a standalone application or when quick corrections are needed.

• Perfect Eraser – Using content-aware fill technology and simple brush strokes, the Perfect Eraser removes objects and automatically reconstructs the image with realistic results.

Twice as Many Filters – The Effects module now includes new adjustable filters including: HDR Look, Dynamic Contrast for tonal clarity, Vintage, Grunge, Antique, and more.

Customizable Presets – All built-in presets included in Perfect Photo Suite 8 may be deconstructed by their filter settings and personally customized.

FocalPoint is now in the Effects Module – The best parts of FocalPoint technology to create bokeh, tilt-shift, and selective focus effects after the shot, are now in the Effects module as the

Lens Blur filter.

New Browse module – Images can be browsed and directly accessed from Perfect Photo Suite wherever they are stored—on the computer, an external drive, a connected network, and even on a cloud-based storage service like Dropbox, Google Drive, or Apple’s photo stream.

Perfect Batch Utility – Powerful batch processing of actions from one or multiple modules, including the insertion of a watermark.

Multiple File Handling: As a photo editor, you can now open and work with more than one image at a time. Move between images to edit or copy layers from one file to the next.

Improved Masking Bug: Redesigned Masking Bug in the Effects and Layers modules make mask creation easier and more intuitive.

Higher Quality Effects: Performance enhancements improve effects by minimizing artifacts without sacrificing processing speed.

Improved RAW file handling: Open and process RAW files faster and with better quality. Support for new cameras also added.

Availability and Pricing

The new Perfect Photo Suite 8 will be available November 26, 2013. Pre-orders are available immediately at www.onOnesoftware.com/affiliates/idevaffiliate.php?id=459. Perfect Photo Suite 8 is available in three editions: Premium, Standard, and an edition for Adobe Lightroom & Apple Aperture. The Premium Edition works with Adobe Photoshop, Lightroom, Aperture, Photoshop Elements, and as a standalone application. Owners of previous versions of Perfect Photo Suite Premium Edition can upgrade for $99.95. New users may pre-order the Premium Edition for $179.95. For a limited time, pre-orders of Perfect Photo Suite 8 Premium Edition will include a complimentary Essential Video Guide to Perfect Photo Suite 8, which provides a comprehensive collection of getting started training videos for Perfect Photo Suite 8 ($40 value).

Perfect Photo Suite 8 for Adobe Lightroom & Apple Aperture works with Lightroom, Aperture, Photoshop Elements, and as a standalone application. It is available for $129.95 | $79.95 upgrade. The Standard Edition works as a complete standalone photo editor and is available for $79.95. New users who pre-order Perfect Photo Suite 8 will immediately receive a complimentary license for Perfect Photo Suite 7.5. Customers who pre-order Perfect Photo Suite 8 will receive all upcoming Loyalty Rewards that will be delivered monthly to owners of the Perfect Photo Suite 8. For those who have purchased Perfect Photo Suite 7.5 on or after August 1, 2013, onOne Software will issue a complimentary upgrade to Perfect Photo Suite 8 via download when it is available. For more information on Perfect Photo Suite 8, visit http://www.onOnesoftware.com/affiliates/idevaffiliate.php?id=459

About onOne Software

onOne Software, Inc., is a leading developer of innovative software tools and apps for digital photography and offers time-saving software solutions for photographers of all levels, from enthusiasts to professionals. Leveraging its extensive history as successful plug-in developer for Adobe Photoshop, Photoshop Elements, Photoshop Lightroom, and Apple Aperture, and continued development of cutting-edge technology, onOne publishes unified solutions that offer both full-featured photo editing capabilities and the flexibility of traditional plug-ins.

For additional information, visit OnOne using the link below:

http://www.onOnesoftware.com/affiliates/idevaffiliate.php?id=459

HDR Images Using Topaz Restyle and OnOne Perfect Effects

Ohio River Bridges Project Downtown Span #1

Click on the image to enlarge it in another window.

This first image was created in NIK HDR Efex Pro 2 from a three frame bracket set using +2, 0 and -2 EV. Because it was evening I shot it with a tripod to allow for the long exposures needed to capture such a low light scene. After merging the three frames in NIK HDR Efex Pro 2  I returned the image to aperture 3 where I made some adjustments to the color channels and applied sharpening.

Ohio River Bridges Project Downtown Span #4

Click on the image to enlarge it in another window.

This second image was created by taking the same HDR image as above into OnOne Perfect Photo 7.5 and then opening it in Perfect Effects where I first added a layer with the  Daguerrotype effect I then added a second layer where I overlaid the Palladium Print effect after that I added another layer where I applied one of the Border effects to complete the image. As you can see it gives an entirely different feeling to the image which is one of the strengths of the Perfect Effects application.

Ohio River Bridges Project Downtown Span #3

Click on the image to enlarge it in another window.

For this third version I took the HDR image into the newest Topaz Labs product, Topaz ReStyle, and applied the preset named Saffron Sunset. I was amazed by the transformation that Topaz ReStyle made to the image. I didn’t stop with simply selecting the preset; instead I then adjusted the sliders in the preset to give the image the feeling I was looking for. Topaz ReStyle has over 1000 different presets built into it and by previewing them in groups I was able to find one that I liked for this scene. One of the interesting feature of Topaz ReStyle is the ability to select a color pallet to work with and search the entire preset library to find variations that use the colors you have selected. You can then preview the presets with your image before committing to one of them.

I hope these three images help you to see the potential of combining different software options from Topaz, OnOne and NIK to create an image that expresses your personal vision for a particular image. Topaz ReStyle is going to become another tool for me to use when I want to explore variations on a theme and I think over time it will be as valuable in my workflow as the many other plug-ins that I already use.

Topaz ReStyle is on sale for $29.99 (a 50% discount) until August 31  if you use the link below and the promo code restyleit 

http://www.topazlabs.com/705.html


A Path Through The Woods

Enchanted Wood
Enchanted Wood

Click on the image to enlarge it in another window.

Today I am sharing an HDR image that has been processed with Aperture  3, NIK HDR Efex Pro 2, Adobe Camera Raw, Photoshop CS5, Topaz Clarity and OnOne Perfect Effects. I shot the scene along Floyds Fork in the new Parklands Park that is being developed in eastern Louisville. My bracket set was -2, 0 and +2 EV which gave me three versions to work with for my HDR merger and tone mapping.

I first took the three bracket set into NIK HDR Efex Pro 2 where I merged them and applied the Balanced Preset. After that I made some adjustments in Aperture 3 before opening the HDR image in Adobe Camera Raw where I adjusted color saturation and luminance and then saved it in Photoshop CS5 as a tiff file. I then used Topaz Clarity to add micro-contrast and further refine the colors in the image. After returning the image to Aperture 3 I adjusted the sharpening, definition and added a vignette. I then opened the image in OnOne Perfect Photo Suite 7 and used Perfect Effects where I first applied the Vecchio filter at approximately 75% opacity to warm the image even further. Next I added the Holga Filter to another layer in OnOne Perfect Effects before returning the image to Aperture 3 for final sharpening.