Tag: cars

Photographing Louisville at Night From The Ohio River Bridges Project, Downtown Span, Tower Three

Louisville's spaghetti junction at night from atop the western tower on pier three of the Ohio River Bridges Project.
Louisville’s spaghetti junction at night from atop the western tower on pier three of the Ohio River Bridges Project.

Click on any image to enlarge it.

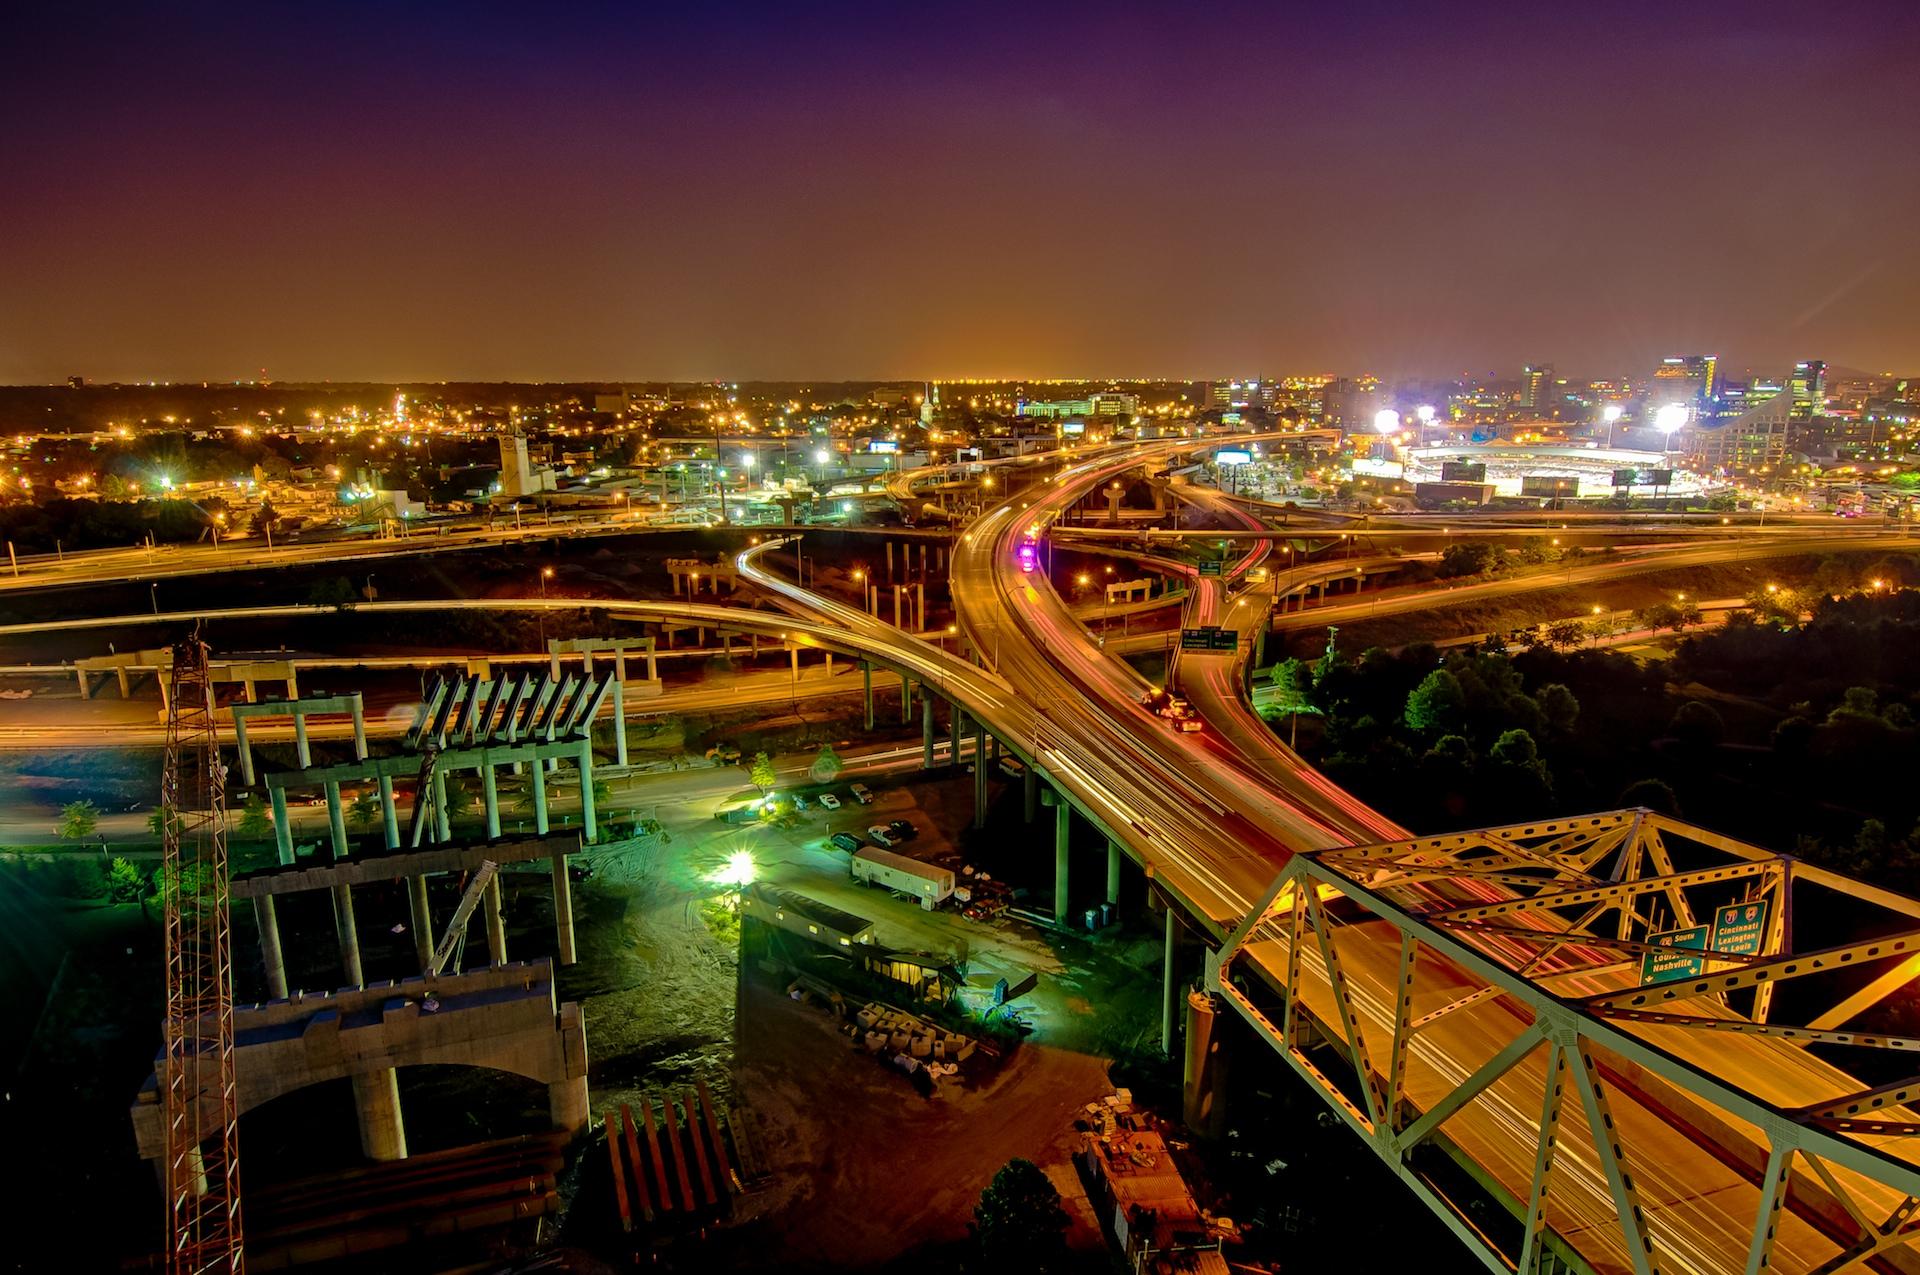
A couple of weeks ago I climbed up on the western tower on Pier Three to shoot the Ohio River Bridges Project Downtown Span and Louisville at night. I was 300 feet above the river standing on the top of the tower and decided to use long shutter speeds to capture the light trails of the traffic moving through Spaghetti Junction. I really like the way the colors of the light change across the images especially the green of work areas vs the orange of the existing sodium lights along the roadways. I was also interested in the flow of the roads and the way the light trails emphasized their paths.

Louisville's spaghetti junction at night from atop the western tower on pier three of the Ohio River Bridges Project. #2
Louisville’s spaghetti junction at night from atop the western tower on pier three of the Ohio River Bridges Project. #2

Click on any image to enlarge it.

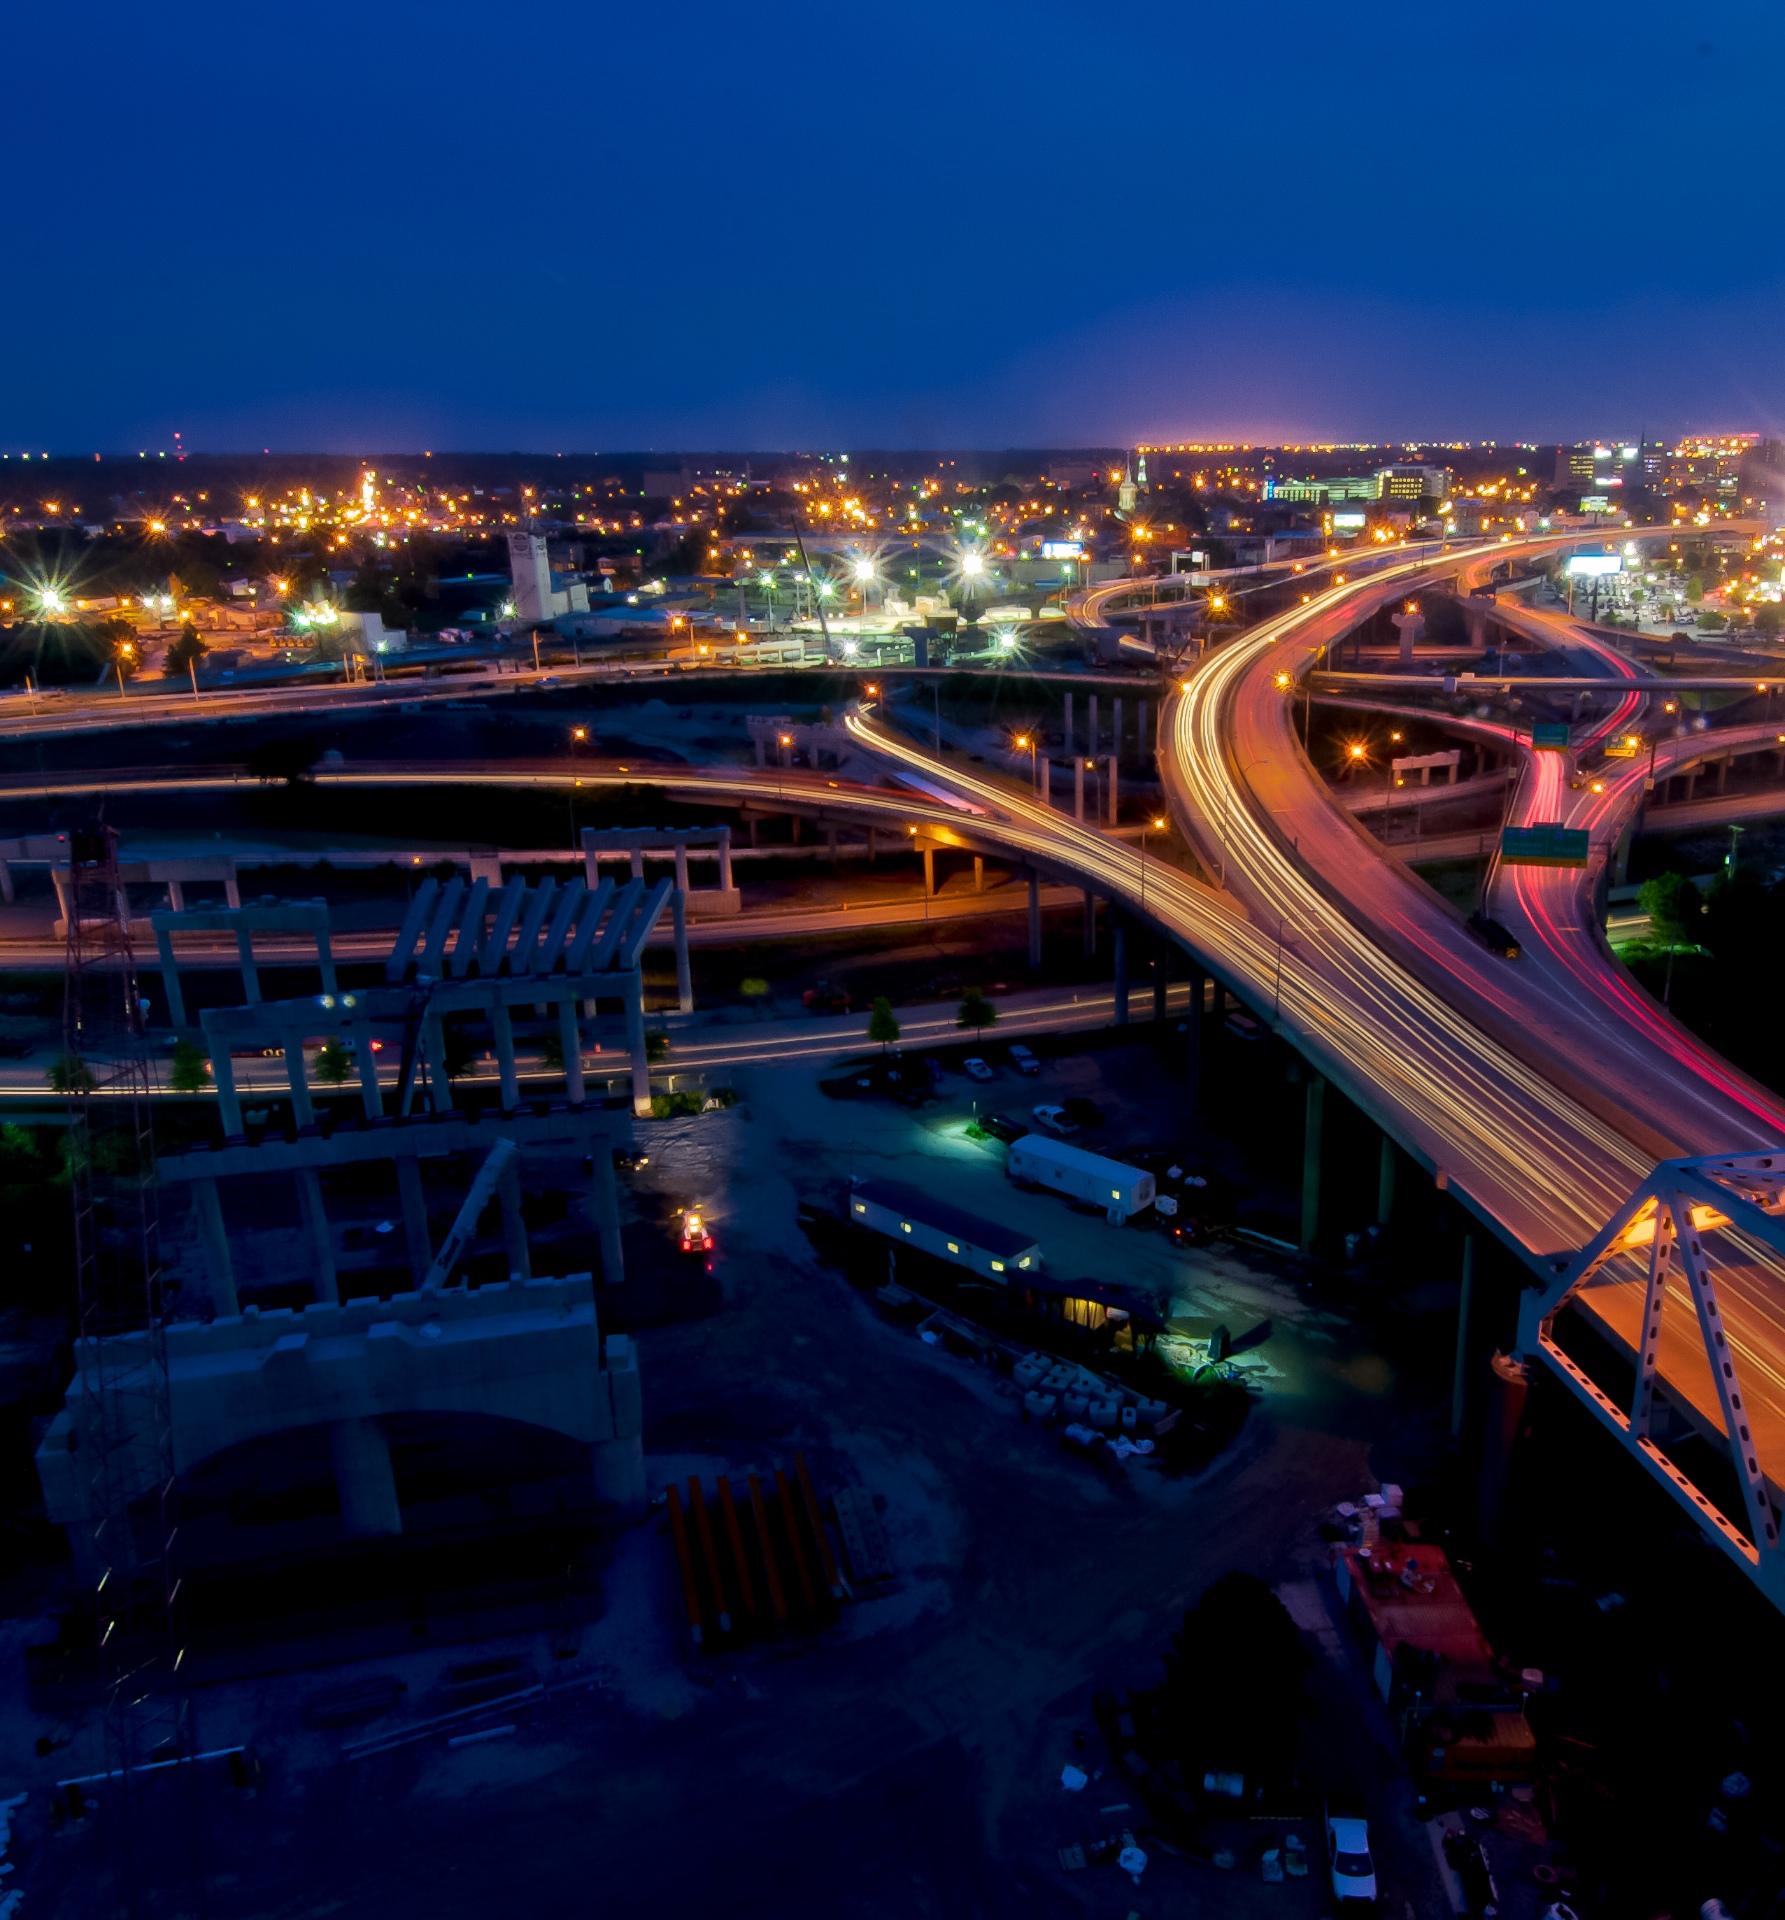
In this version I purposely emphasized the orange lighted areas to contrast them with the deep blues in the darker areas. The little hits of green around the construction offices really popped and added another dimension to the image.


Kennedy Bridge on I-65 at night seen from above .
Kennedy Bridge on I-65 at night seen from above.

Click on any image to enlarge it.

This shot above the Kennedy Bridge uses the orange of the roadway and along the river’s shore as unifying elements to integrate the foreground with the distant skyline.

Night in Waterfront Park as seen from atop the western tower on pier three of the Downtown Span on the Ohio River Bridges Project.

Click on any image to enlarge it.

The final pair of images in this post show Waterfront Park and the Big Four Bridge lit up. I used the contrast of the straight lines of the bridge tower and crane boom as counterpoints to the arcing curves of the park to create this composition.

Night in Waterfront Park as seen from atop the western tower on pier three of the Downtown Span on the Ohio River Bridges Project. #2

Click on any image to enlarge it.

In this final image the Big Four Bridge in the background and the lights in the park really stand out from the reflected light on the concrete tower and the yellow crane boom. The purple of the Big Four Bridge lighting is a great compliment to the green and aqua of the park lights.

I shot in three frame bracket sets of +2, 0 and -2 EV exposures for HDR merging into single images. I used NIK HDR eFex Pro 2 and Adobe Camera Raw to do most of the processing as well as Photoshop CS5 to do some lens correction.

Experimenting with HDR Black and White Processing

Since early January I’ve been experimenting HDR Black and White processing. For the accompanying photos I usually began with a color HDR image that I then processed again with Topaz B&W, onOne Perfect B&W or NIK Silver Efex Pro 2 to create the HDR Black and White version. Through this combination of processing techniques and apps I have rediscovered my love of black and white photography.

The workflow that I have adopted for HDR Black and White images usually begins by using a three frame bracket set of +2, 0 and -2 EV exposures that I first merge using NIK HDR Efex Pro 2 and apply the Balanced Preset with Accentuated Detail. After merging them I take the merged file into Adobe Camera Raw for initial adjustments to fill light and shadows as well as a curves adjustment. I also adjust Saturation and Luminance in ACR before opening the image in Photoshop CS5. In Photoshop CS5 I add a new layer where I usually start with lens correction filter and an unsharp mask filter. At this point I may decide to crop the image in order to refine the composition.

After I am satisfied with my color HDR version I duplicate it and add a new layer with Topaz B&W, onOne Perfect B&W or NIK Silver Efex Pro 2 to create the HDR Black and White version. The more I experiment with these B&W apps the more I find myself using Topaz B&W as my first choice. I really like being able to build my own presets with special feature such as edge treatments and opacity when I am seeking a hand tinted effect.

Vintage Motorcycle Engine Detail

Click on any image to begin a light box slideshow of all the images in this gallery.

I think this has been a good exercise for me and helps me see more possibilities for many of the images I love to capture. HDR Black and White photography really excites my creative side and lets me reveal another facet of the world as I see it.

Exploring and Building Presets In Topaz B&W Effects and NIK Analog Pro Plugins

This post looks at using Topaz Software with various NIK Software to create your own plugin presets for HDR photography.

Sam’s Volvo Build

Sam's Passion Black and White HDR version
Sam’s Passion Black and White HDR version

Click on the image to enlarge it in a separate window.

This photo of my friend Sam was taken when he was building a Volvo streetrod in 2013. Sam is an incredibly talented car builder with several cars to his name. He usually chooses cars that other folks ignore for one reason or another. His past projects include a Ford Anglia, Nash Rambler, 53 Willys Hardtop, 60 Ford Falcon and a 60s Studebaker Lark. His reputation for sound construction has people lining up to buy his creations even before they are finished. Sam likes them “loud and nasty” and he usually manages to stuff a V-8 into these small cars.

Sam’s passion is chassis engineering and he likes to work with unibody cars. This Volvo was the latest one to roll out his shop door and like all most of his previous builds it was sold in a matter of days. I always enjoy a visit to his garage because I never know what he’s going to tackle next. The night I shot this image he was totally engrossed in what he was working on and that gave me a chance to shoot without his knowing what I was shooting.

This image is a black and white conversion of a color HDR image that I converted using Aperture 3. All adjustments were done with the tools in Aperture 3 which is still my favorite image editing software. I entered it last night in the Louisville Photographic Society monthly competition for “People Working” and it took First Prize.

Sam's Passion Color HDR Version
Sam’s Passion Color HDR Version

Click on the image to enlarge it in a separate window.

I am including the color HDR version that I used to show the difference that the two processes have on the same image. This image is from a three frame bracket set of +2, 0 and -2 EV exposures that I merged using NIK HDR Efex Pro 2 and completed in Aperture 3.

Sam at work on his Volvo Project.

Click on the image to enlarge it in a separate window.

Sam's Garage in Black and White
Sam’s Garage in Black and White

Click on the image to enlarge it in a separate window.

I’ll finish this post with another color HDR image that I processed as a black and white using a preset in NIK HDR Efex Pro 2 that I adjusted to my taste. One thing to notice is the way that HDR allowed me to expose for the shadows in the garage and also expose another frame that allowed the fence and the outdoors to render in the final image.

Using Topaz Adjust to Process Vintage Tin Photos

Rusty 1940 Chevrolet Detail

Click on the image to enlarge it in another window.

On my motorcycle ride up US 31 yesterday I came across a 1940 Chevrolet sedan sitting outside BABBS Auto Collision Center in Sellersburg Indiana. It was around 12 o’clock and the sun was pretty high in the sky which is almost always regarded as a poor time to shoot anything. I decided to stop anyway and shoot some rusty vintage tin for processing with Topaz Adjust. I knew from experience that the Spicify preset in Topaz Adjust would reveal a rainbow of iridescent colors in weathered dark paint that is streaked with iron oxides from the rust around it. As you can see I was well rewarded and captured some incredible textures and colors in this image. I finished it with a small black border that just felt right to me when I applied it.

Rusty 1940 Chevrolet Detail #2

Click on the image to enlarge it in another window.

Here’s another version of the same car from another frame that I captured with a normal exposure value. The previous image started out as a 2 stops underexposed frame and this normal exposure produced even more iridescence when the Spicify preset was applied in Topaz Adjust. As with the previous image I added that small black border I have come to like for these sorts of images.

Rusty 1940 Chevrolet Detail #3

Click on the image to enlarge it in another window.

Same basic processing as the two previous images using Topaz Adjust and the Spicify preset.

==========================================================

I have an affiliate relationship with Topaz Labs, and earn a small commission on any sales that are made by using the Topaz Labs link below, which helps support this site. Even if you aren’t ready to make a purchase you can use the link to access a Free 30 day Trial of Topaz Labs products to determine whether or not they will fit your own digital workflow.

http://www.topazlabs.com/705.html

==========================================================