Category: Streetrod

Change Perspective and Improve Your Photographic Vision

1938 Ford Truck
1938 Ford Truck

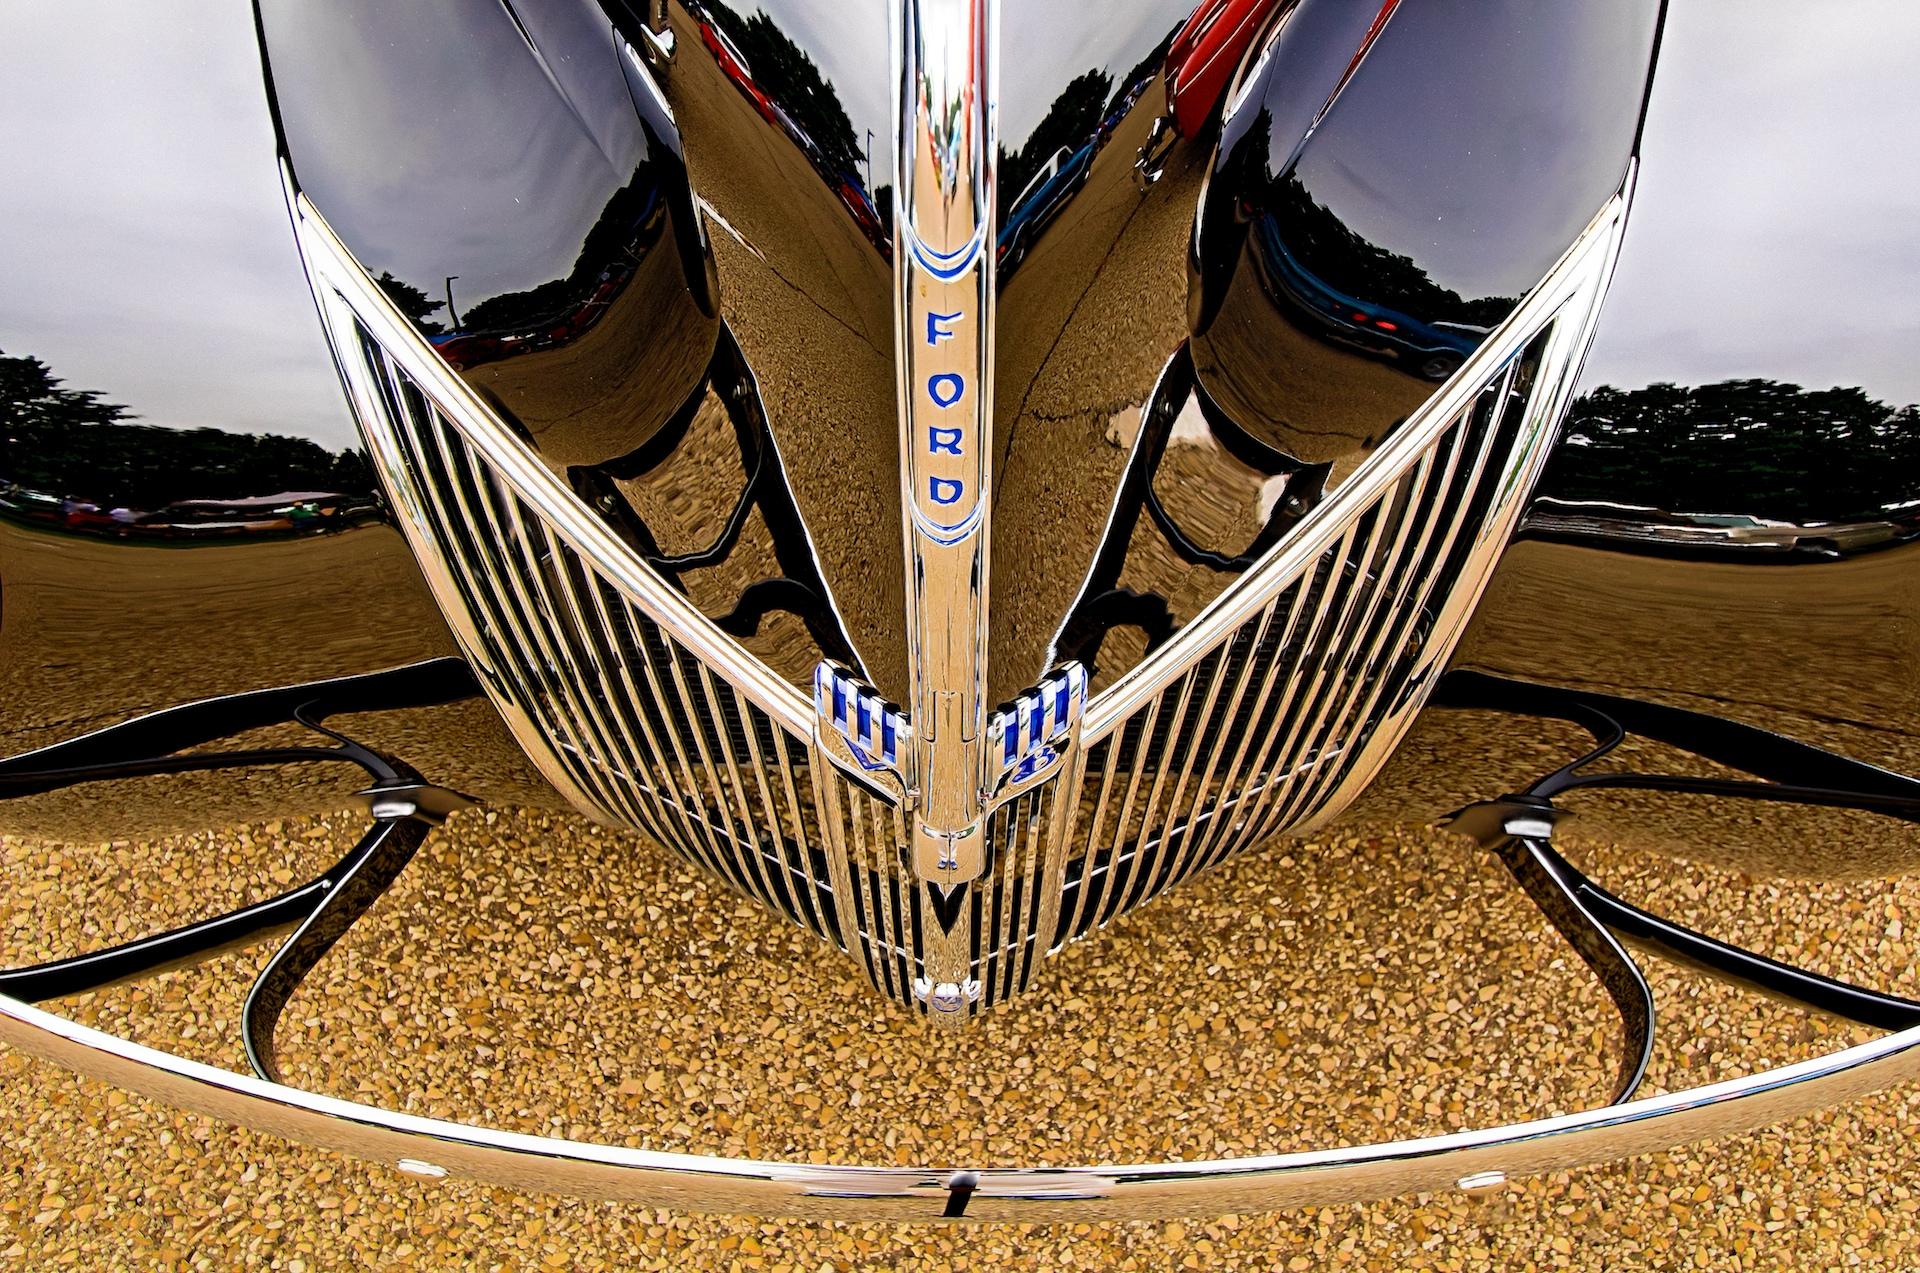
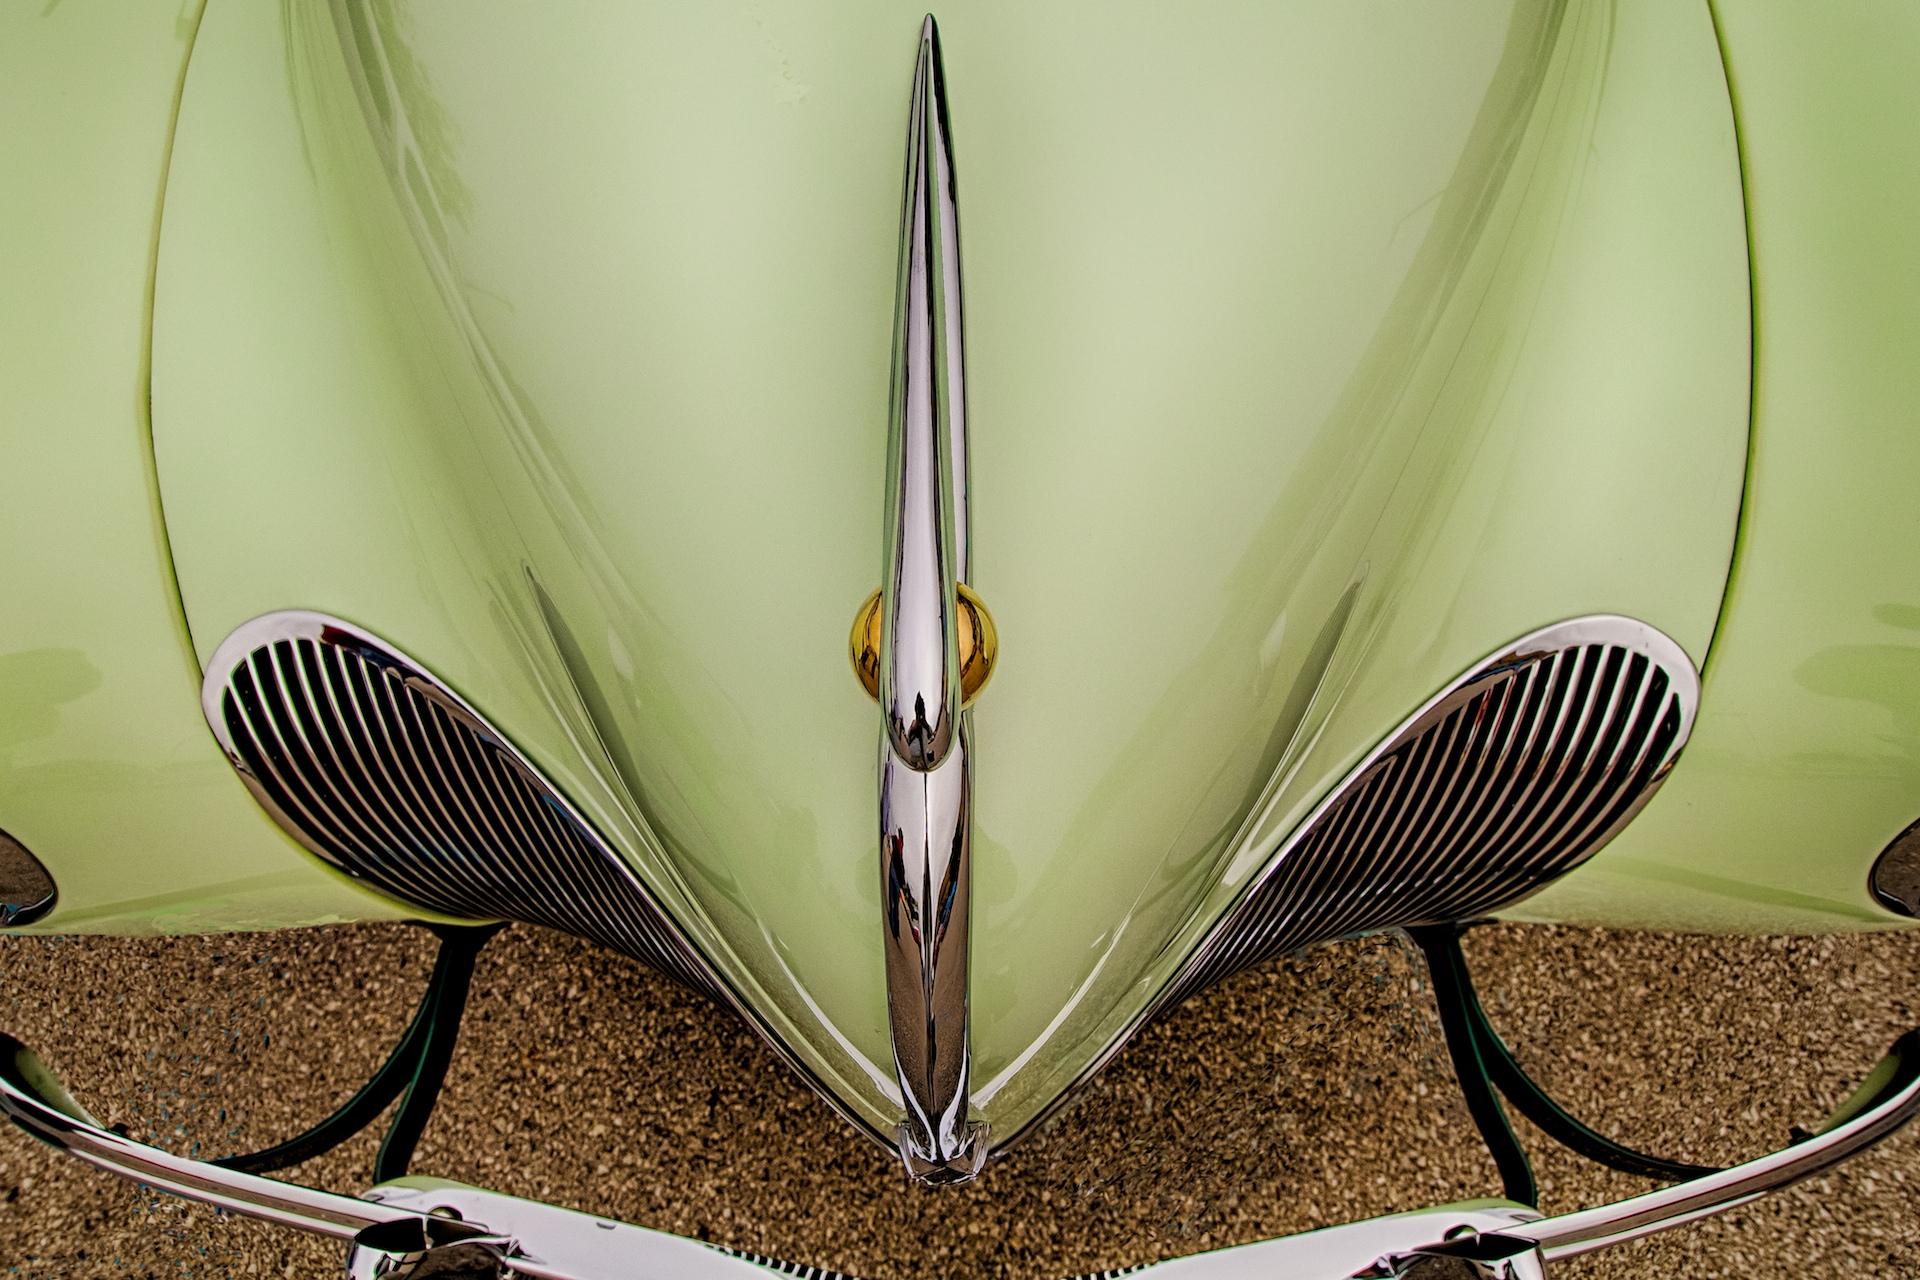
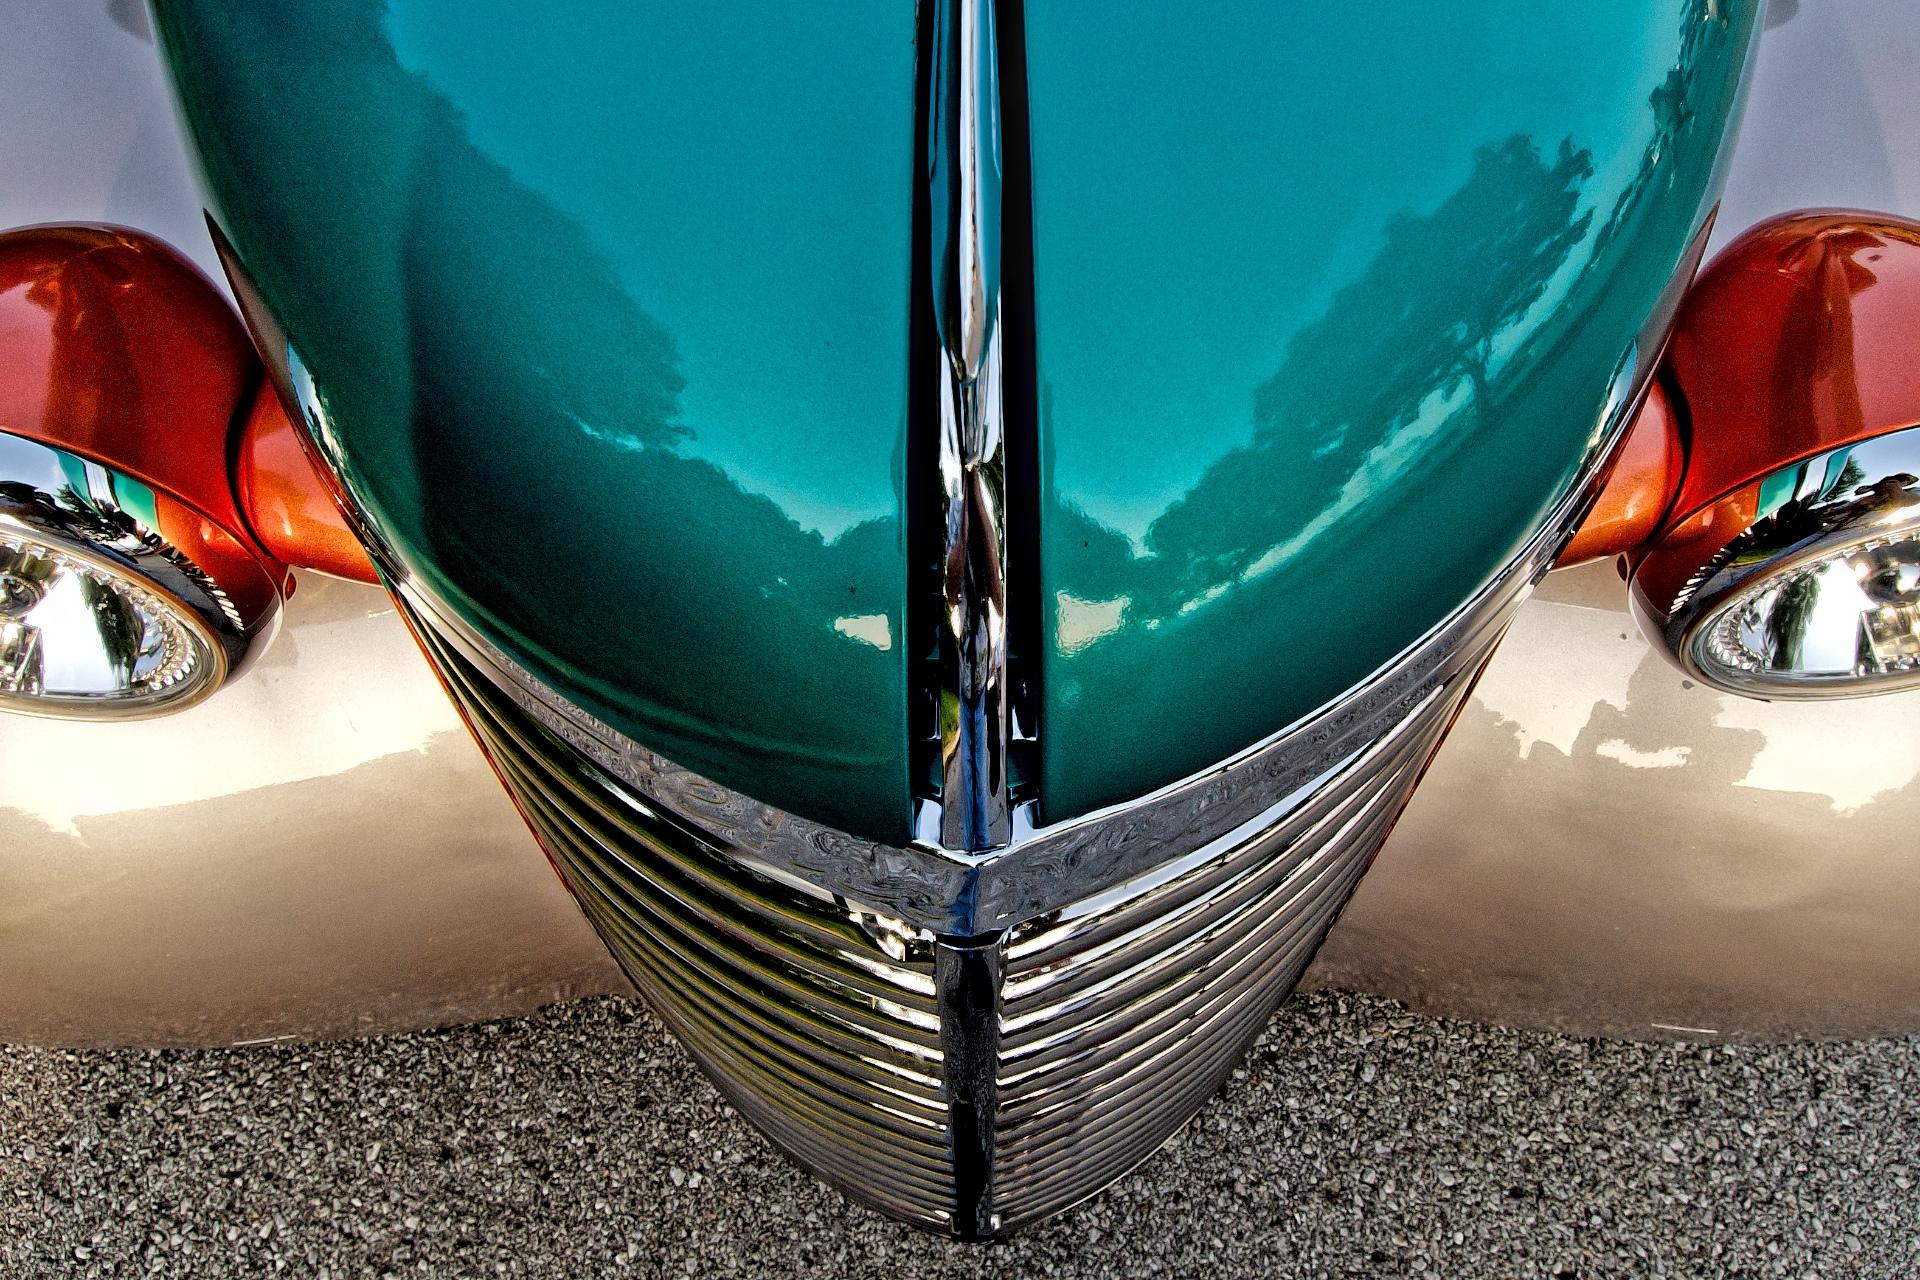
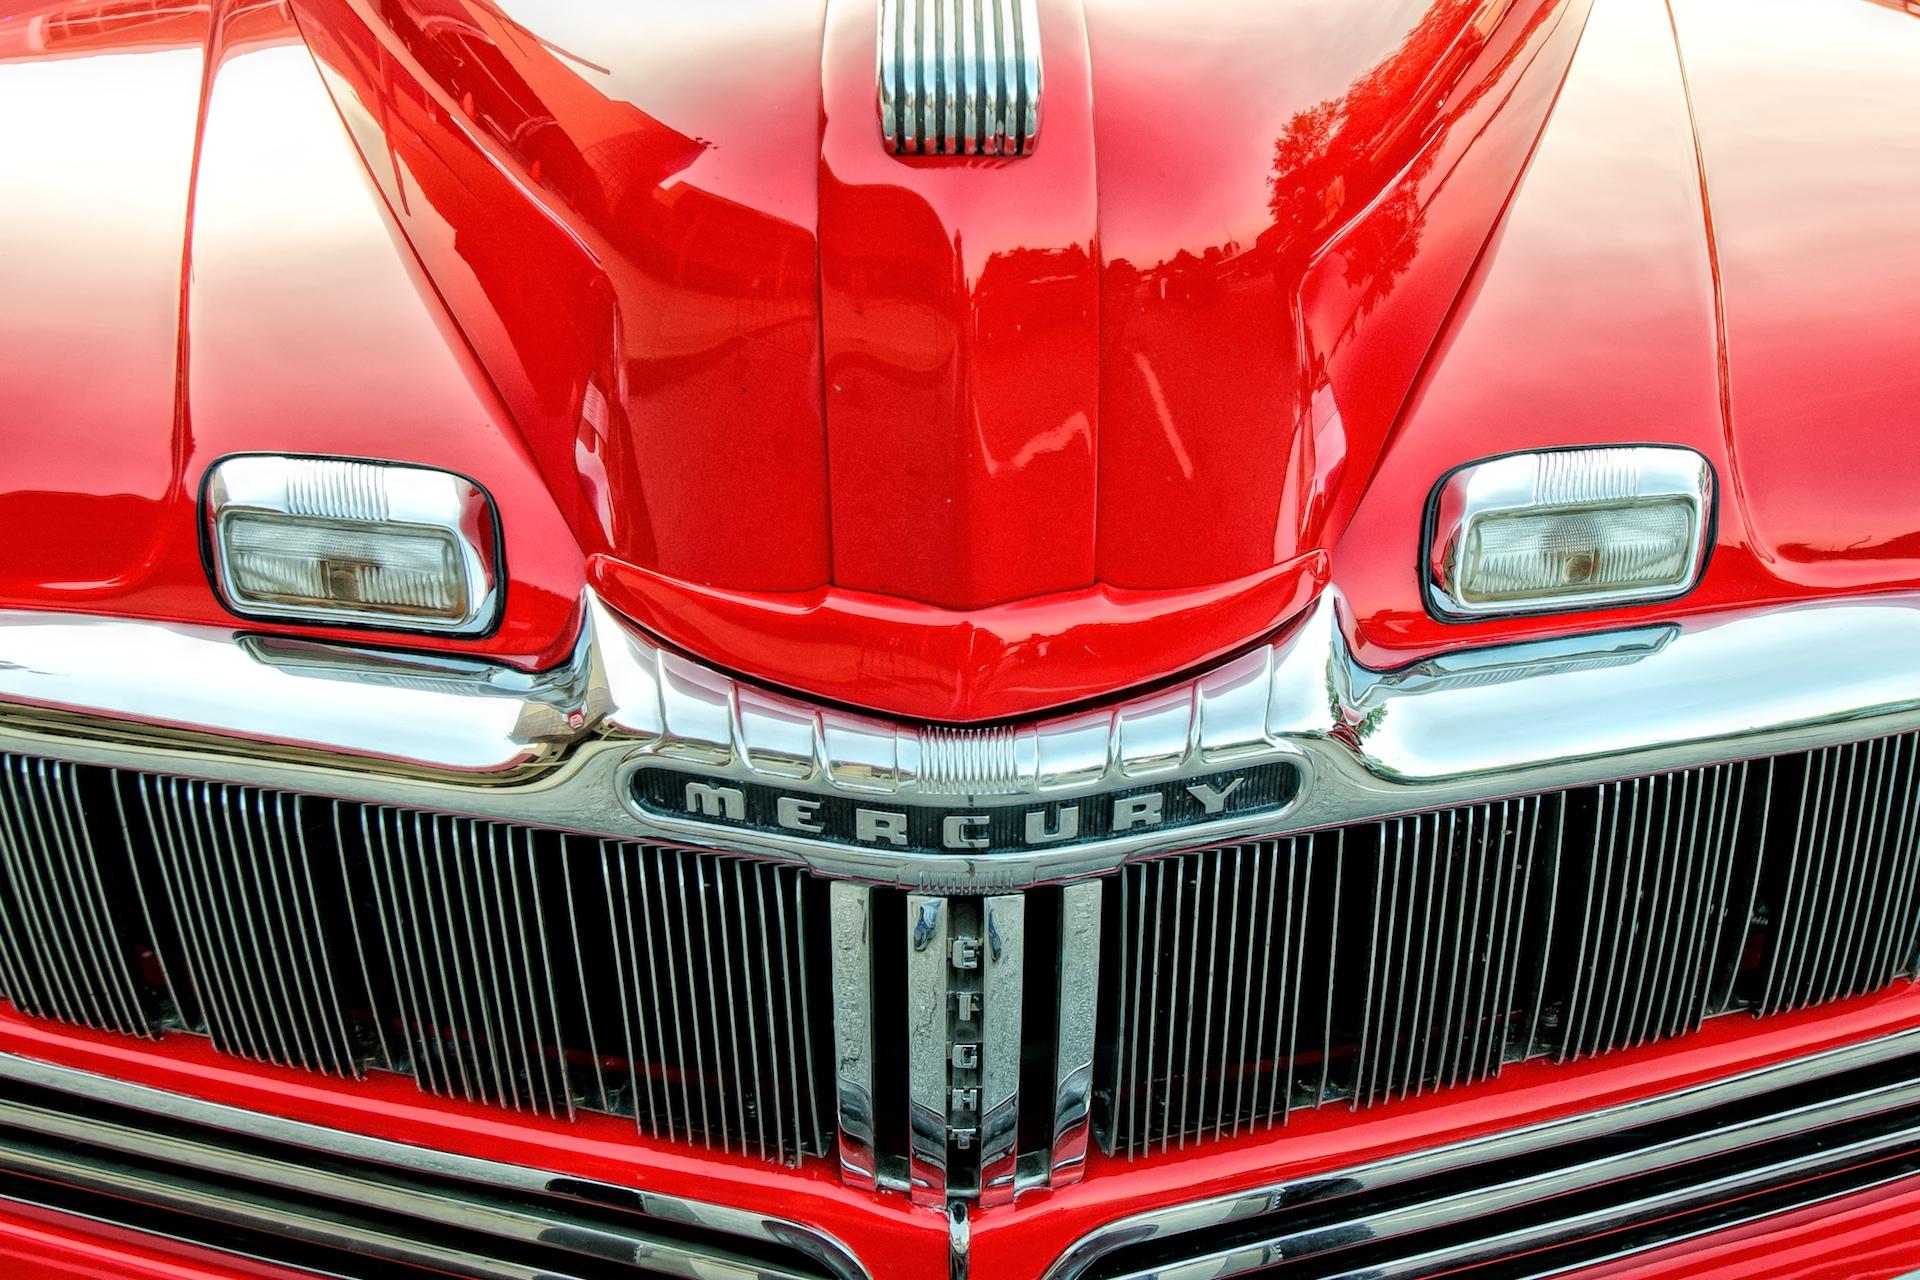
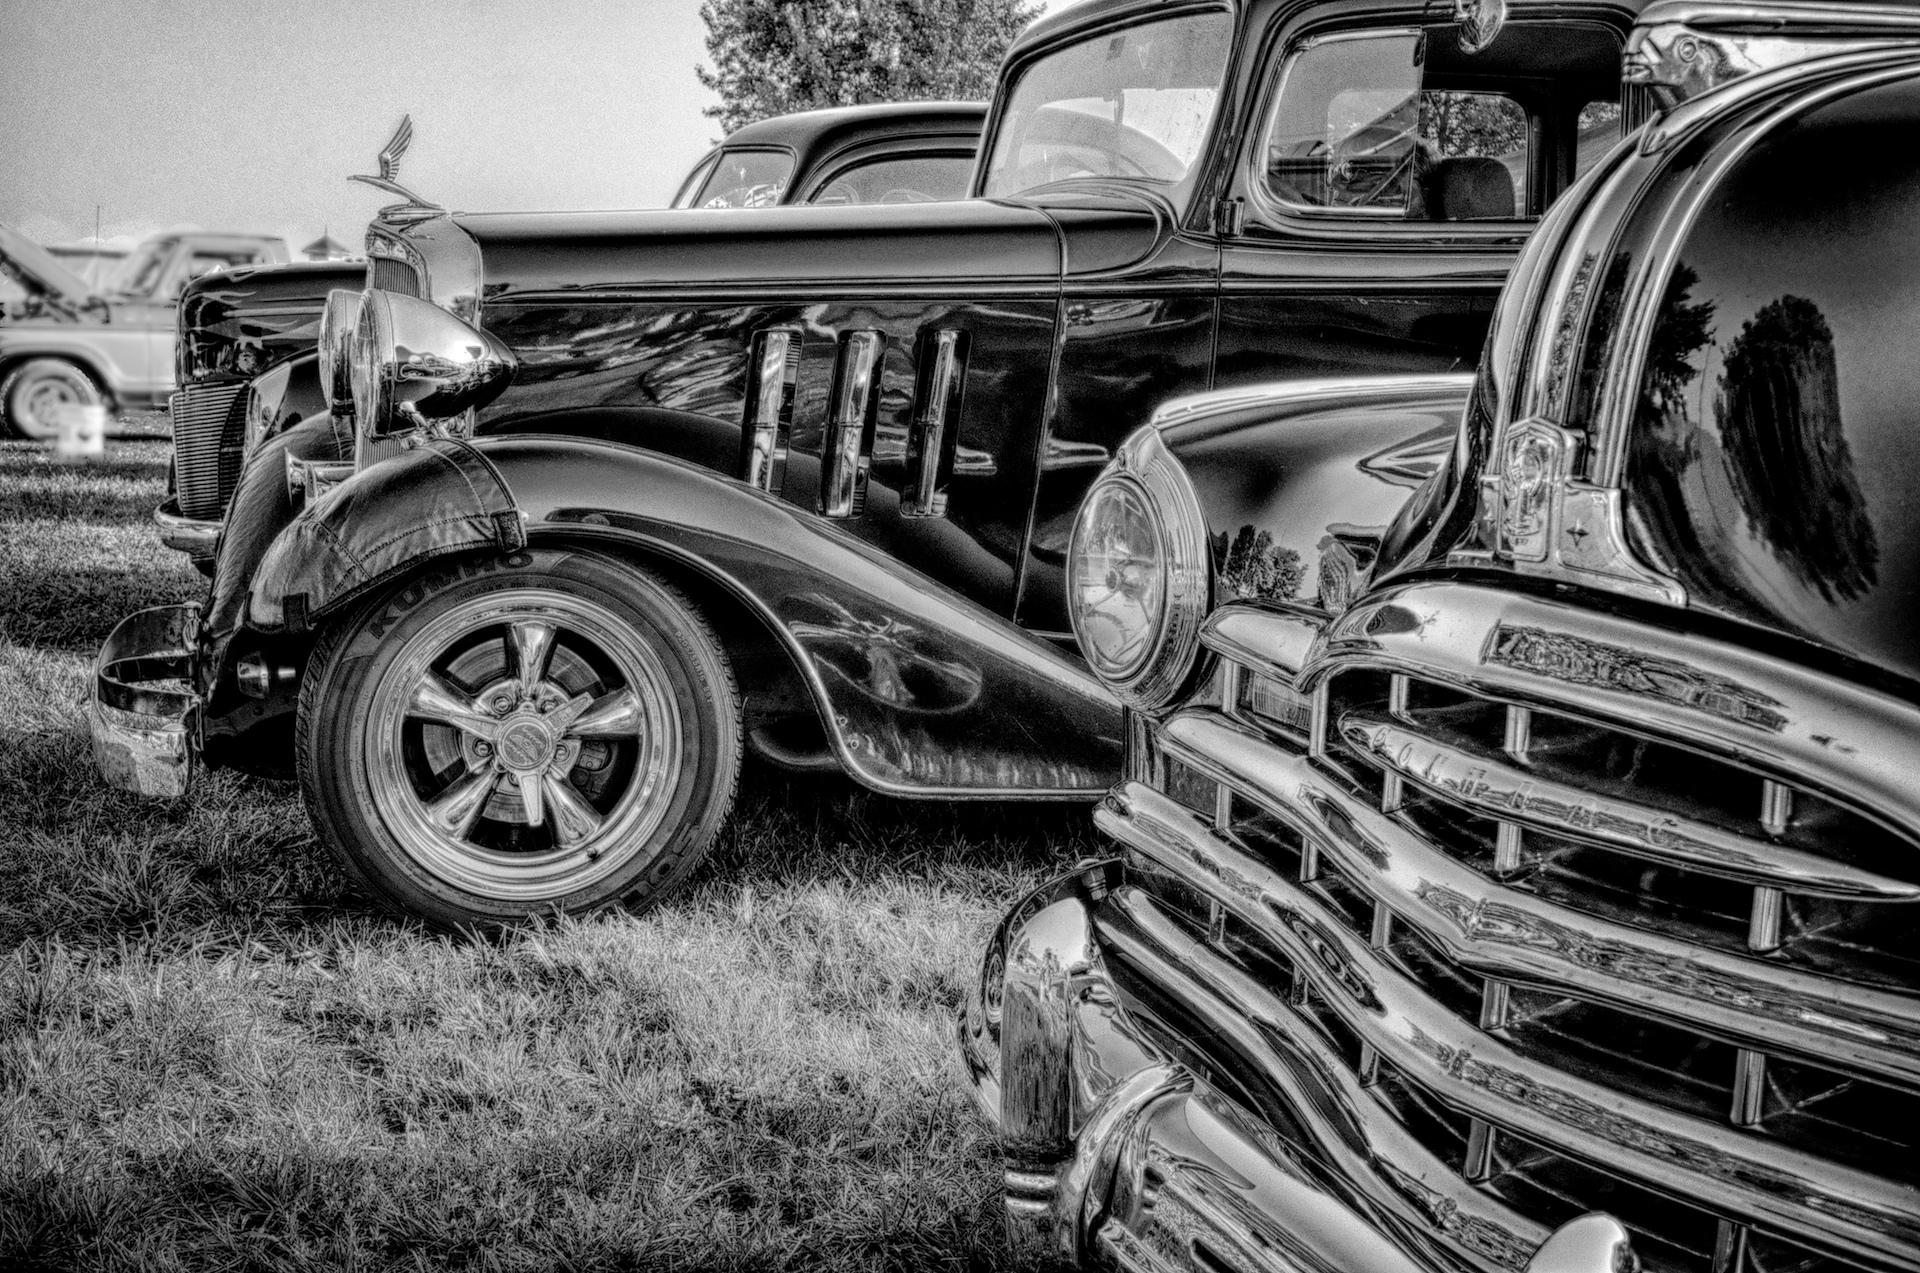
One good way to reinvigorate your photography is to change perspective; doing so will improve your photographic vision. I love cars and have been photographing them since I was a kid. Over the years, for the most part, I had fallen into a predictable method of framing them: I would pick a three quarter angle and fire away. While this method produced many interesting photos it wasn’t that different from the way 99% of photographers approached the subject.

1956 Ford
1956 Ford

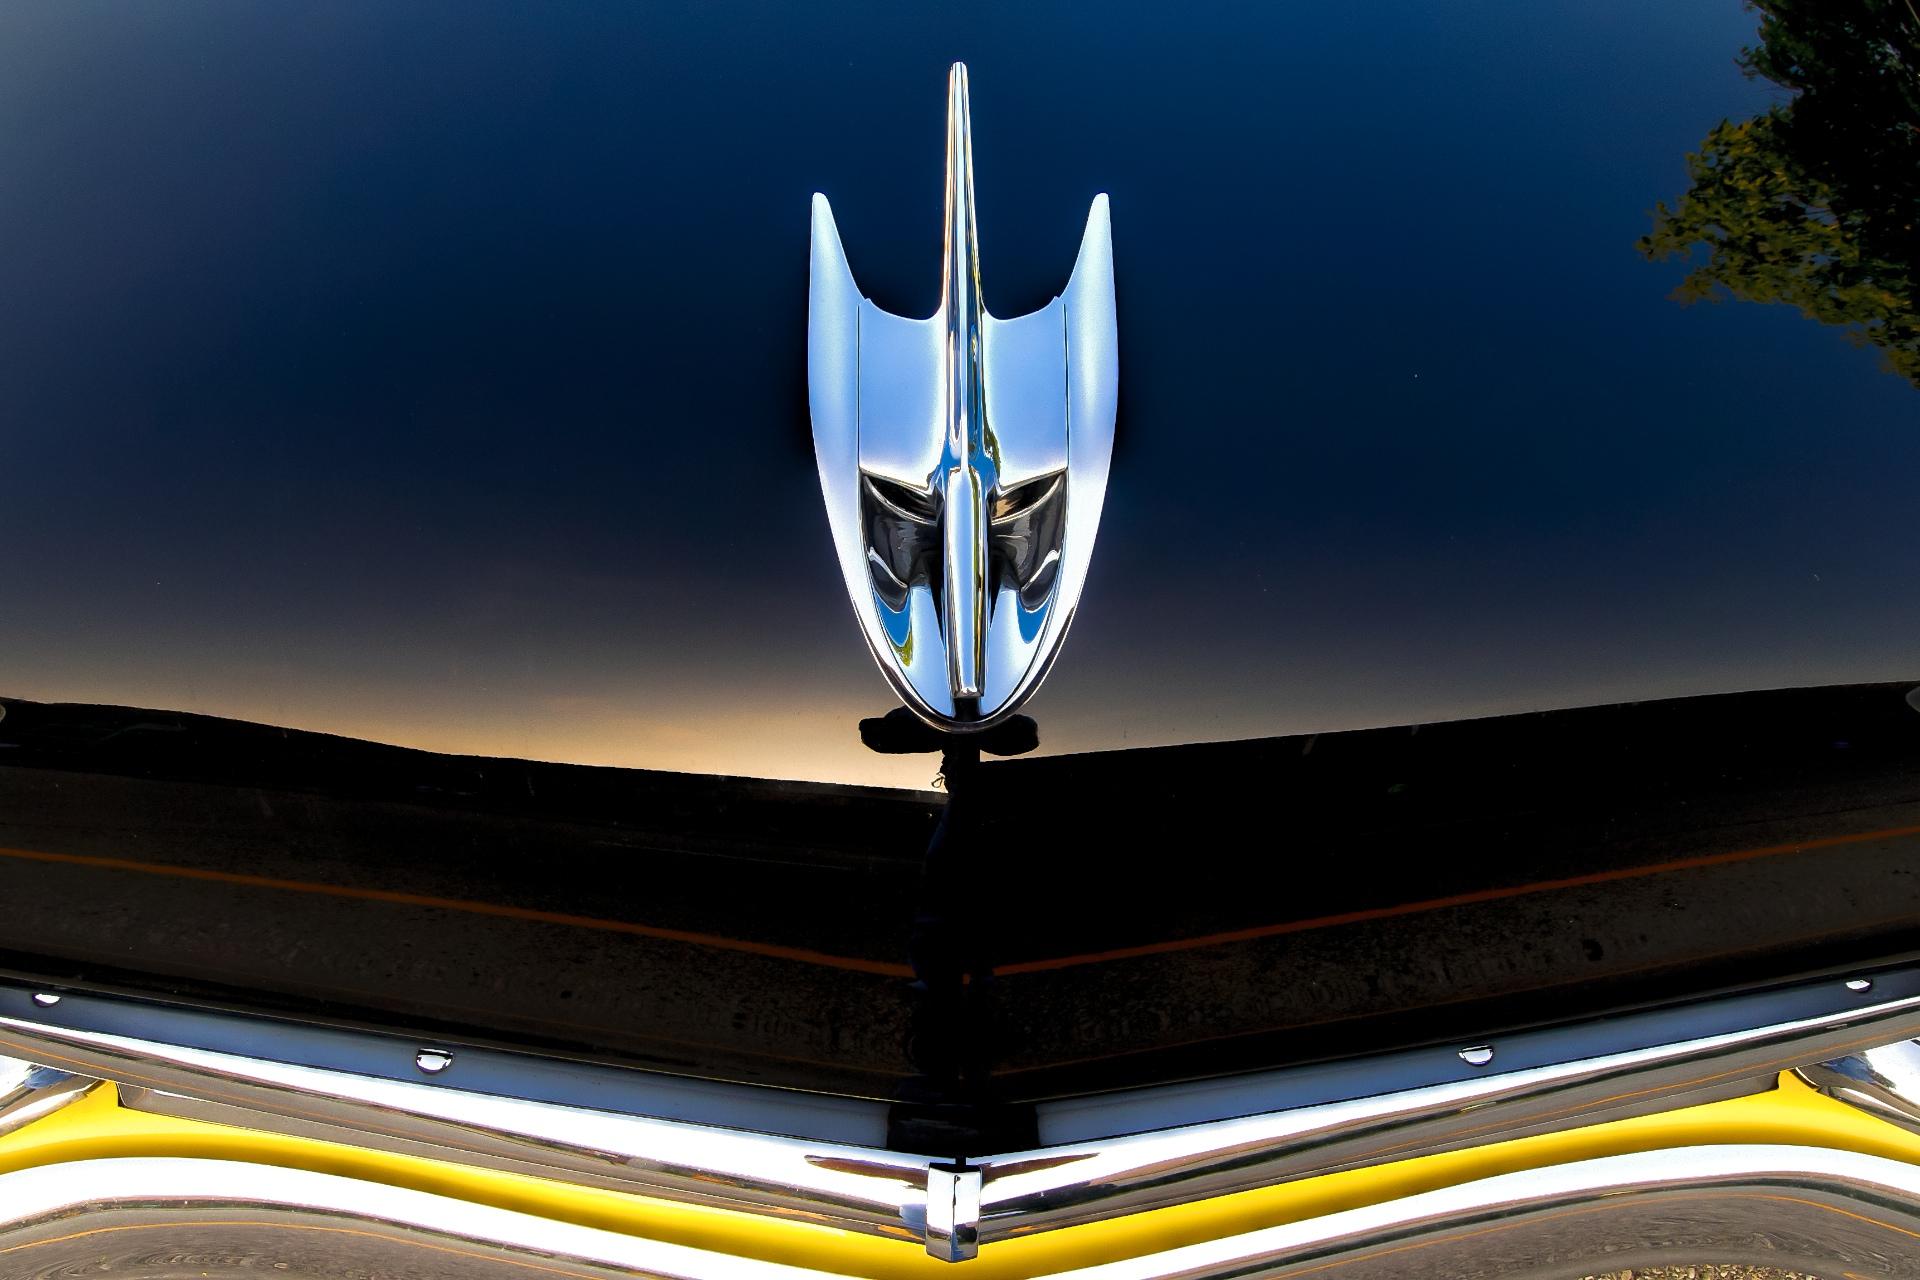
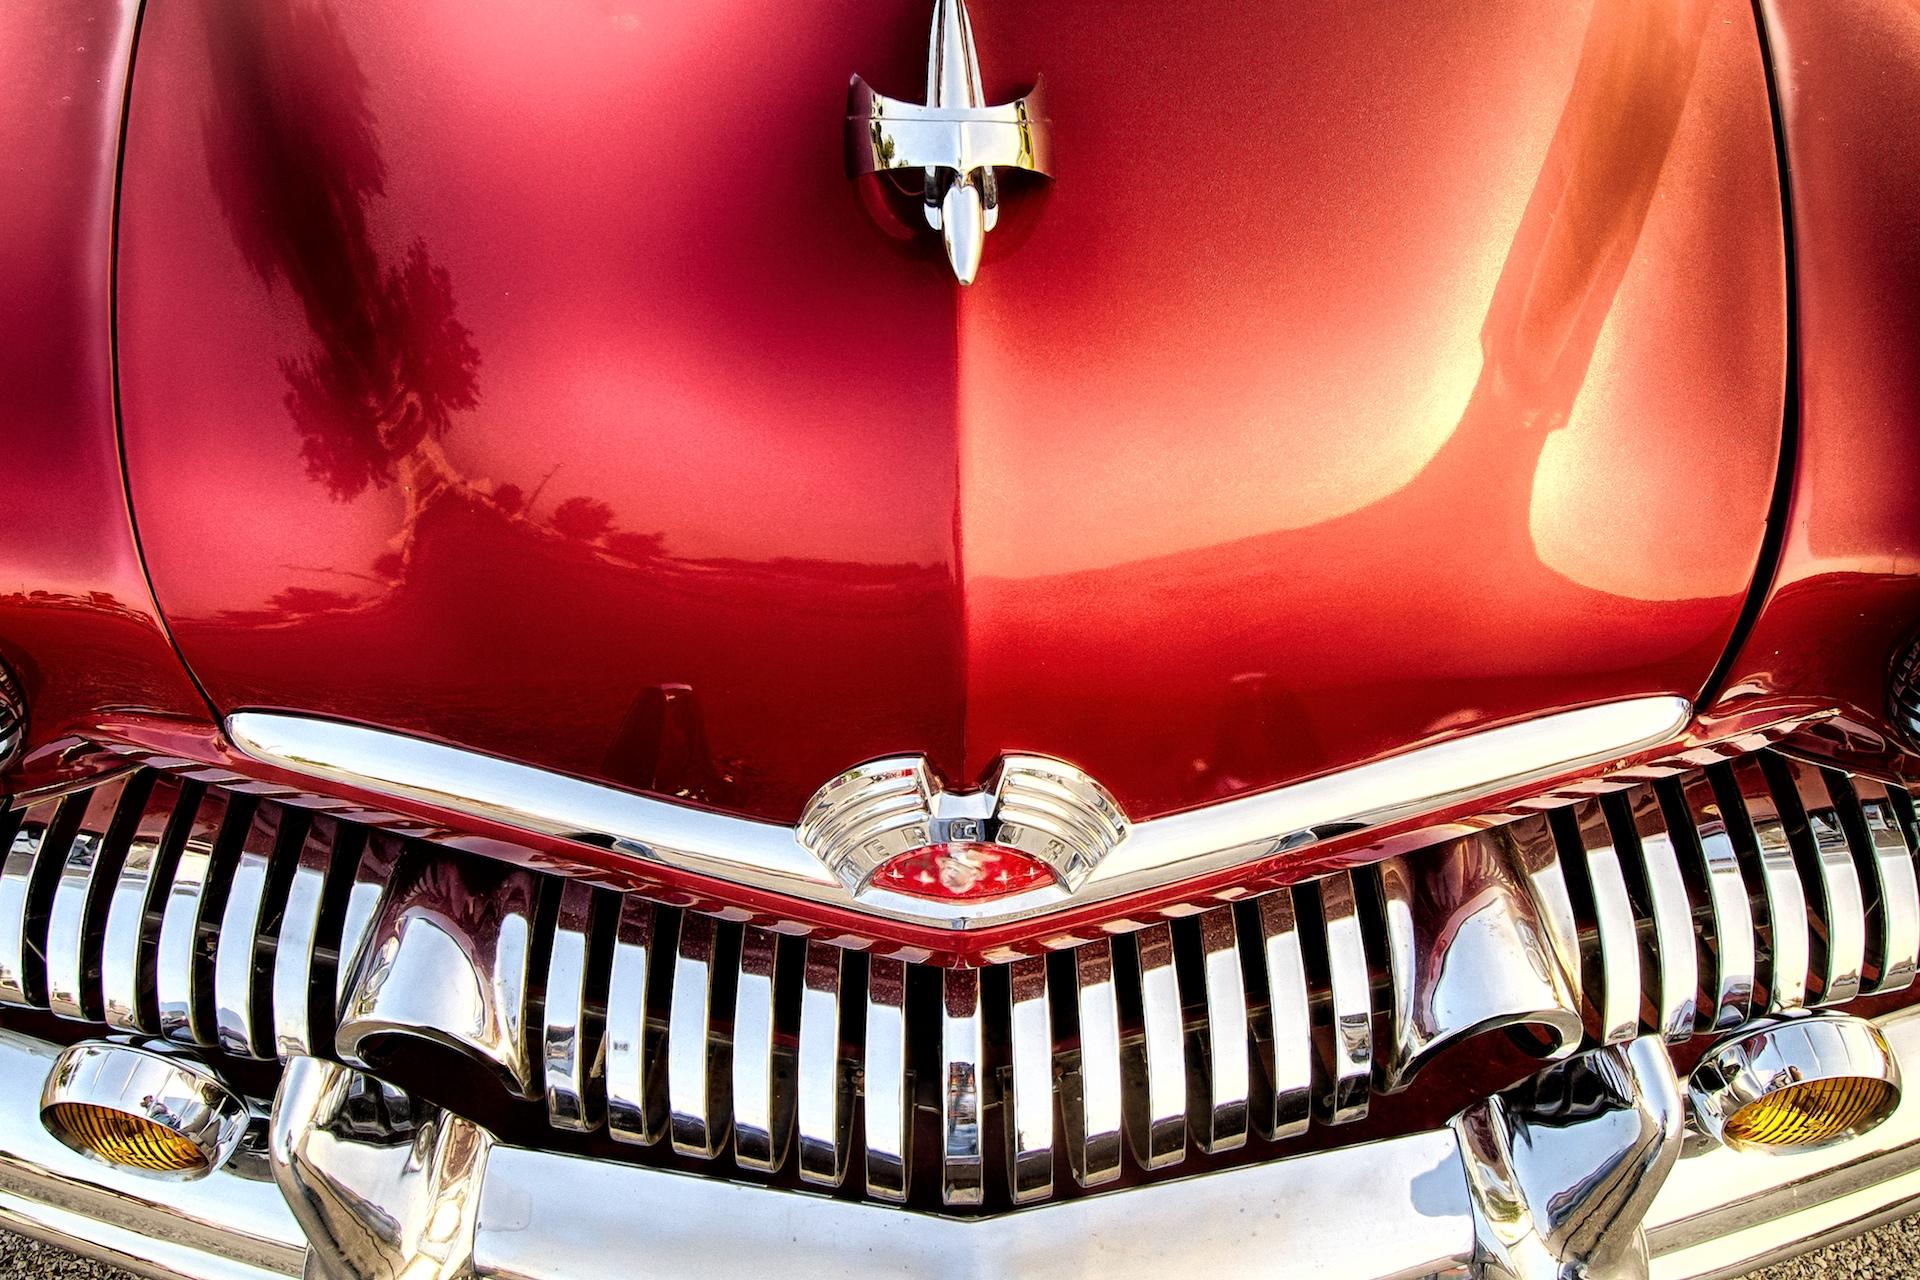
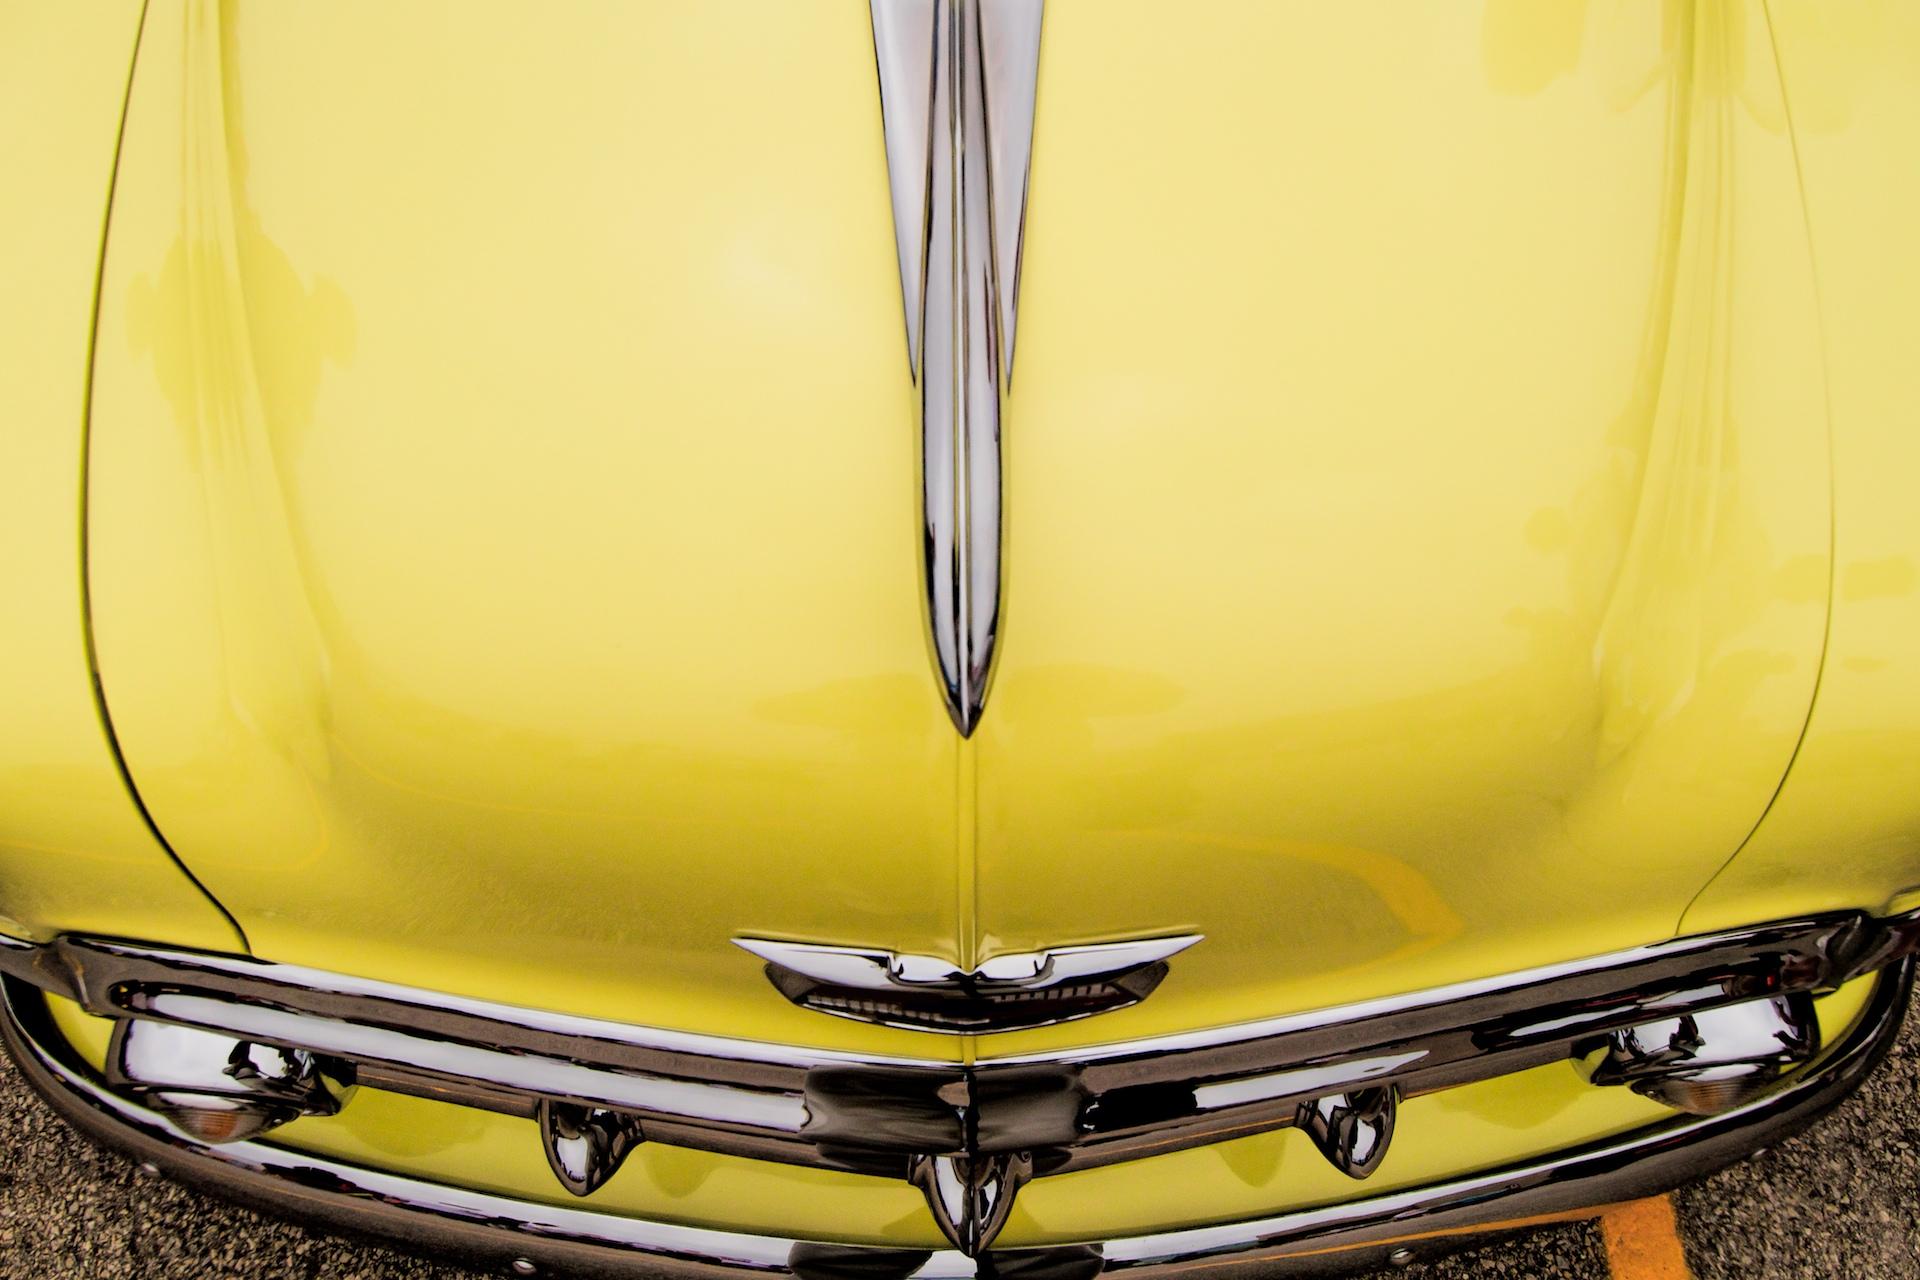
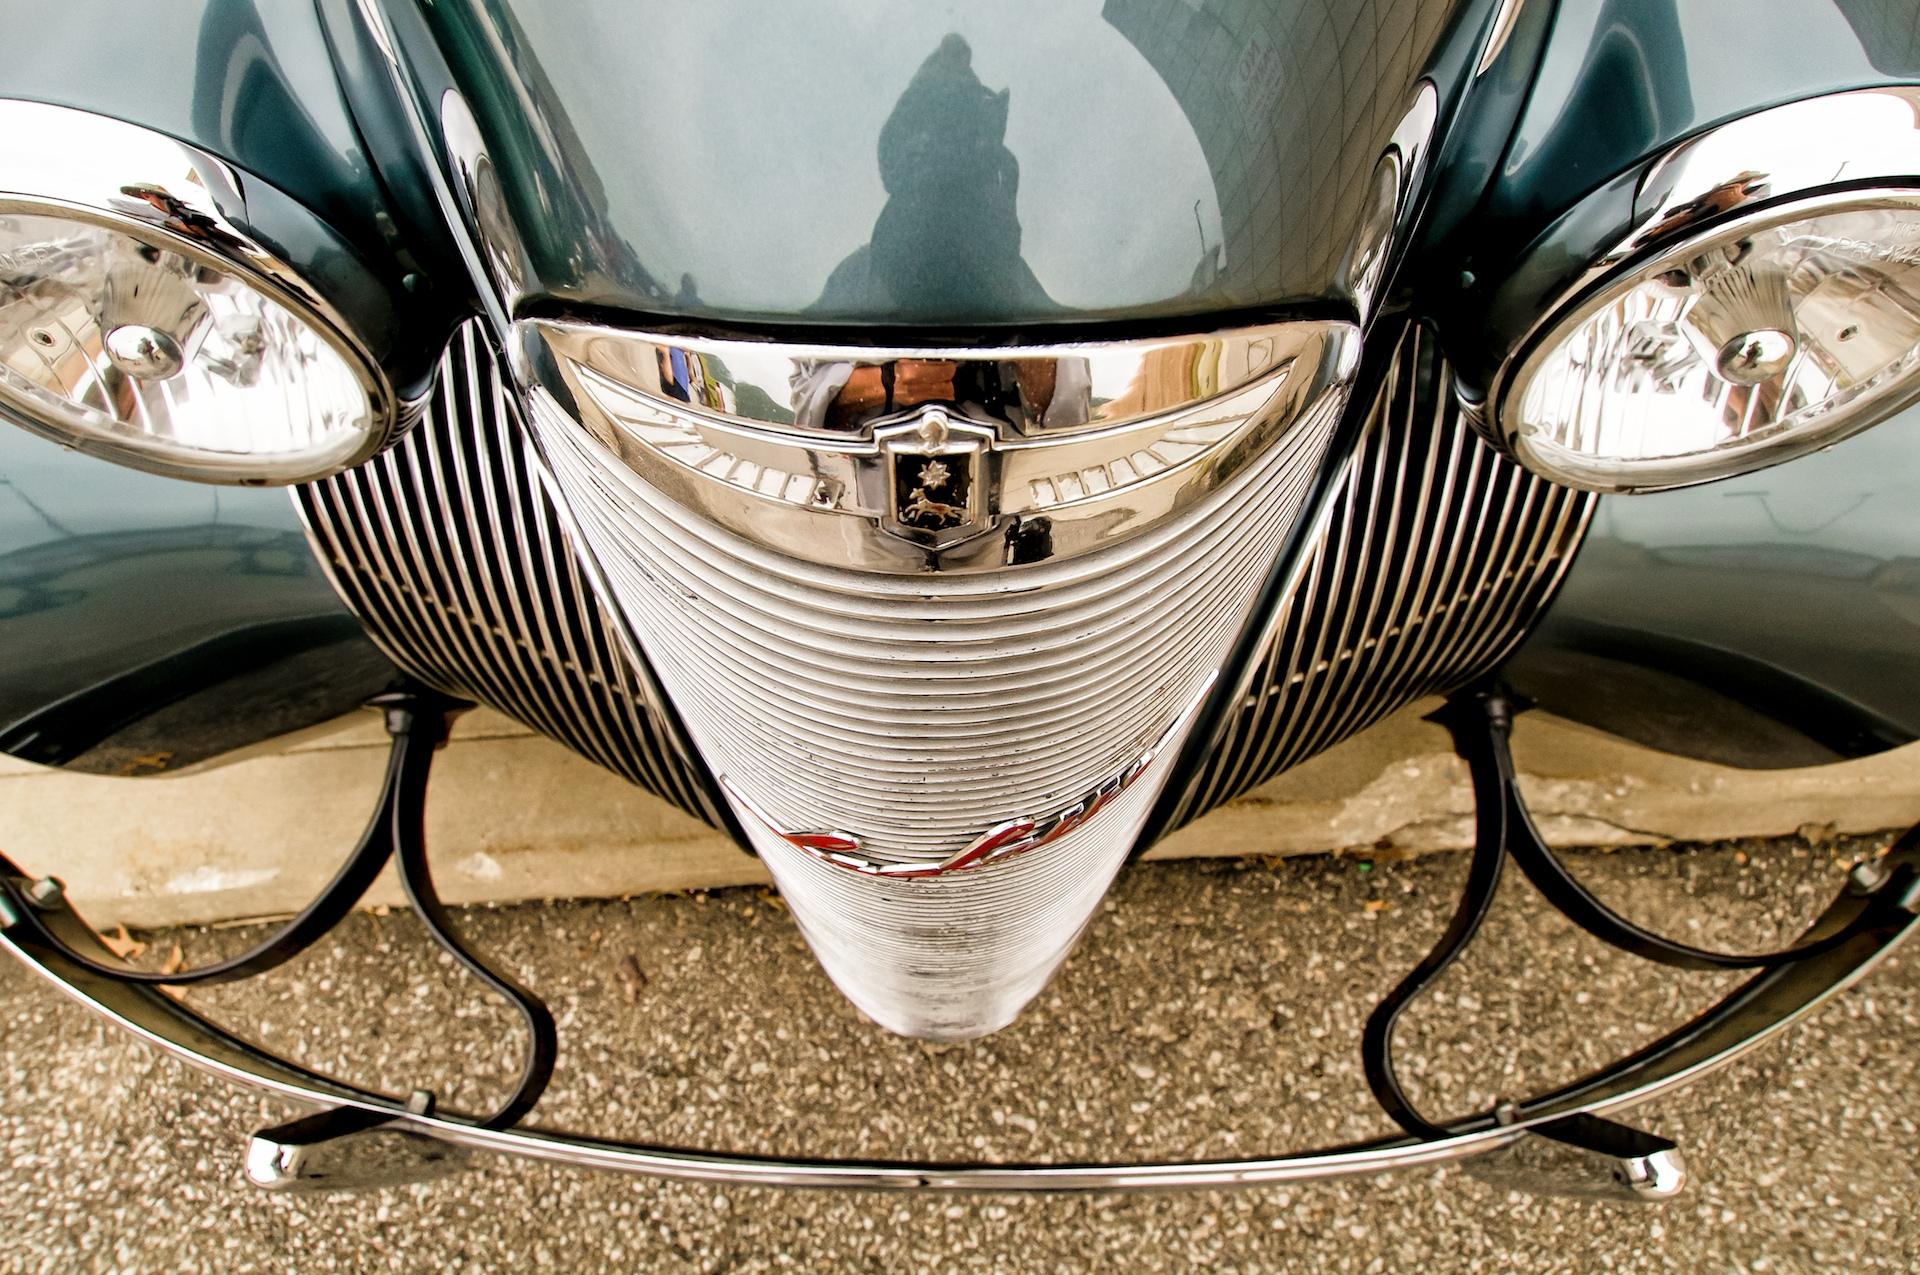
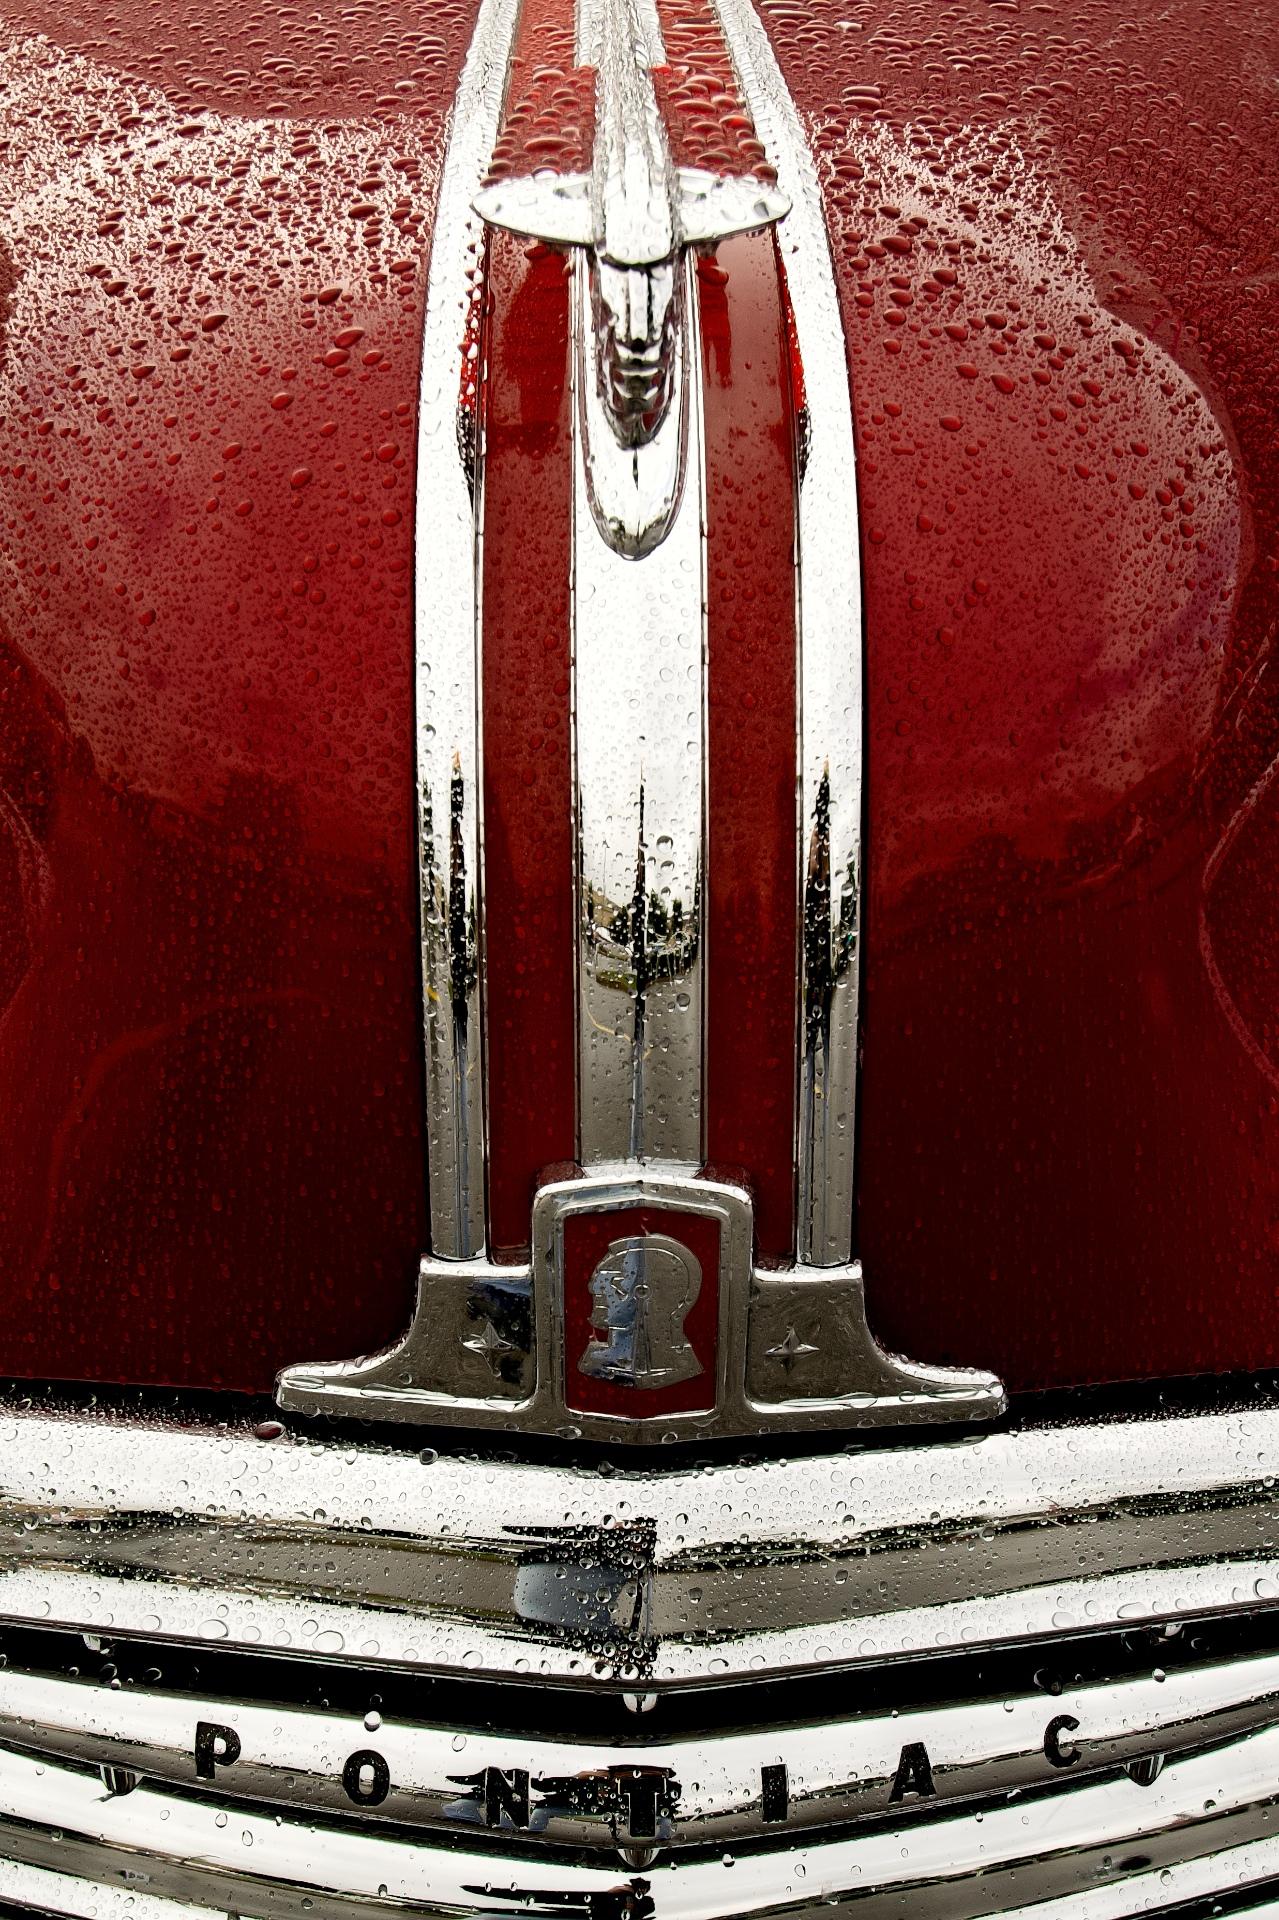
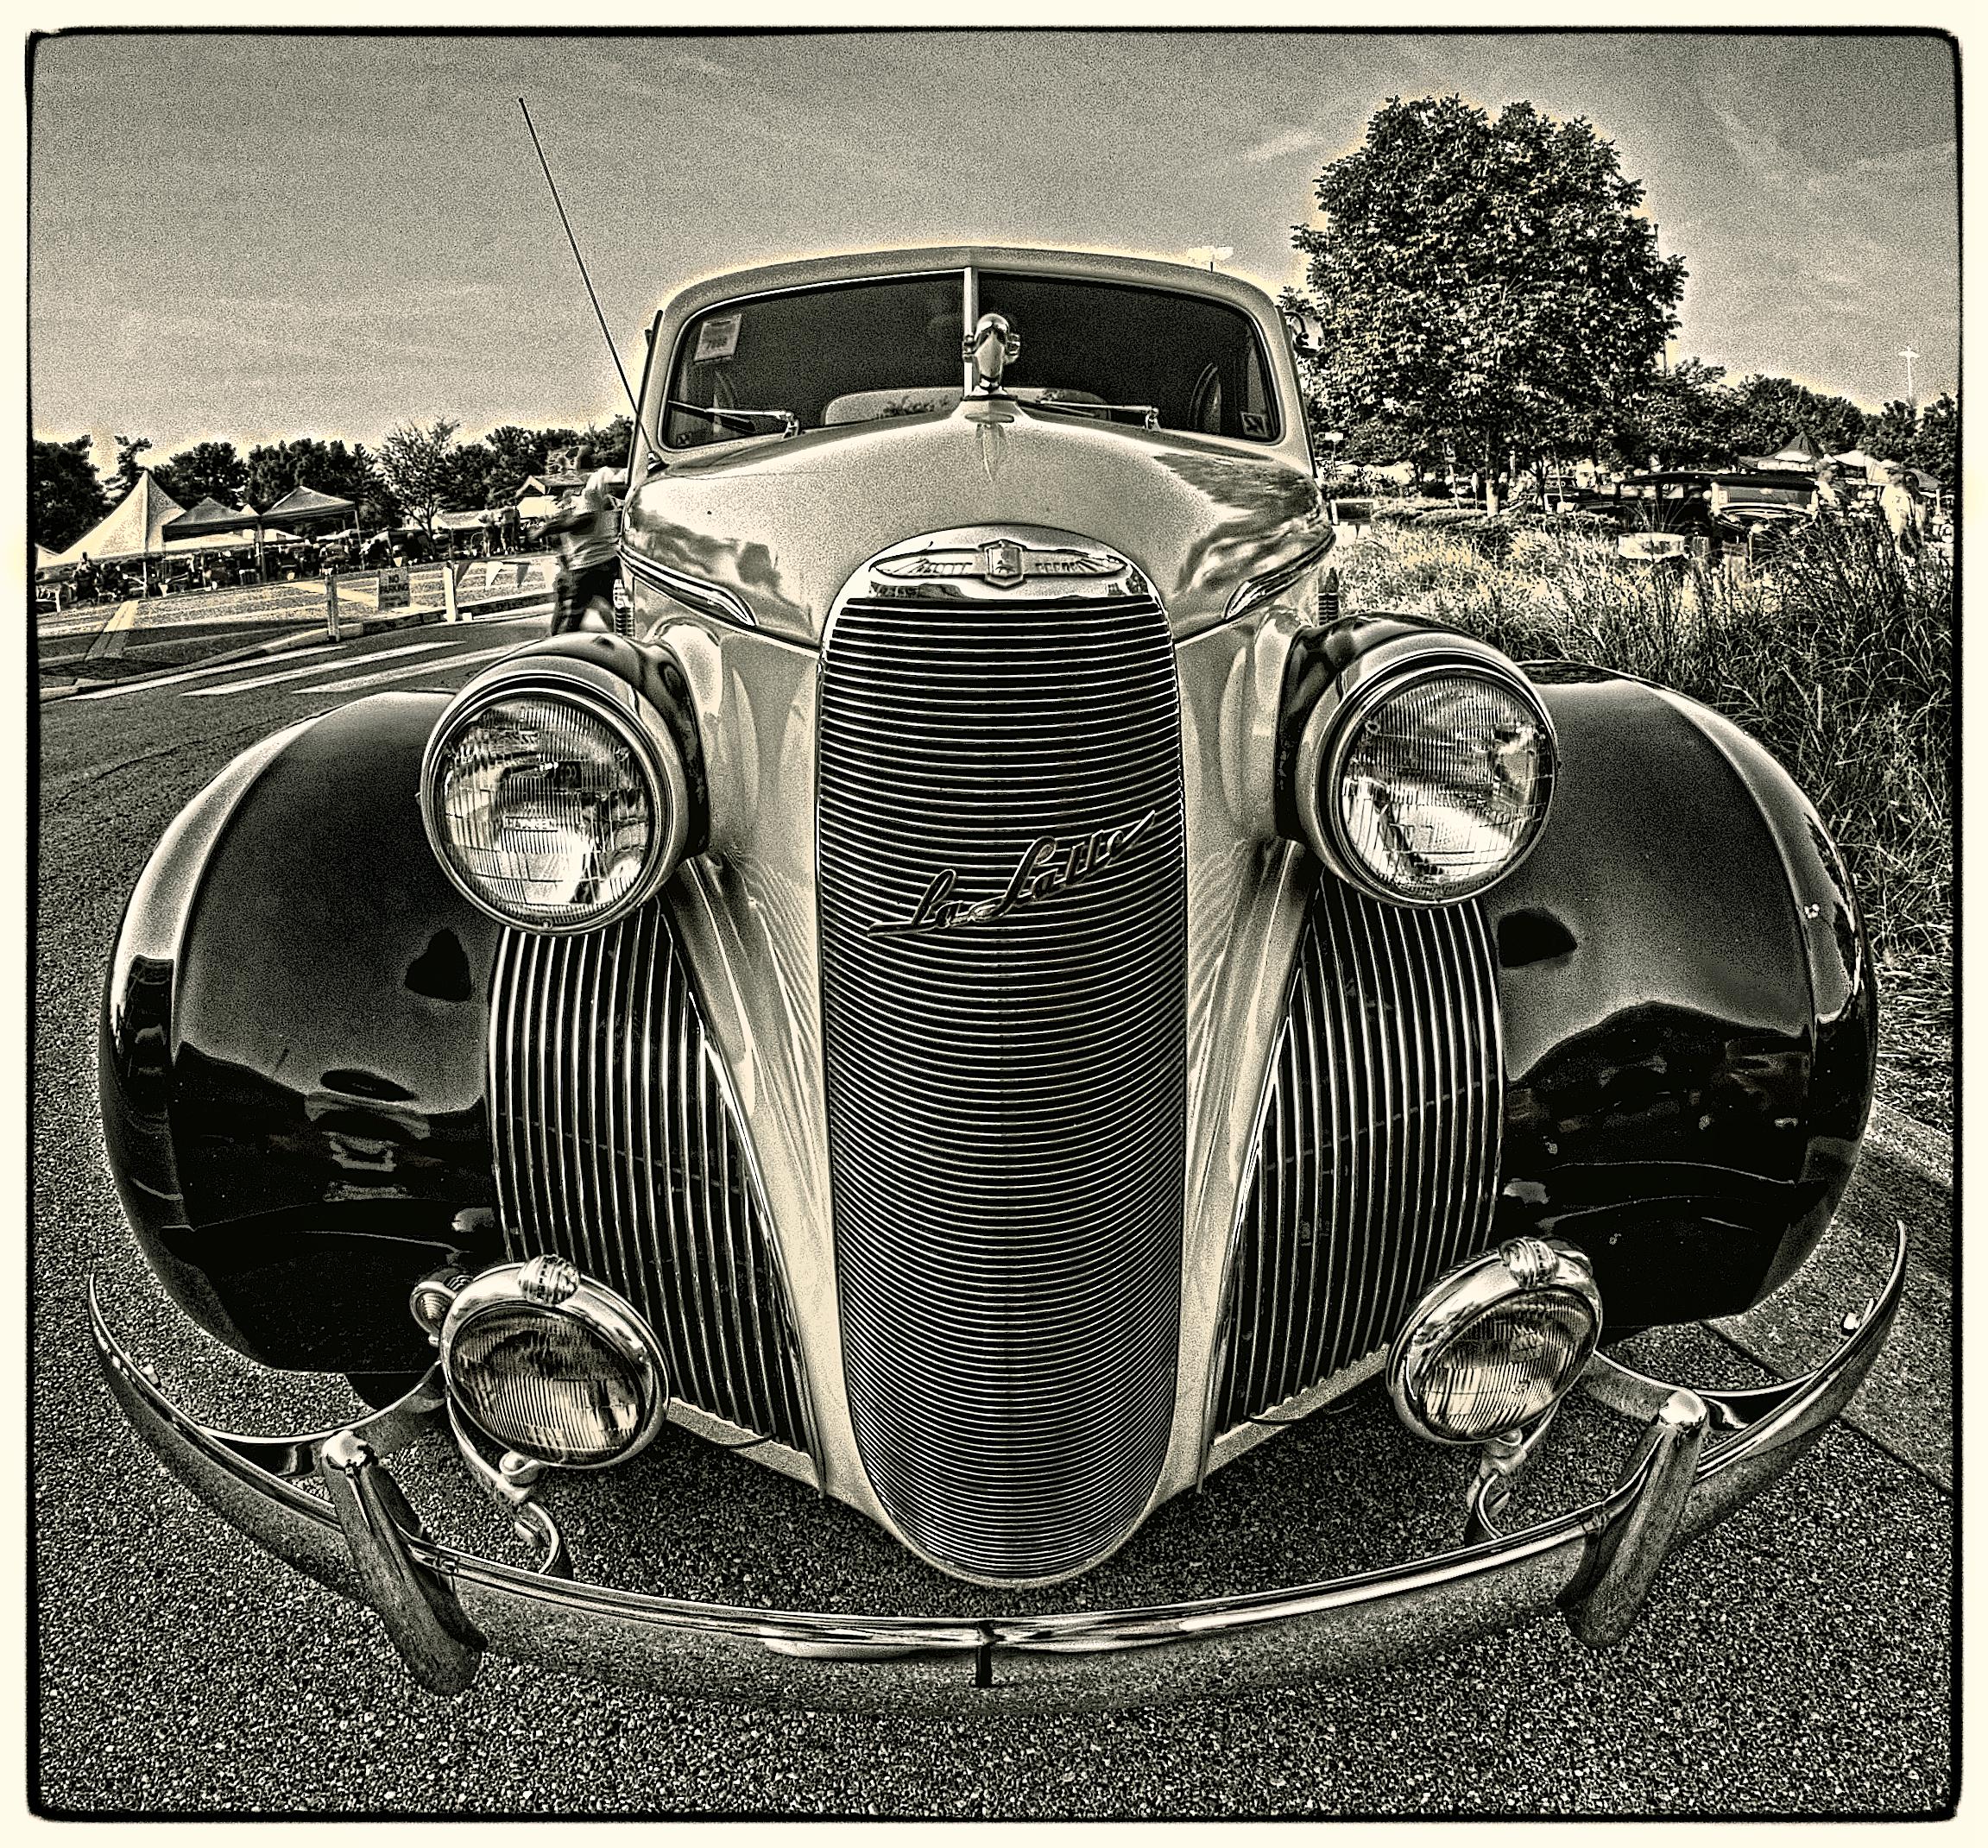
This past summer when the annual Street Rod Nationals came to Louisville I decided to use two distinct approaches that I hadn’t used much over the past several years. The first approach was to shoot symmetrical compositions, something I usually avoid due to their static nature. Symmetric compositions don’t usually have a lot of movement and can be rather bland but once I started shooting these images I realized that it was far more challenging than I initially thought it would be.

1955 Ford
1955 Ford

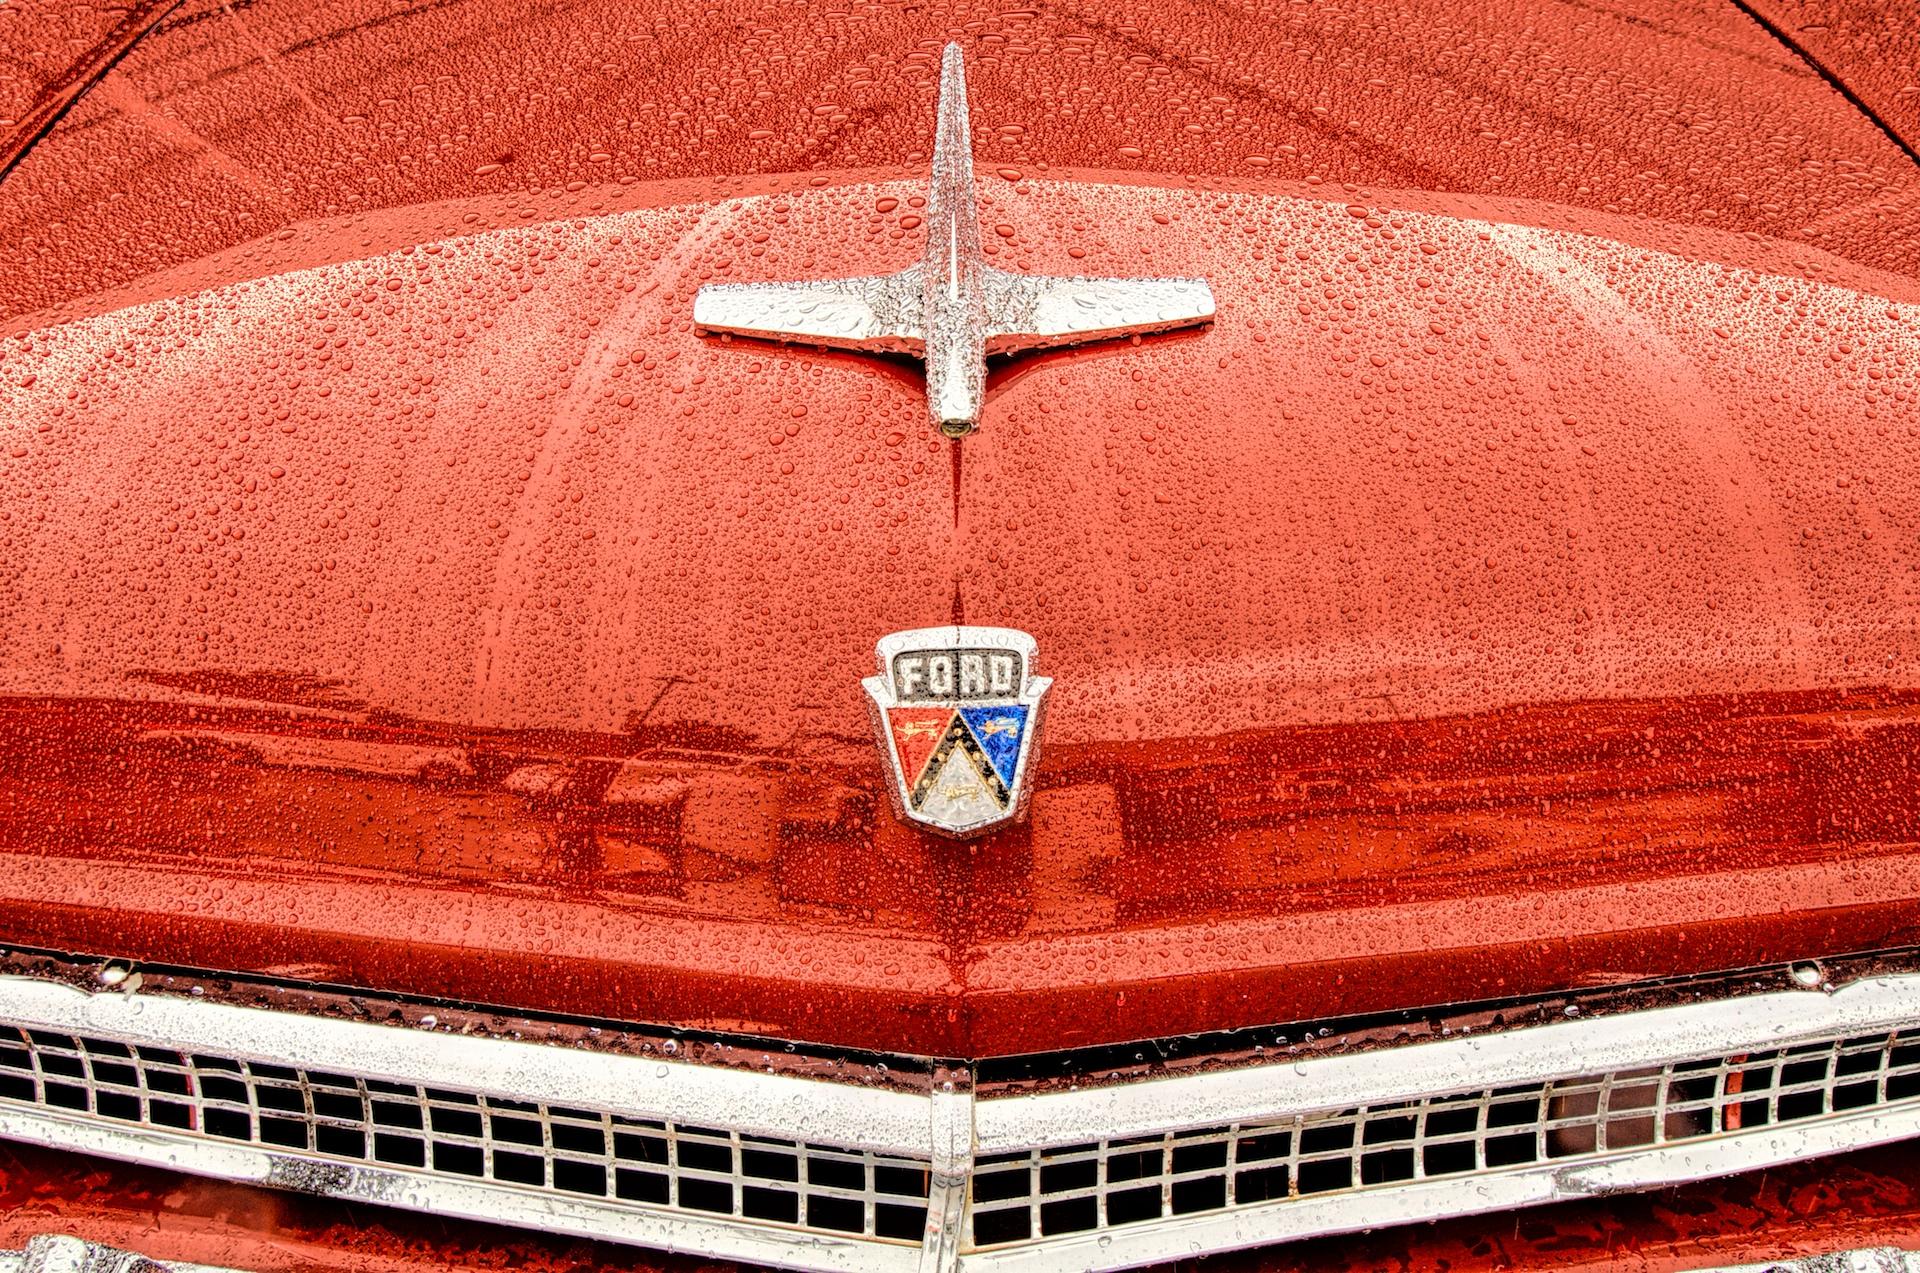
The first challenge was to frame perfectly symmetrical images; shifting the angle of the camera away from a pure 90 degrees from the subject would introduce a subtle asymmetry. It wasn’t as simple as standing in front of the subject and trying to center the details. I discovered that if I was even a fraction off center the distortion of the sensor plane to the plane of the car would result in missing the mark. I compensated for that by making certain to use the grid lines in the viewfinder to accurately bisect the image but even at that there was still the problem of getting the edges of the other elements equally framed. That was when I realized that it was also important to think about the sensor plane too. I would first align the vertical lines in the viewfinder and then shift slightly left or right to center the elements along the edge of the frame a perfectly as possible. I started using a monopod to stabilize my camera while still having the flexibility to move freely among the crowds that surround the cars.

1946 Ford
1946 Ford

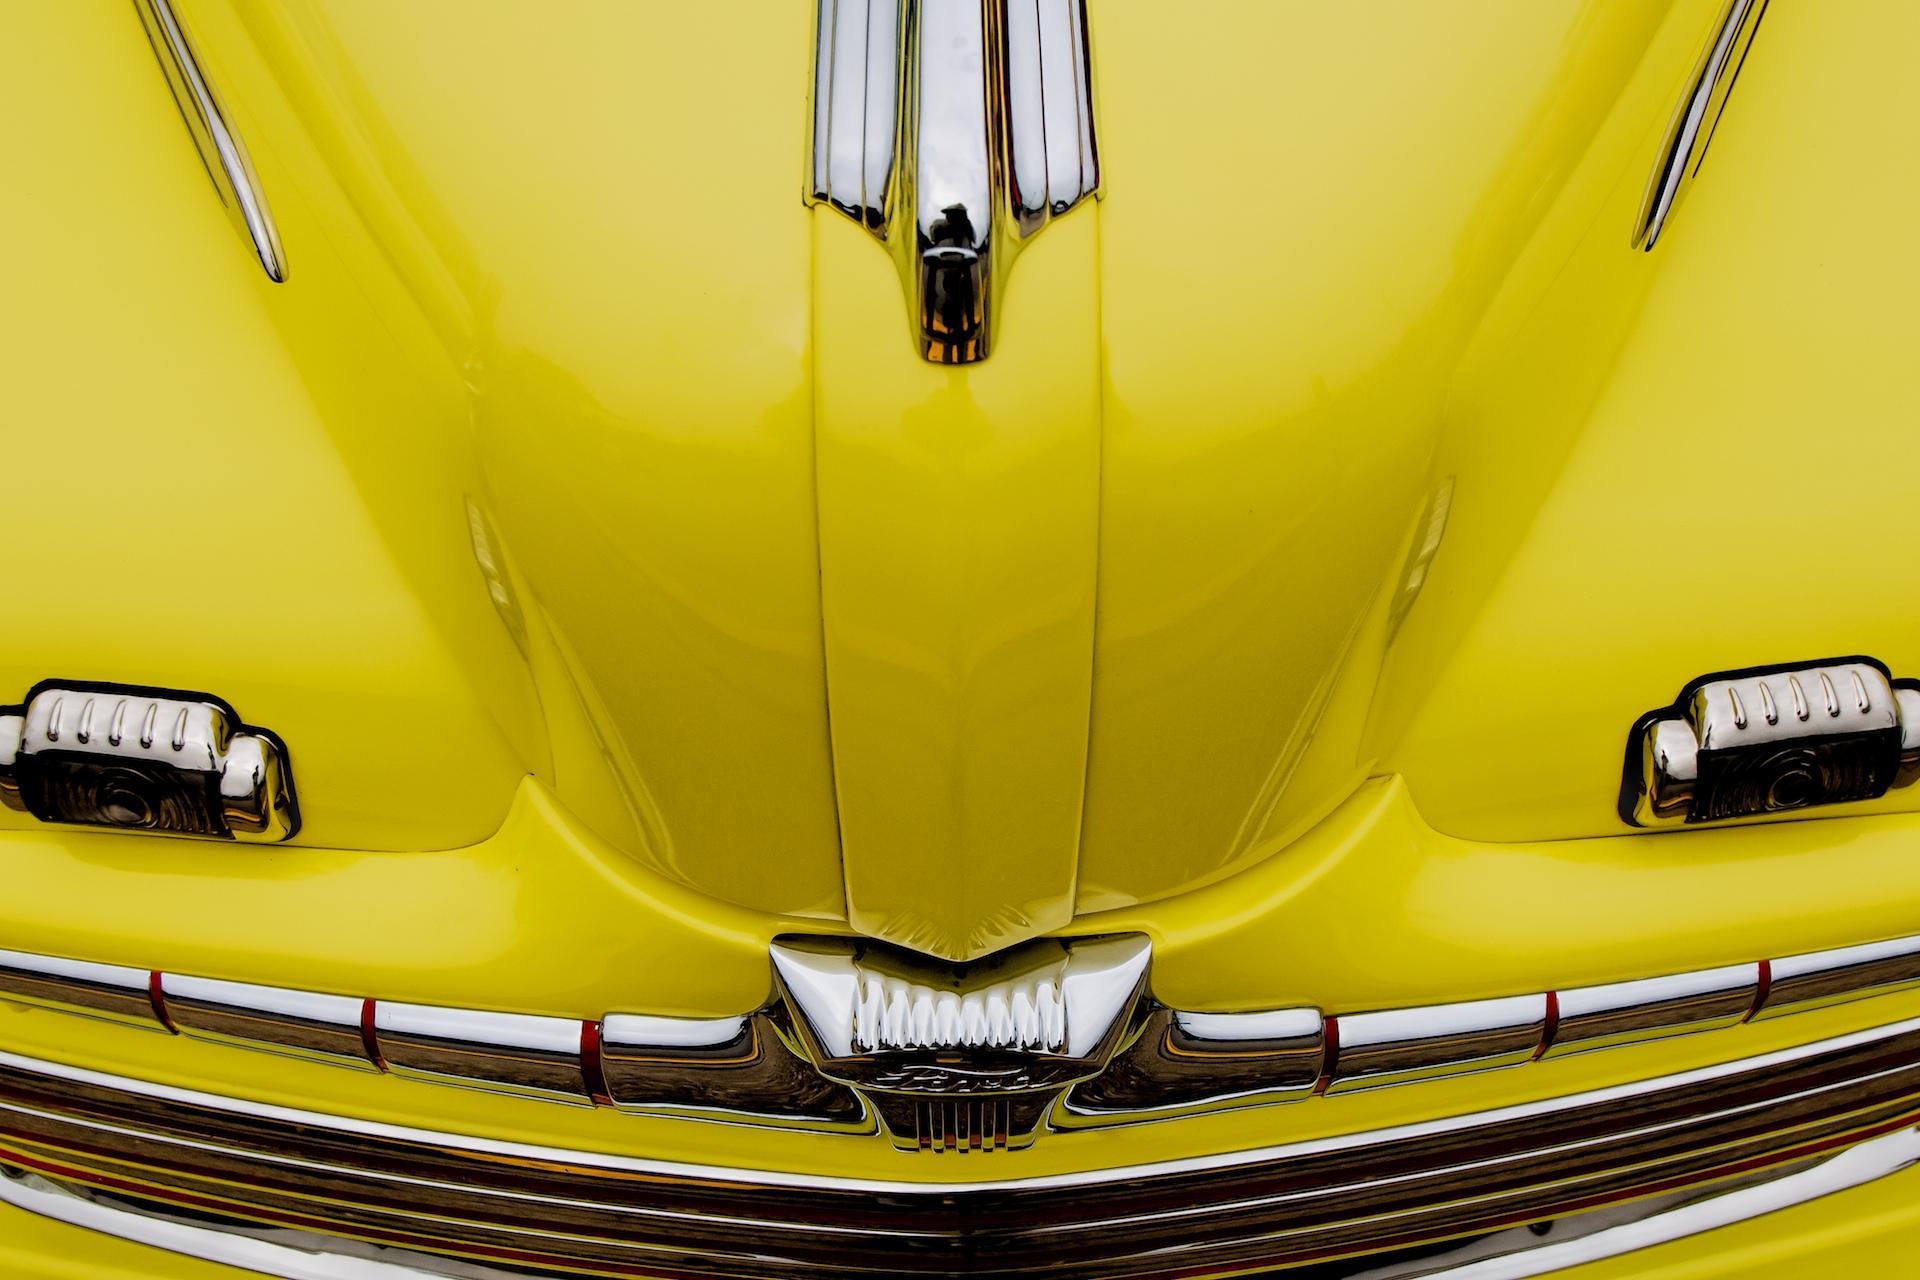
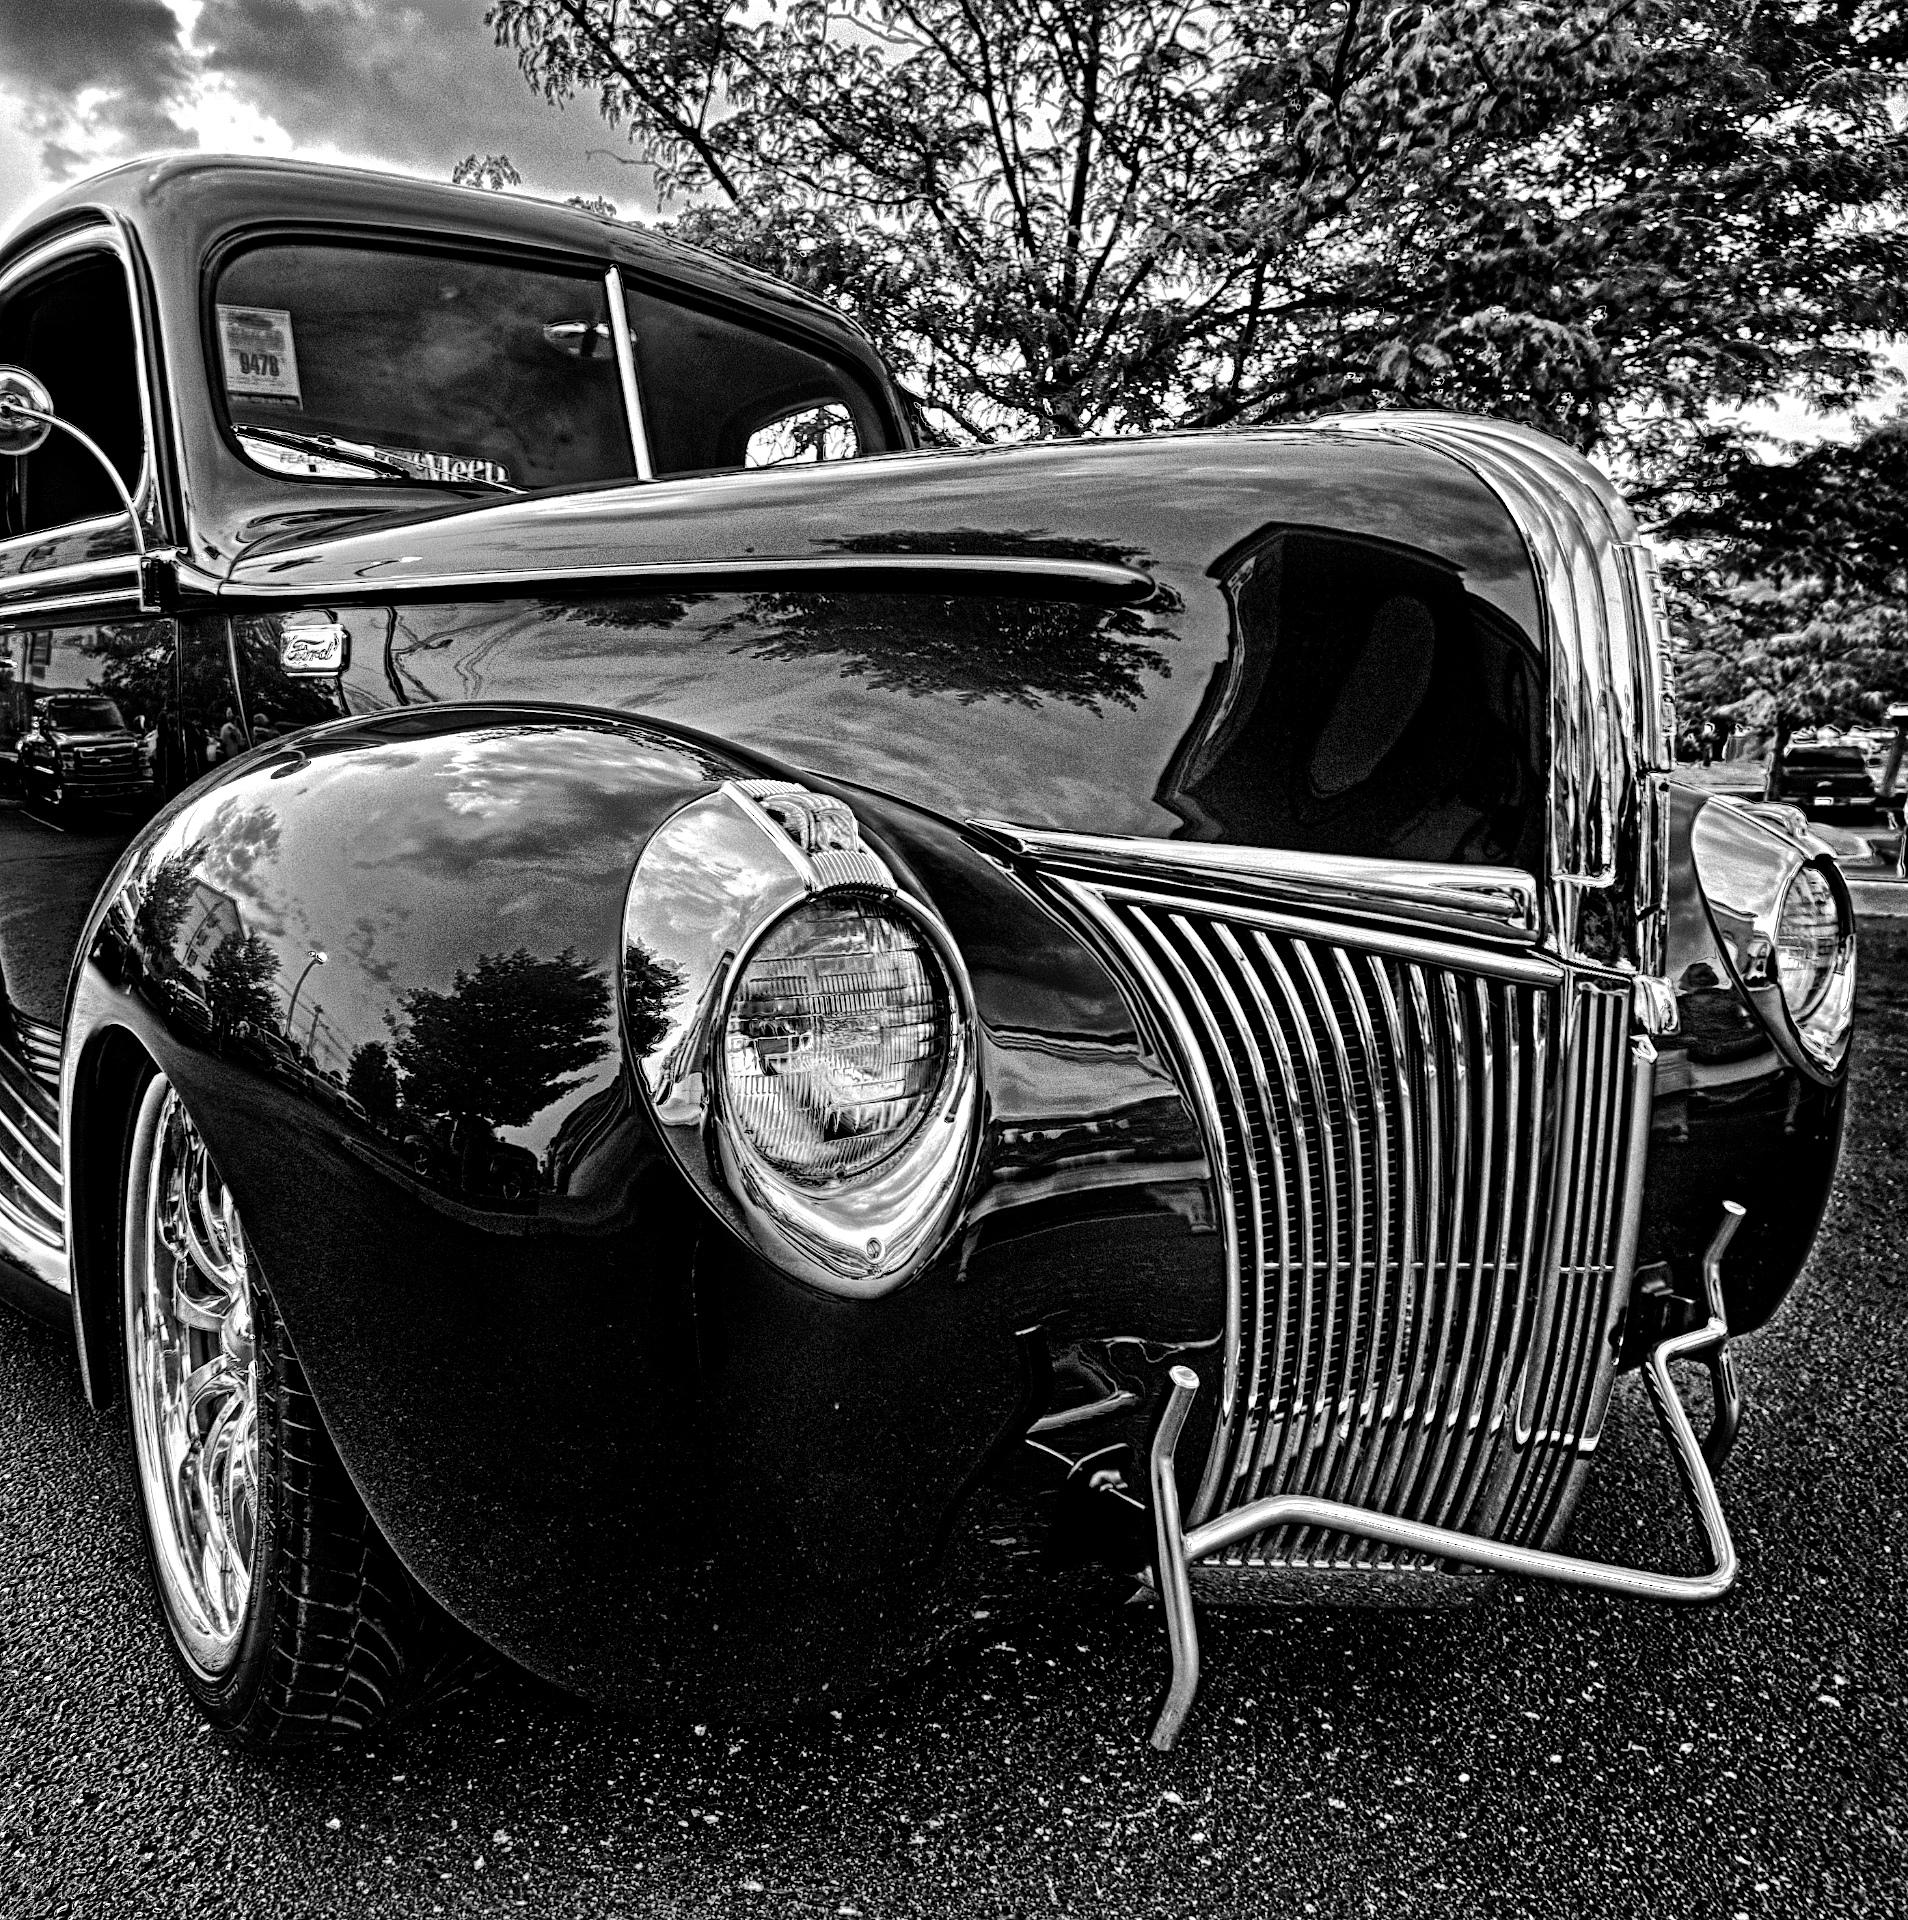
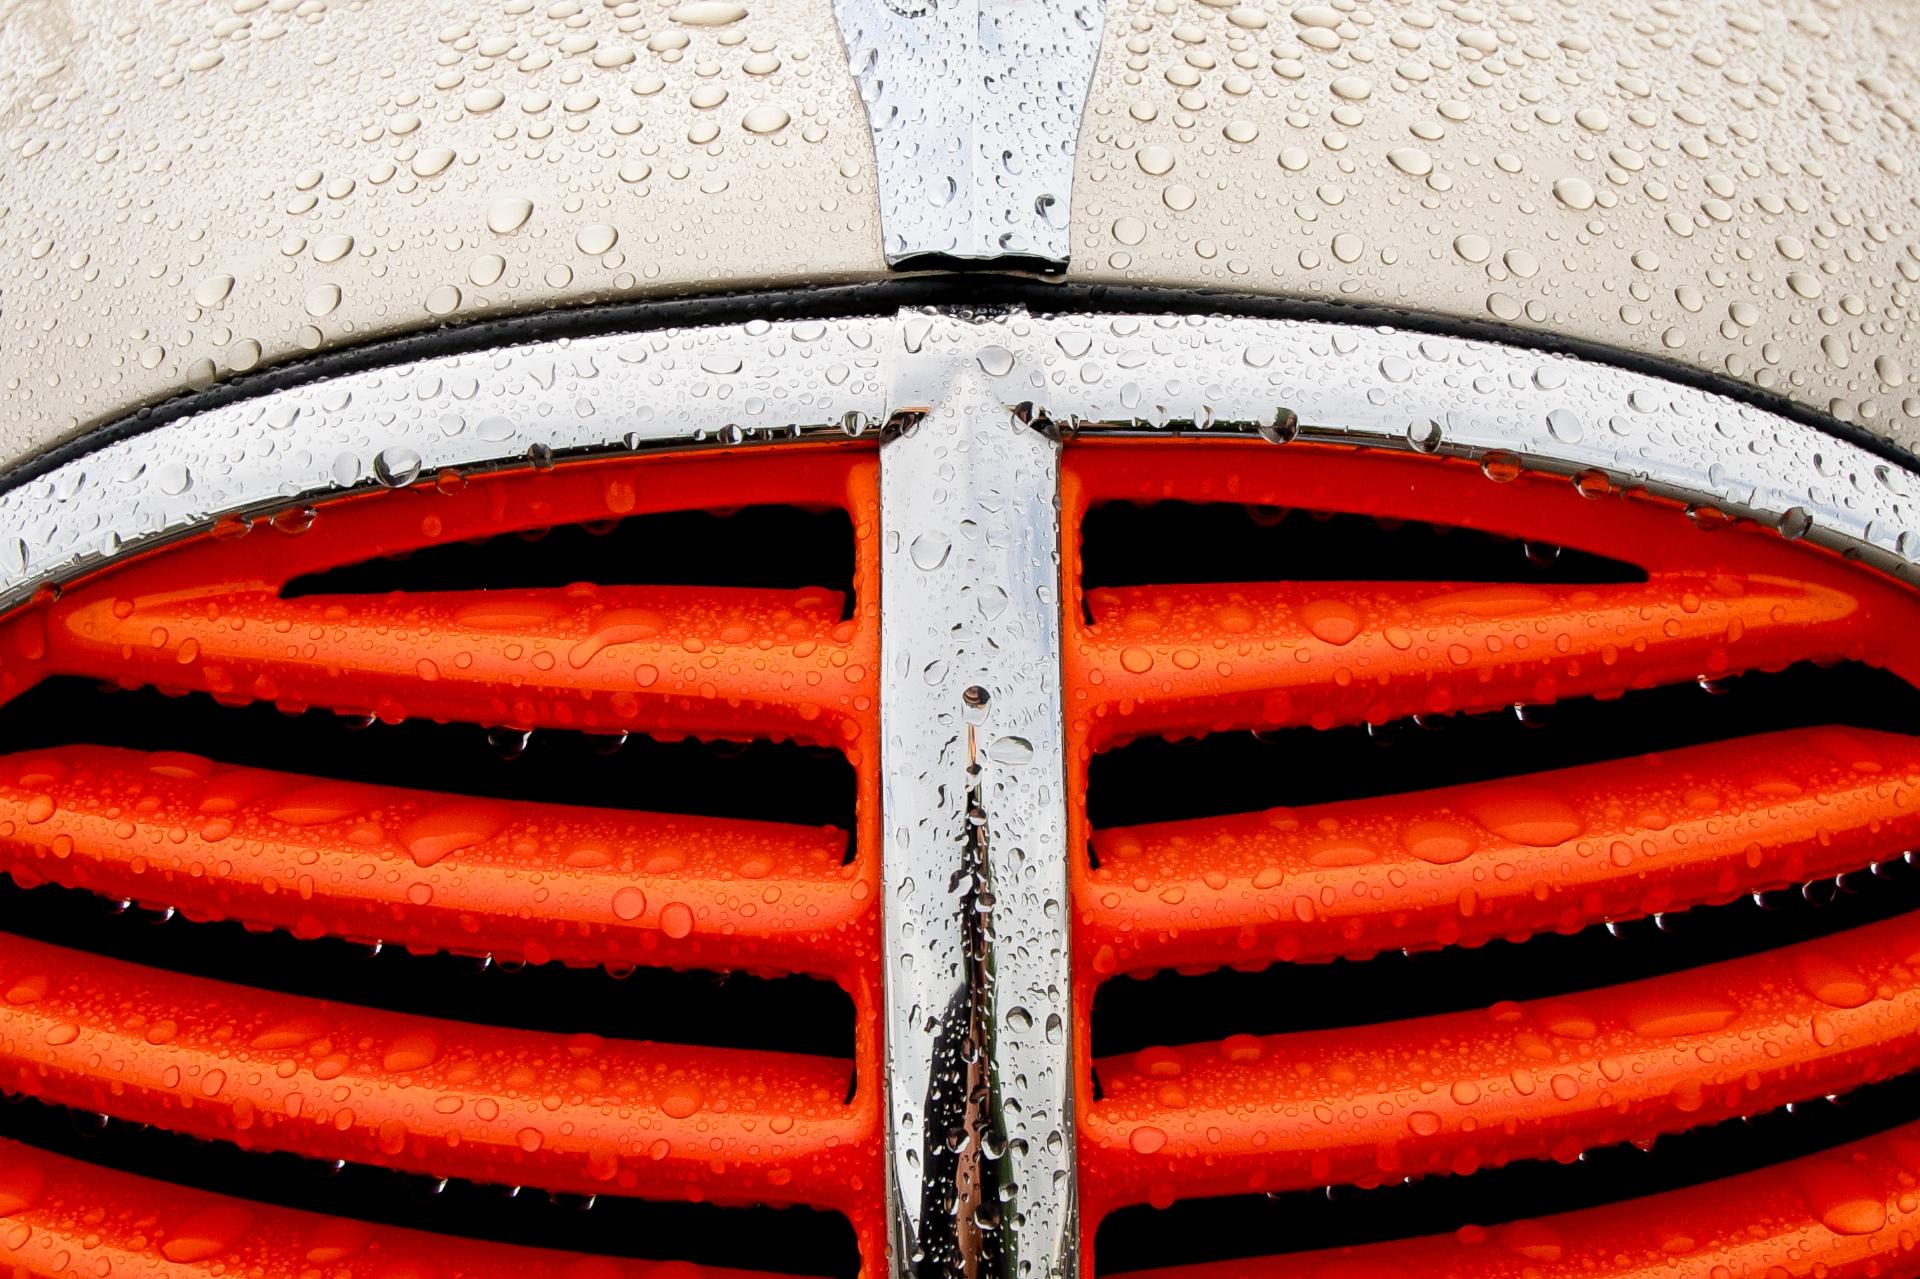
The second challenge was to come up with a different viewpoint. I opted for coming in over the front of the car above the hood so that I was shooting almost straight down. As soon as I started doing that I saw how the shapes of the cars were so different than I was used to seeing. The photos that follow were a refreshing change for me and the act of shooting them added another aspect to my way of seeing familiar subject matter with a fresh eye.

Faux HDR with Topaz Adjust

Patina Pickup
Patina Pickup

Click on the image to enlarge it in another window.

Today I’m wrapping up my automotive theme of the past week with this shot from the NSRA Streetrod Nationals a couple of years ago. Unlike most of my current work this image is a single frame which means it isn’t a true HDR image. I used Topaz Adjust to create the overall feeling of the shot and emphasize the sky and clouds while still rendering the truck’s shadow detail. By working with Topaz Adjust I was able to pull out the wonderful colors and tones that were in the image.

I hope you have enjoyed this week’s posts and writings. My goal with SpeedDemon2 is to share my workflow and discoveries as I evaluate and apply the many plug-ins that are out there today. I won’t claim that I’m an expert with any of them but after several years of exploring them I do have a pretty good handle on their strengths and their shortcomings. Plug-ins won’t make a poor composition or a badly exposed image better but when applied to photographs that are well thought out and  well executed they can definitely add interest and a personal style to your work.

Topaz, NIK and OnOne are really expanding the capabilities and usability of their products as they learn from their customers what they, the end users, want and need. The ability to combine presets, modify the presets and also create your own presets is rapidly expanding the range of styles and results we can get without spending hours or days inside Photoshop. Adobe’s decision to stop selling it’s creative suite and offering a subscription only model is, in my opinion, driving this expansion of features and functionality and will ultimately benefit all of us who enjoy creating photographic art.

On that note I want to mention that Topaz Labs has added another incredible program to their already extensive line. Topaz ReStyle is their latest offering and from my short exploration yesterday I think it will be a great addition to my workflow. ReStyle contains over 1000 presets and each one is fully customizable to allow the artist to fully explore his or her vision for their images. It is on sale at an introductory price of  $29.99 (the regular price after 08/31/2013 is $59.99)with the coupon code restyleit.

Use this link to go to the Topaz Labs website and download a free 30 day trial or take advantage of the introductory pricing which is good until August 31, 2013.

http://www.topazlabs.com/705.html

ReStyle_box_clear

Using OnOne Perfect Photo Suite 7.5 with HDR Images

Old School Hotrod
Old School Hotrod #1

Click on the image to enlarge it in another window.

I took an HDR image that I created in NIK HDR Efex Pro and started experimenting with it in OnOne Perfect B&W to see what I could get from it. The OnOne Perfect Photo Suite is very powerful. It allows me to work in layers so that I can turn on and off each individual layer to see whether I like what it does in conjunction with other layers. For the first image here I applied the Ambrotype preset and then made several adjustments to the paper tone and silver tone, added an Emulsion border and adjusted the contrast and sharpening. Using the HDR image as a starting point helped render the interior details while still maintaining the surface textures on the car.

Old School Hotrod #2

Click on the image to enlarge it in another window.

This is the HDR image I started with. As you can see there is a lot of color in the image due to the patina of age. Most of the color in the glass and the wooden steering wheel was too muted for my taste until I adjusted the separate color channels in Aperture 3 after merging my bracket set in NIK HDR Efex Pro 2.

Old School Hotrod #3

Click on the image to enlarge it in another window.

For this last image I used the Perfect Effects application and applied a preset that changed the overall color of the image yet allowed me to emphasize the yellow and red in the window sticker. I can’t recall which preset I started with but I’m sure that I adjusted it’s effect to get the result I was looking for. I seldom stop with the base settings in these presets as I consider them to be starting points rather than end results.

The point of this post is to show that digital image processing opens the door to many options when creating art photography. It’s no longer necessary to spend hours in Photoshop building an image only to discover that it doesn’t convey your vision for the piece. By applying plug-in presets the artist is able to look at variations rapidly and decide what they want final result to be. Once a preset has been selected the artist can then make their own changes to it and emphasize the aspects of the image that are important for their vision of the image.

Avoid Cliches

Chevrolet
Chevrolet

Click on the image to enlarge it in another window.

cliché or cliche (UK /ˈklʃ/ or US /klɪˈʃ/) is an expression, idea, or element of an artistic work which has become overused to the point of losing its original meaning, or effect, and even, to the point of being trite or irritating, especially when at some earlier time it was considered meaningful or novel.[1] (source Wikipedia)

Too often we photographers fall into the trap of shooting the same type of images that we have seen for years. With automobiles and car shows we will often shoot the entire car or some detail like a hood ornament, etc. I suggest you try moving beyond those cliched shots and approach the subject with an abstract approach that still speaks to the essence of the subject but isn’t so obvious.

In this image I fell in love with the bright yellow paint and the complimentary red and blue accents. I chose to use them as leading lines that reinforced the diagonal pattern of the clouds above the car. The blue sky is a direct compliment to the yellow color and also picks up on the blue pinstripes on the red louvers as it also provides background interest to the composition . While there is no question that the subject is an automobile the overall effect is to emphasize color and composition instead of being just another photo of a car.

I used my regular HDR brackets +2, 0 and -2 EV and processing with NIK HDR Efex Pro 2 which allowed me to capture and emphasize things such as the texture in the clouds and the reflections in the the door. I finished the image in Aperture 3 using some minor adjustments to the blue and yellow color channels, cropping and sharpening.